author avatar
    Technology Manager of Test Dept.
 

Summary
Learn how to resolve the issue of a write-protected U disk, facilitating effortless data transfer between different devices. Explore valuable tips and methods in this article.


cant copy files to usb

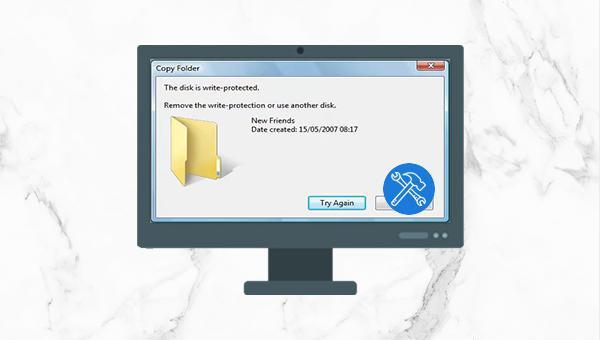
I. The solution that the U disk is write-protected and cannot copy files into it?

1. Check whether the U disk is infected with virus

When the U disk cannot copy files into it, it looks like the U disk is write-protected. In fact, it may also contain viruses in the U disk. It is recommended to use virus scanning software (such as Windows Defender or 360 antivirus software, Norton antivirus software, McAfee software, etc.) to conduct a comprehensive scan on the U disk to rule out virus infection. If the U disk is not infected with viruses, continue to deal with the problem of U disk write protection.

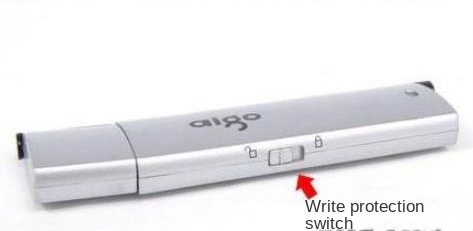
2. Turn off the write protection switch of the U disk

Some U disks have a write-protect switch. When you find that the U disk cannot be copied, modified or stored in new data, you can try to turn off the U disk write-protect switch. If the write protection switch is turned off, but the USB flash drive is still in the write-protected state, it may be that the operating system has protected the USB flash drive, and you can try the following methods to remove it.
Turn off the U disk write protection switch

3. Use the Diskpart command to clear the read-only attribute of the U disk

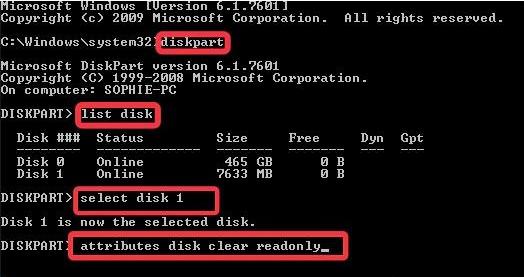
Step 1: Connect the U disk to the computer, enter (cmd) in the search box, right-click (command prompt), and select (run as administrator).
run as administrator
Step 2: Please enter the following commands in sequence, and press the (Enter) key once for each line of command input:
diskpart
list disk (will list all disks in the computer)
select disk 1 (1 indicates the disk number of the U disk, which can be judged according to the capacity and modified accordingly)
attributes disk clear readonly (clear the read-only attribute of the disk)
exit (exit)
diskpart clear read-only attribute
Kind tips If the prompt “Diskpart failed to clear disk attributes” appears after entering the (attributes disk clear readonly) command, it may be because the physical write protection switch of the U disk is still closed, or it may be because the U disk A bad sector or file system error has occurred, which can be checked and repaired using the Windows Error Checking tool.

Diskpart cannot clear disk properties

4. Remove the write protection of the U disk in the registry

There are write-protected settings in the registry, which can prevent all mobile devices from writing any data. The following are the steps to remove the write protection of the U disk in the registry:
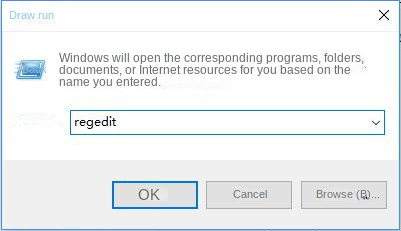
Step 1: Press the (Windows+R) key at the same time, enter (regedit) and click (OK).
Enter regedit in the run
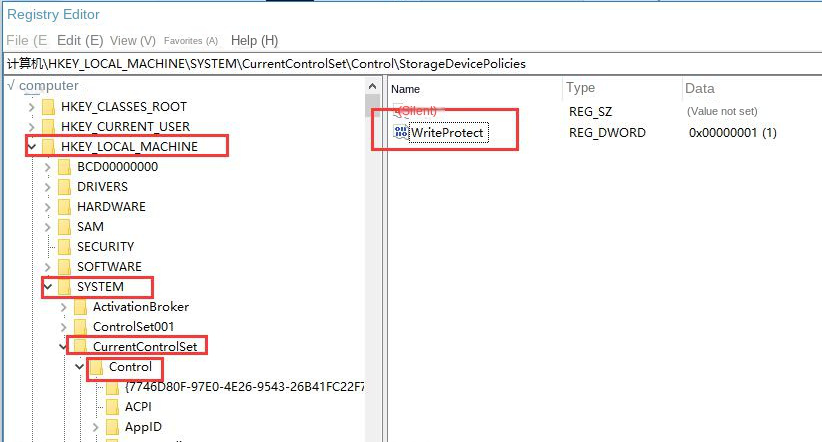
Step 2: Locate the WriteProtect value in the registry at the following path:
HKEY_LOCAL_MACHINE\SYSTEM\CurrentControlSet\Control\StorageDevicePolicies
Find WriteProtect in the registry
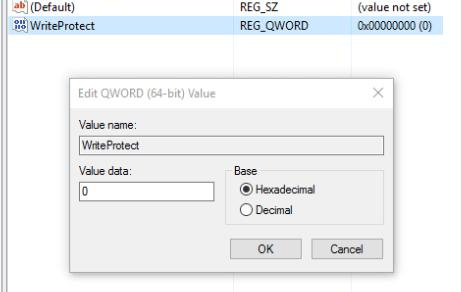
Step 3: Double-click WriteProtect and change its value from 1 to 0 to remove the write protection. After the modification is complete, please restart the computer.
Modify the value of WriteProtect
Kind tips If you do not find the WriteProtect value in the registry, you can try to disable the (Removable Disk: Deny write permission) setting in the local group policy editor.

5. Check whether the copied file is read-only

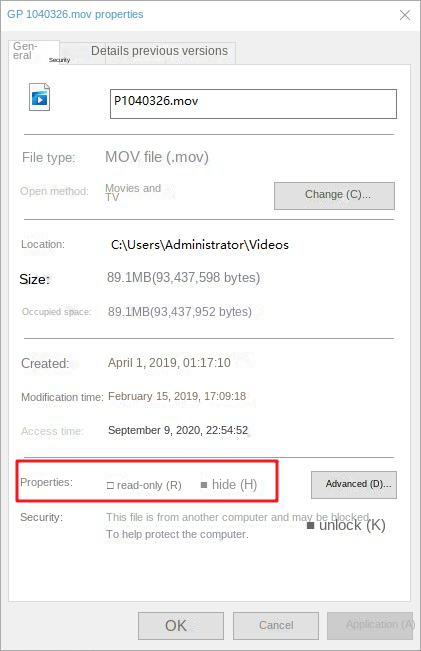
If the file you need to copy to the USB flash drive is in read-only mode, it will also cause the problem that it cannot be copied to the USB flash drive. You can right-click the target file, select (Properties), and check whether the properties at the bottom of the pop-up window are checked (read-only). If so, please cancel it and try again.
File read-only attribute

6. Reconnect the U disk and update the driver

When the U disk is not connected correctly or there is a problem with the driver, it may also cause the U disk to fail to copy files into it, and you can follow the steps below to deal with it.
Step 1: Right-click on the Start menu and select (Device Manager).
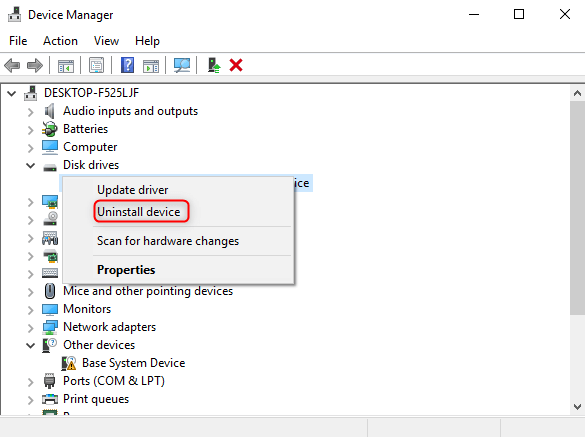
Step 2: Expand (Disk Drive), right-click the USB flash drive, and select (Uninstall Device).
uninstall SD Device to fix data transfer error
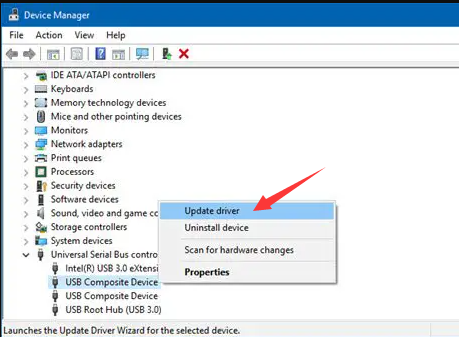
Step 3: Remove the U disk, and then reconnect it to the computer, the U disk will be automatically recognized in the device manager. In addition, you can also right-click on the U disk and select (Update Driver).
update USB Driver
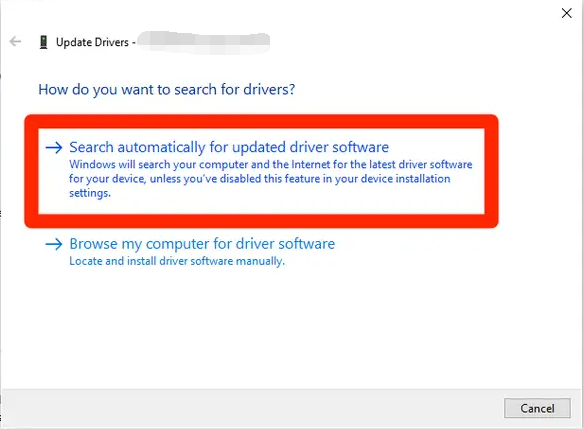
Step 4: Select (Automatically search for drivers) and wait for the update to complete. Then copy the file to the U disk again to see if the problem is resolved.
update Driver Confirm

7. Try to format the U disk
If there are some faults in the U disk, it may also cause the files to be unable to be copied. You can try to format the U disk in Disk Management or File Explorer. The steps are very simple. Just right-click the U disk and select (Format), and then set the U The volume label, file system, and allocation unit size of the disk are sufficient. You can also format the USB drive through the command prompt. Please note that it is best to do a good job in advance before formatting the U disk file backup , so as not to lose important data .
Step 1: Search (Command Prompt) or (CMD) in the search bar, right-click (Command Prompt) and select (Run as administrator).
run as administrator
Step 2: Enter the (Format F: /x) command in the opened command prompt window (where F is the drive letter of the U disk, which can be entered according to your own situation), and press the (Enter) key to run. After the operation is complete, you can format your U disk.

II. After formatting, how to restore the data in the USB flash drive?

If important files are found to be lost after formatting the U disk, it is recommended not to save new data to the U disk, and then use data recovery software to scan and repair the U disk immediately. The following will introduce a very practical data recovery software – Renee Undeleter , which has multiple scanning modes and supports Windows and Mac systems.

1. What is Renee Undeleter?

Rene.E Laboratory ™ data recovery software It is a software specially used to restore system data files. When you accidentally delete important files, empty the recycle bin, or format the disk/storage, you can use this tool to retrieve the lost data. The software covers four functional modules, including file recovery, format recovery, partition recovery and image creation, which can help you solve all data loss problems in an all-round way.
Hot Topic - ADsRenee Undeleter – Simple & Powerful Software for Data Recovery

Easy to use Recover data by 3 steps;

Multiple scan modes Fast partition scan, whole partition scan and whole disk scan;

Supported file types Image, video, audio, text, email and so on;

Image creation Create a partition image to read and back up data;

Supported devices SD card, SDHC, SDXC, USB flash drive, hard disk and computer.

Easy to use Recover data by 3 steps;

Multiple scan modes Fast partition/whole partition/whole disk scan;

Supported devices SD card/USB/hard disk.

Free TrialFree TrialFree Trial 800 people have downloaded!
2. How to use Renee Undeleter to recover data from U disk?

As a professional data recovery software, Renee Undeleter not only has comprehensive functions, but also has a very simple operation process. The specific operation steps are as follows:
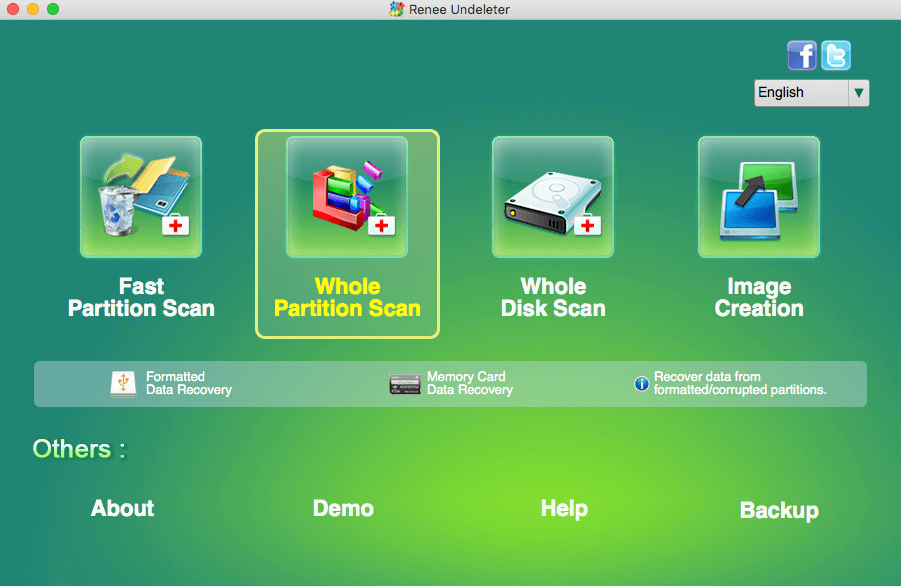
Step 1: Connect the U disk to the computer, download and install Renee Undeleter on the computer, and run Renee Undeleter. Select the (Format Recovery) option on the main interface.
Notice : Do not install Renee Undeleter in the USB flash drive where the data is lost to avoid data overwriting.
select whole partition scan in renee undeleter on mac
Data recovery function introduction:
File Recovery: Quickly retrieve files lost due to accidental deletion or emptying the recycle bin.
Format Recovery: Quickly recover files lost due to inaccessible or formatted partitions.
Partition Recovery: It can analyze and obtain partition information, and fully scan the entire partition.
Create mirror image: You can create a mirror image for a partition to back up the current partition state, and then you can restore data from the mirror file.
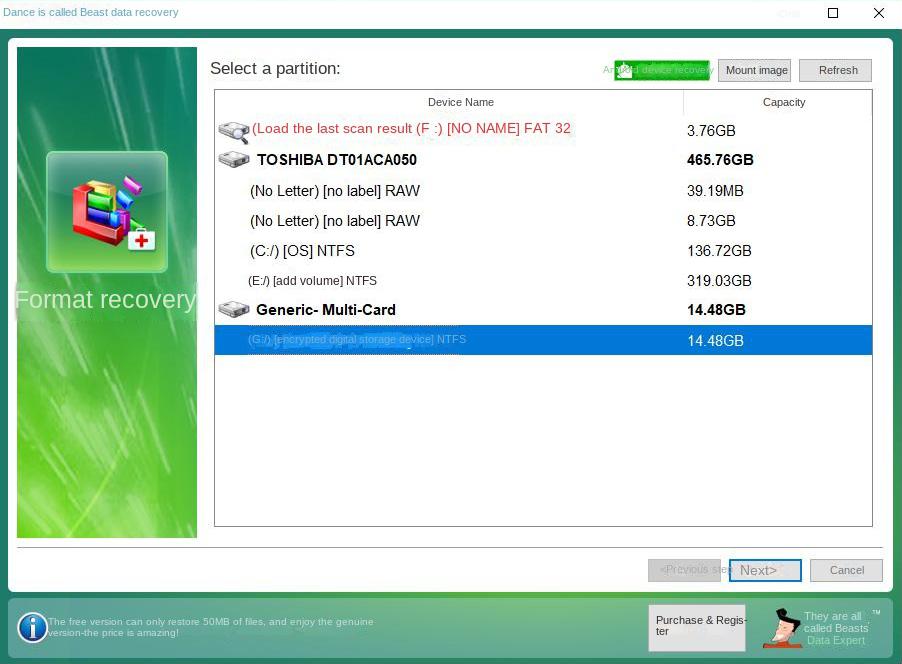
Step 2: Next select the U disk partition. After the selection is complete, click (Next).
Format recovery selected partitions to scan
Step 3: Then wait for the scan, the scan time will depend on the size of the U disk. During the scanning process, you can double-click to preview the file. If you have found the file you need to recover, you can check it and click the (Recover) button. At this time, the scan will be terminated to start recovering the file. You can also wait for the scan to finish, check the files to be recovered from the scan results, and then click the (Recover) button.
Notice: It is recommended to save the recovered files in other partitions instead of the original U disk to avoid data overwriting.
preview before recovery