author avatar
    Technology Manager of Test Dept.
 

Summary
Explore effective fixes for the "can't read from source file or disk" error and effortlessly recover lost data with Renee Undeleter.
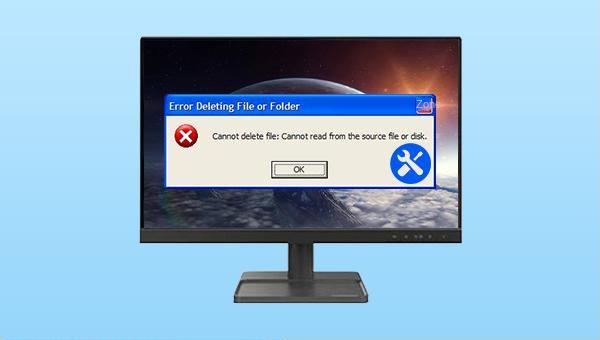
can't read from source file or disk

I. Why does the problem of Unable to delete file: Unable to read source file or disk appear?

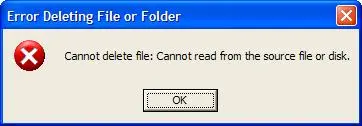
When a file created on a Mac computer is shared with a Windows system, it may not be recognized and used properly. Deleting the file may prompt an error message saying “Cannot delete the file: cannot read the source file or disk.” This issue could be due to Windows not supporting certain filenames generated by Mac computers. Additionally, other factors may also contribute to this problem:
●The file to be deleted is corrupted.
●The disk where the file is located has bad sectors.
●There is a problem with the USB port or data cable of the mobile hard disk, which affects file deletion on the external disk by the computer. Try replacing the port or data cable.
Unable to delete file Unable to read source file or disk prompt
After understanding the possible causes of the failure, we can refer to the following methods to try to solve this kind of problem.

II. How to solve the problem that Windows prompts Cannot delete file: cannot read source file or disk ?

1. Restart the computer

Restarting your Windows computer can help resolve the first-time failure. It is recommended to use the restart button on the computer for a direct restart. This will allow the computer to address the errors and restore the equipment to optimal working condition.

2. Check disk errors and fix them

The Windows system has a built-in disk error checking function. You can use the disk checking tool to scan and repair the target disk where files cannot be deleted. The steps are as follows:
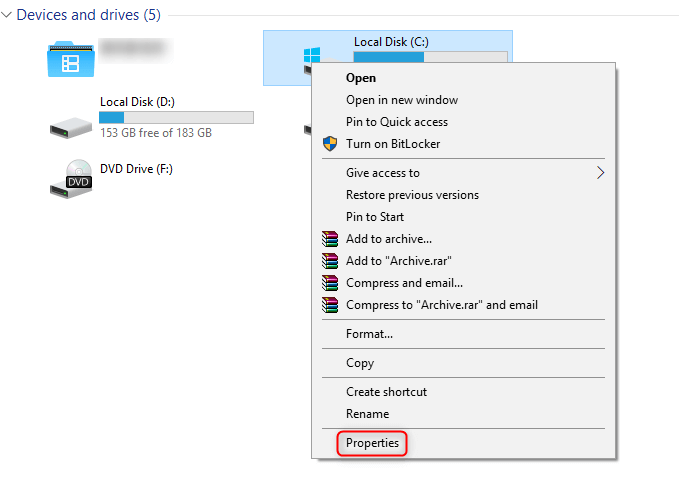
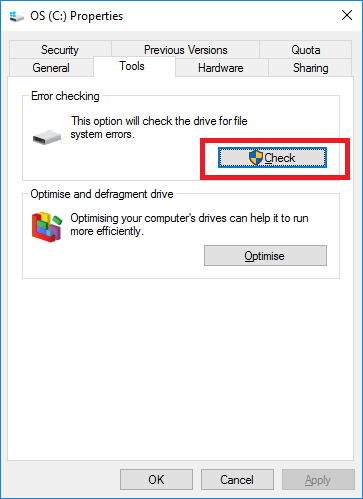
Step 1: Open “My Computer/This PC“, right-click the disk to be repaired, and select (Properties). Switch to the (Tools) option in the Properties window and click the (Check) button.

select properties check disk

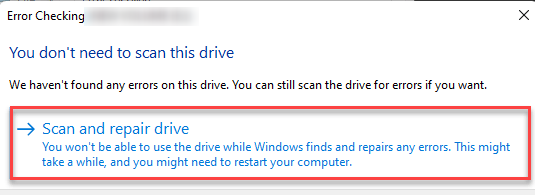
Step 2: Next, select the (Scan and repair drive) option in the Error Checking interface, then wait for the scan and repair according to the prompts.
scan and repair SD card

3. Use the chkdsk tool to repair bad sectors

chkdsk is a useful tool for checking the disk status in Windows. It can display disk status, memory status, and the number of files in a specified path. Additionally, it can repair the disk. Repairing the disk with chkdsk is a straightforward process. Here are the steps:
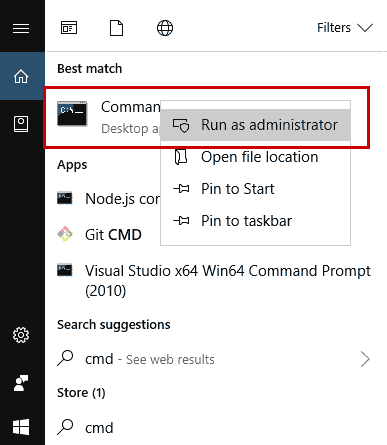
Step 1: Run the computer, search (cmd) directly in the search box in the lower left corner, and select (Run as administrator) to open the command prompt tool.
run cmd
Step 2: Open the command prompt window and enter the command chkdsk X: /r /f (X is the letter of a drive). Press Enter to fix errors and restore readable information. Restart the computer to check if the problem is resolved.
run chkdsk

4. Transfer other files and format the target disk

If none of the above methods work, you can transfer/copy important files from the faulty disk to other disks. Then, format the faulty disk using the disk management program.
Step 1: Run the computer, and then press the (Windows+X) keys on the keyboard at the same time. Then in the pop-up list, select the (Disk Management) option.
open windows disk management
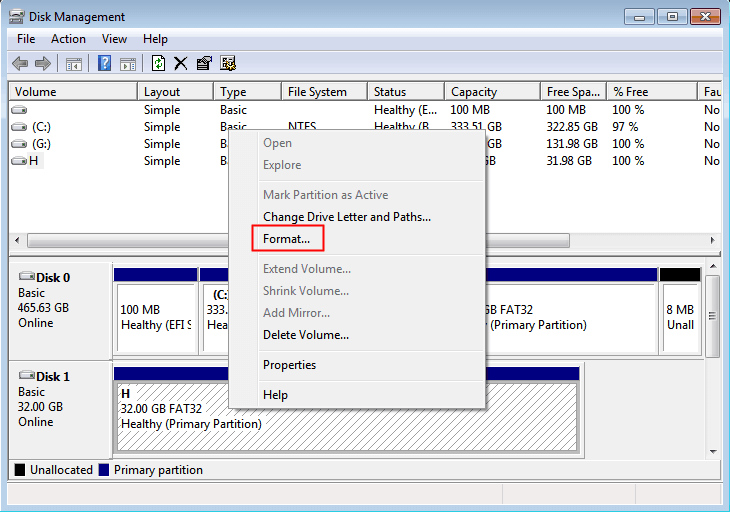
Step 2: Next, find the disk that needs to be formatted, right-click on it and select the (Format) option.
format sd
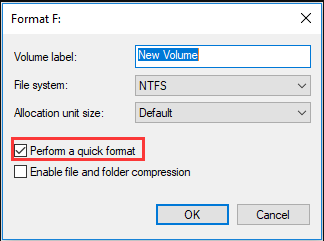
Step 3: Choose the desired file system (FAT32, NTFS, or exFAT), enable Quick Format, confirm with OK, and follow the instructions to complete the formatting. Please note that formatting will permanently delete all data on the disk, including the intended files for deletion.
quick Format
Tips

For the issue of “cannot delete the file: the source file or disk cannot be read“, you can open the command prompt on your computer and use del to delete files or rd to delete directories. This method is complex and may fail if incorrect paths or instructions are entered. It is recommended for those with computer knowledge. Links to Microsoft’s official guidance on del and rd commands are provided below:

Del command: https://docs.microsoft.com/en-us/windows-server/administration/windows-commands/del

Rd command: https://docs.microsoft.com/en-us/windows-server/administration/windows-commands/rd

If you forget to transfer files from the disk before formatting, resulting in data loss, you can use Renee Undeleter to retrieve the lost data. Read on together for more details.

III. Recover lost data with Renee Undeleter

1. What is Renee Undeleter?

Renee Undeleter is specialized software for data file restoration. It can recover lost data in situations such as accidental file deletion, emptying the recycle bin, or disk/storage formatting. The software offers four functional modules: file recovery, format recovery, partition recovery, and image creation. With its comprehensive capabilities, it efficiently addresses various data loss issues that may arise during system usage.
Hot Topic - ADsRenee Undeleter – Simple & Powerful Software for Data Recovery

Easy to use Recover data by 3 steps;

Multiple scan modes Fast partition scan, whole partition scan and whole disk scan;

Supported file types Image, video, audio, text, email and so on;

Image creation Create a partition image to read and back up data;

Supported devices SD card, SDHC, SDXC, USB flash drive, hard disk and computer.

Easy to use Recover data by 3 steps;

Multiple scan modes Fast partition/whole partition/whole disk scan;

Supported devices SD card/USB/hard disk.

Free TrialFree TrialFree Trial 800 people have downloaded!
2. How to recover lost data with Renee Undeleter?

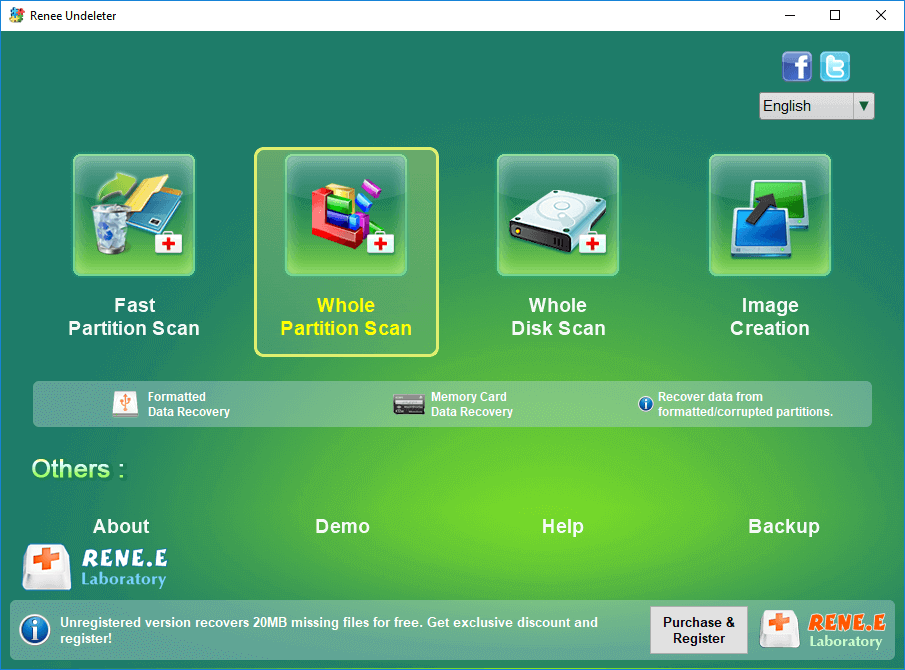
Step 1: Run the computer, download, install and run Renee Undeleter, and select the (Whole Partition Scan) option in the main interface.
Do not install the software on the disk that needs to recover data, so as not to cause data overwriting.
select whole partition scan in renee undeleter to recover deleted video from sd card
Data Recovery Function:

  • Fast Partition Scan – Quickly retrieve files lost due to accidental deletion or emptying the recycle bin.
  • Whole Partition Scan – Quickly recover files lost due to inaccessible or formatted partitions.
  • Whole Disk Scan – Analyze and get partition information and perform a full scan of the entire partition.
  • Image Creation – You can create a mirror image for a partition to back up the current partition state.
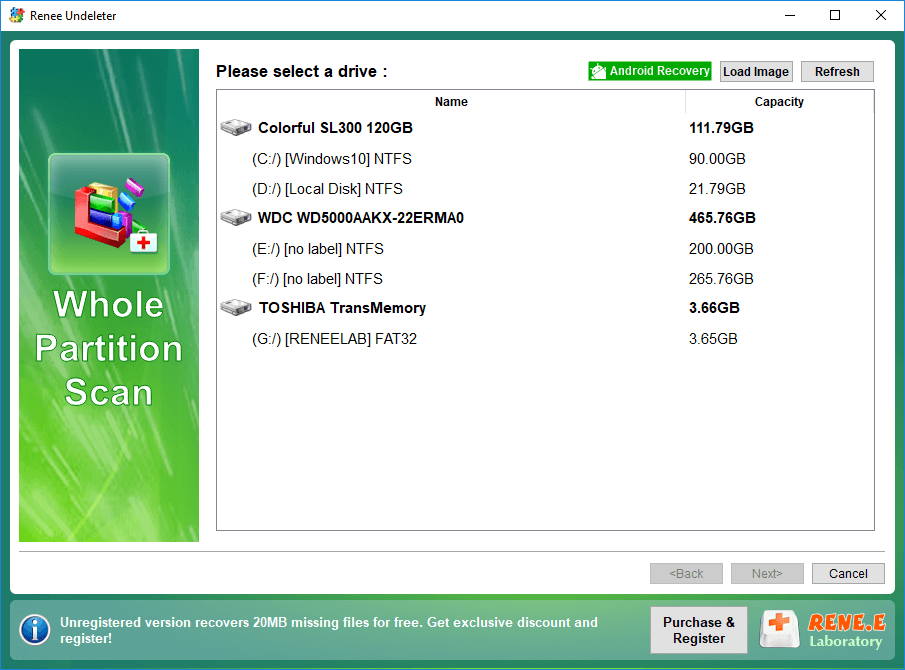
Step 2: Select the partition where the lost data is located and click on (Next).
select the target drive to scan in renee undeleter
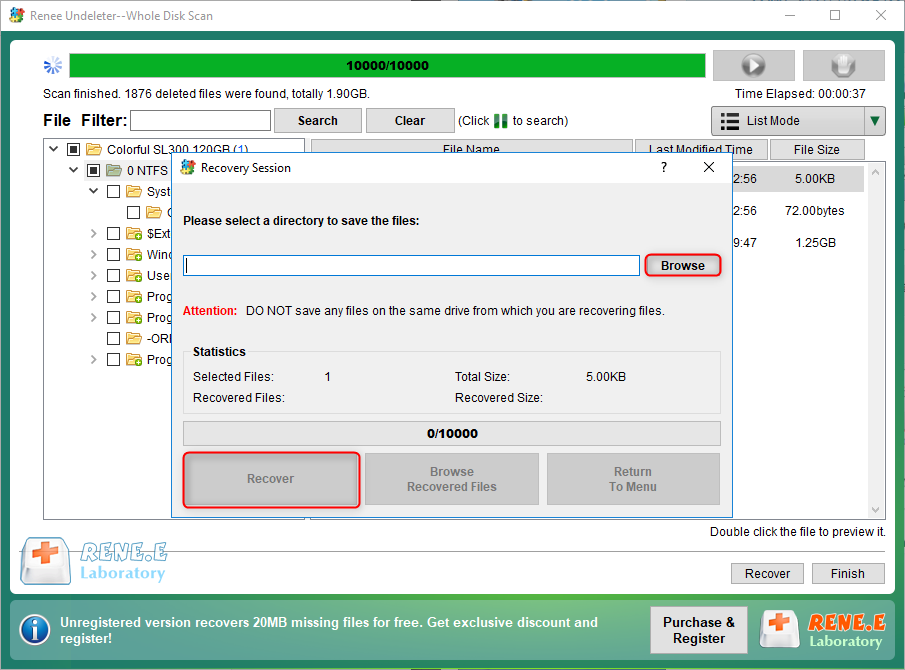
Step 3: After the scan is over, you can preview and select the files to be recovered, and click the (Recover) button.
Note: To avoid data overwriting, please choose another disk or partition to save the recovered files.
recover files from whole disk scan with renee undeleter