author avatar
    Specialist of Customer Service Dept.
 

Summary
Learn about the causes and common solutions to the problem of "Unable to read the source file or disk during copying" in this authoritative article.
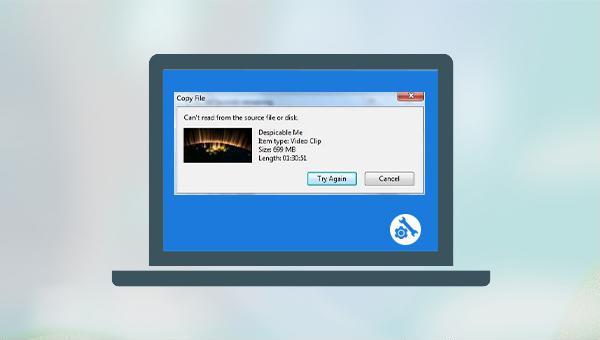
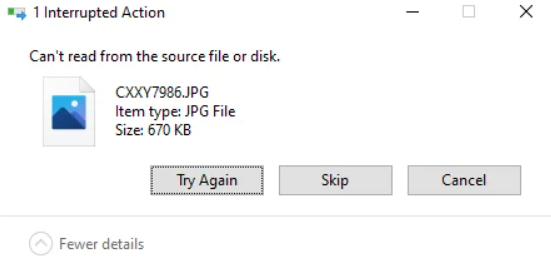

cant read from the source file or disk

I. What causes the problem of unable to read source file or disk ?

When copying files, the prompt “Can’t read from the source file or disk” may appear due to various reasons.
can't read from the source file or disk
● External connection failure when copying files from an external hard disk may be due to a damaged USB interface or data cable. Ensure these are in normal working condition to complete the process successfully. If an issue arises where the source file or disk cannot be read, try replacing the USB interface or checking the data cable.
● Bad sectors on the source disk can damage the disk and make data inaccessible, resulting in the error message “Can’t read from the source file or disk.
Windows system errors can cause source files or disks to become unreadable. These errors can be caused by corrupted system files or partitions. Use the sfc command to scan and repair system files.
Corrupted source files may result in error messages if the computer system and file explorer cannot recognize or access them. Damaged files are typically challenging to repair, but if you have a backup, you can restore the target file from there.

II. How to solve the problem that the source file or disk cannot be read when copying?

1. Repair bad sectors

If the device is connected properly and the files are not corrupted, the problem may be due to a bad file system on the disk, or bad sectors on the source hard drive. At this point, you can run the Windows Error Checking tool to solve the problem. The specific steps are as follows:
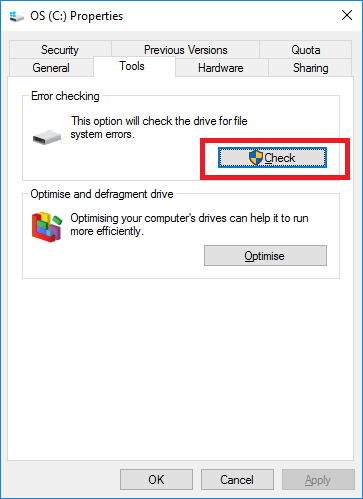
Step 1: Open “My Computer/This PC”, right-click the disk that needs to repair the bad sector, and select (Properties). Switch to the (Tools) option in the Properties window and click the (Check) button.
check disk
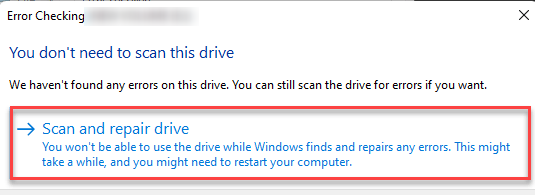
Step 2: Next, select the (Scan and repair drive) option in the Error Checking interface.
scan drive
Kind tipsIn addition to this method, you can also use the Chkdsk command to repair the disk, click here to view the specific steps.

2. Format the disk

Formatting the faulty disk can repair various faults and restore normal function. Note that formatting will erase all data on the disk, so be sure to backup files beforehand. Follow these steps to format the disk:
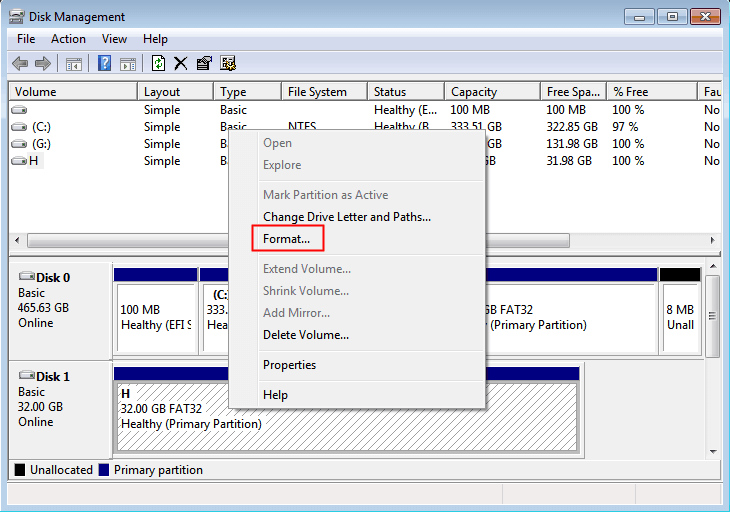
Step 1: Connect the failed hard disk to the computer and press the (Windows+X) keys on the keyboard to select Disk Management from the pop-up list.
Step 2: Find the disk that needs to be formatted, right-click on it, and select the Format option.
format drive
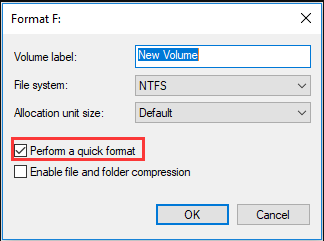
Step 3: Select the appropriate file system: FAT32, NTFS, or exFAT. NTFS is recommended for Windows systems (supports single file sizes above 4GB). Check "Perform a quick format" and click "OK" to start formatting.
quick Format
To solve the issue of unreadable source files or disks during copying, it is recommended to use professional data recovery software like Renee Undeleter. This software supports both Windows and Mac systems, ensuring data recovery with simple and effective operations.

III. Use Renee Undeleter to recover lost data in hard disk?

1. What is Renee Undeleter?

Renee Undeleter is a software designed for restoring various data files. It covers four functional modules: file recovery, format recovery, partition recovery, and image creation, making it a comprehensive solution for all data loss issues that may arise during system use.
Hot Topic - ADsRenee Undeleter – Simple & Powerful Software for Data Recovery

Easy to use Recover data by 3 steps;

Multiple scan modes Fast partition scan, whole partition scan and whole disk scan;

Supported file types Image, video, audio, text, email and so on;

Image creation Create a partition image to read and back up data;

Supported devices SD card, SDHC, SDXC, USB flash drive, hard disk and computer.

Easy to use Recover data by 3 steps;

Multiple scan modes Fast partition/whole partition/whole disk scan;

Supported devices SD card/USB/hard disk.

Free TrialFree TrialFree Trial 800 people have downloaded!
2. How to recover hard disk data with Renee Undeleter?

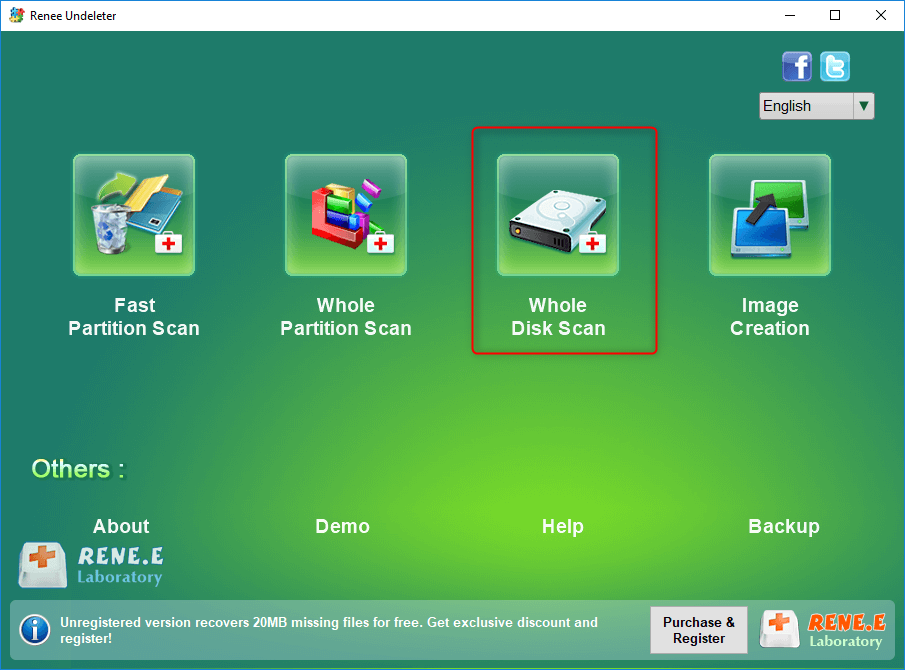
Step 1: Download, install, and run Renee Undeleter. Select the (Whole Disk Scan) option on the main interface.
Note: Avoid installing on a disk requiring data restoration to prevent data overwriting.
elect whole disk scan in renee undeleter
Data recovery function:
Fast Partition Scan – Quickly retrieve files lost due to accidental deletion or emptying the recycle bin.
Whole Partition Scan – Quickly recover files lost due to inaccessible or formatted partitions.
Whole Disk Scan – Analyze and get partition information and perform a full scan of the entire partition.
Image Creation – You can create a mirror image for a partition to back up the current partition state.
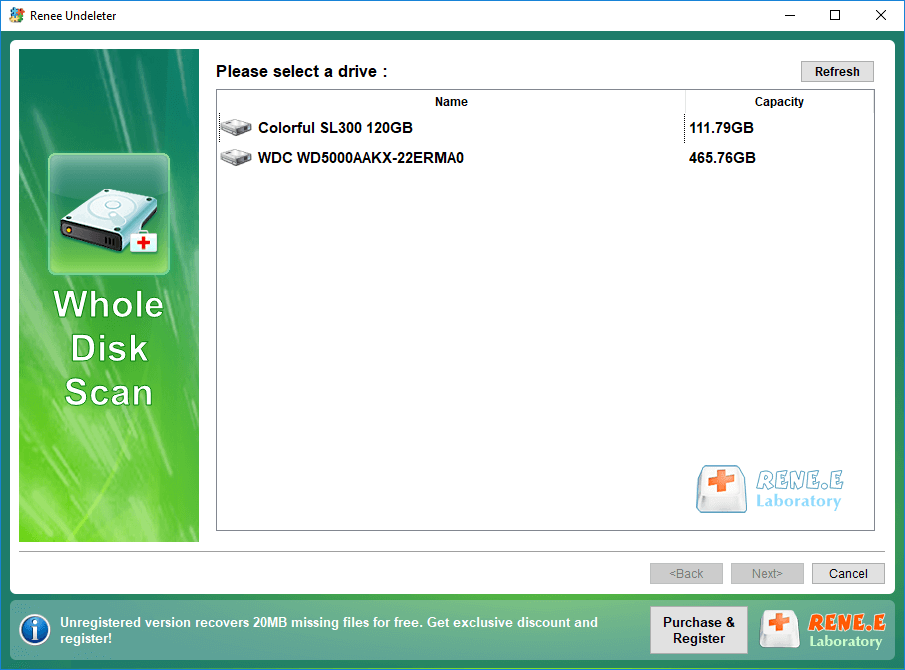
Step 2: Select the device to be scanned, and click (Next).
select a disk to recover in renee undeleter
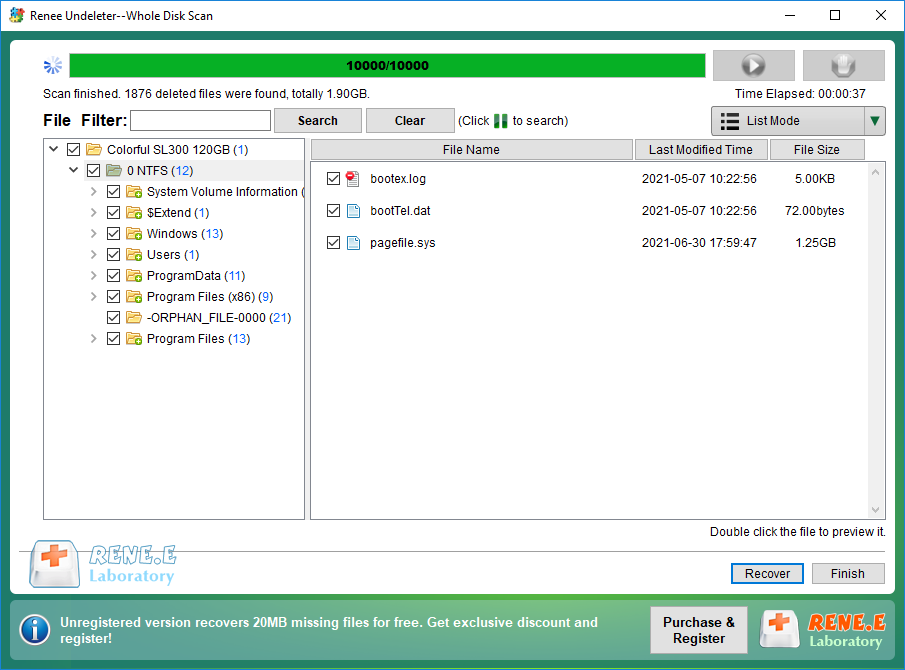
Step 3: The software will analyze the disk device, prompting you to select the partition you need to scan. After scanning, preview and select the file you want to restore, then click the (Recover) button in the lower right corner.
select taget files to recover with renee undeleter
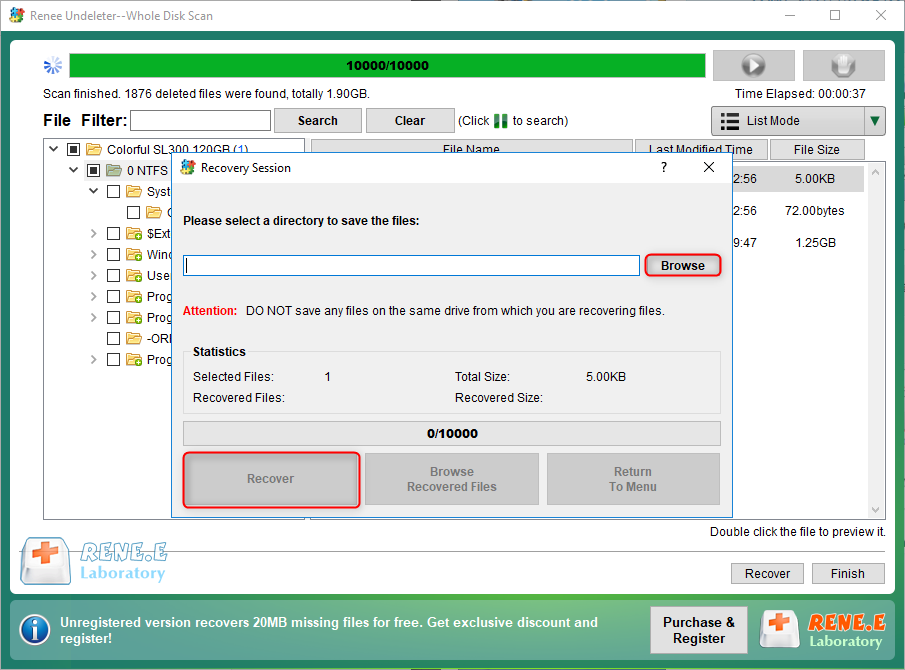
Step 4: Select the target folder, click (Browse) to choose another disk to save the recovered files, then click (Recover) to start the file recovery process.
recover files from whole disk scan with renee undeleter