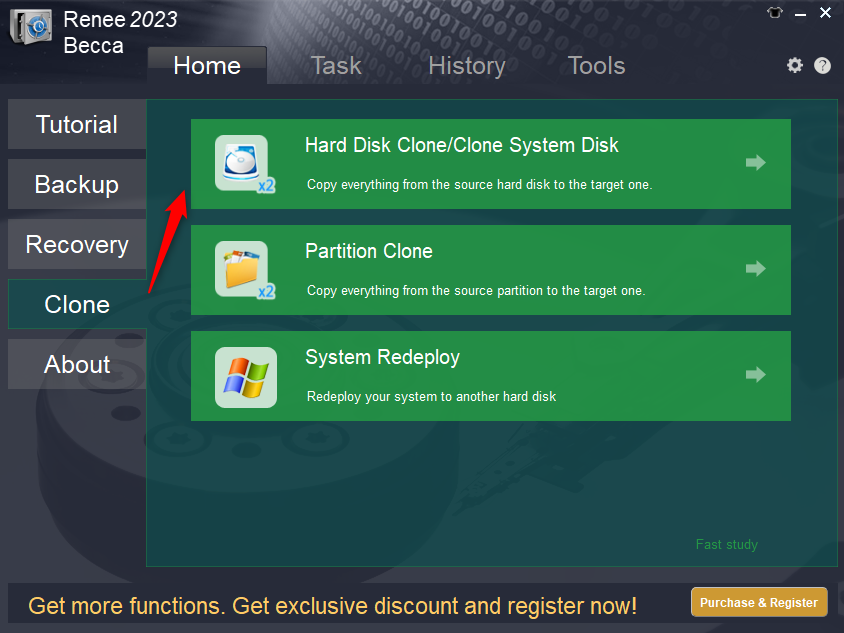
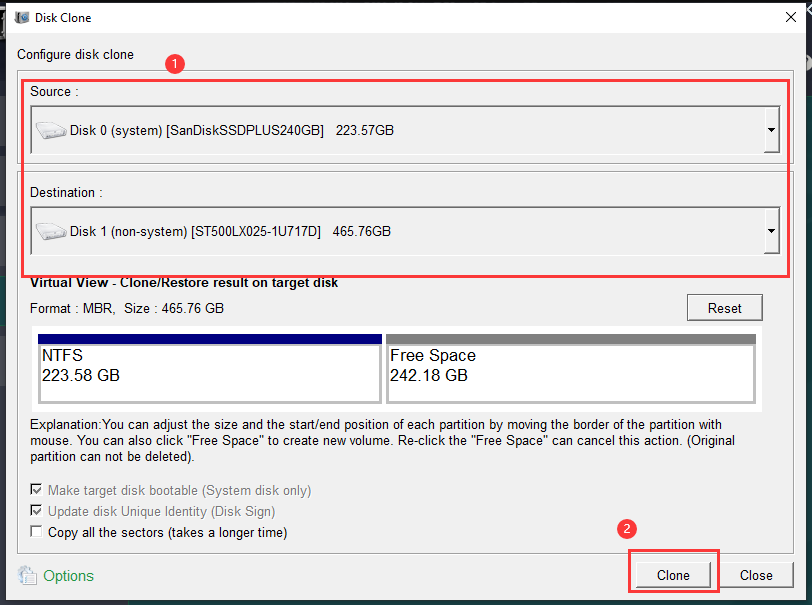
author avatar
    Senior Product Manager
 

Summary
Learn how to clone your SSD to a bigger SSD without data loss. This guide provides detailed steps, necessary tools, and tips to ensure a seamless transition to a larger storage drive.


Cloning your SSD to a bigger one is an essential task when you need more storage space without losing valuable data. This guide will walk you through the process, ensuring it’s done easily and safely. However, before diving into the cloning procedure, it’s important to consider several factors to make the transition smooth. Let’s explore what you may consider when cloning to a bigger SSD.

Considerations When Cloning to a Bigger SSD

Selecting the Right SSD

The first step in cloning your SSD to a larger one is selecting the right SSD for your needs. Ensure that the SSD you choose is compatible with your system in terms of interface and form factor. The most common interfaces are SATA, M.2, and PCIe. SATA SSDs are slower but widely supported, while M.2 NVMe SSDs offer faster read/write speeds but require a compatible slot and support from your motherboard.
When upgrading to a larger SSD, consider how much storage you will need. A 500GB SSD may suffice for the operating system and applications, whereas a 1TB or larger SSD is better for users who handle large files, such as gamers or designers. Estimating your current and future storage needs is essential to avoid running out of space shortly after the upgrade.

Check and Scan source partitions

You can use the built-in CHKDSK function to scan and repair file system errors on the source partition.
1. Right click source partion and select “properties
sd card properties
2. on “Tools” tab, click “Check” button to scan and repair the source partitions.
fix a damaged Android SD card

Preparing the Necessary Tools

To clone your SSD successfully, you will need several tools. A SATA-to-USB cable or an M.2 to USB enclosure is essential for connecting the new SSD to your computer if there isn’t a second slot available.
connect disk to another computer with enclosure
Additionally, you will need reliable cloning software, such as Renee Becca. These tools facilitate the transfer of data without errors and help ensure the new SSD is bootable. These tools also assist in addressing the 4K alignment issue for SSD.
How to Fully Utilize the Extra Storage in a Larger SSD
There are two primary methods: creating a new partition with the extra space or extending the existing cloned partition to include the additional space (e.g., increasing the old partition from 200GB to 500GB). Renee Becca supports both approaches.

Initializing the New SSD

Once you have connected the new SSD to your computer, it needs to be initialized. You can do this through Disk Management in Windows.
1. Press Win + R,
windows Key + R
2. type diskmgmt.msc, and press Enter.
run disk management
3. Find the new SSD, right-click it, and choose Initialize Disk. This step prepares the SSD for data transfer.
how to initialize disk on windows

Step-by-Step Guide to Use Renee Becca to Clone SSD to a Larger SSD

Step 1: Download and Install Renee Becca.
First, you need to download the Renee Becca software from the official website. Once downloaded, run the installer and follow the on-screen instructions to install the software on your computer. Ensure you have administrator privileges, as this may be required during installation.
Renee Becca - Reliable Data Backup & Restore Software

Quick Backup files at up to 3,000MB/min.

Fullfill different backup needs Supports system backup, disk / partition backup, file backup and disk clone.

Intelligent Automatically analyze the differences between source and backup data.

Convenient Support VSS, allowing to freely view webpages when backing up system.

Highly compatible Supports various files and storage devices.

Quick Backup files at up to 3,000MB/min.

Fullfill different backup needs Backup for disk, partition and system. Save disk space by backing up incremental /differential data.

Highly compatible Supports various files and storage devices.

Free TrialFree Trial 2000 users have downloaded and enjoy Renee Becca!
Step 2: Connect the New SSD.
Attach the new, larger SSD to your system. You might need a SATA to USB adapter if using an external connection, or an available SATA port inside your desktop. Ensure the drive is securely connected and properly detected by your system.
Step 3: Open Renee Becca.
Launch the Renee Becca software. On the main interface, navigate to the Clone section. Here, you will find options for different types of cloning tasks.
main interface of renee becca
Step 4: Select Clone Type.
Option 1: To clone only your system, excluding other data partitions, please use the “System Redeploy” function. This feature will transfer your system to the target SSD and fully utilize the remaining space on the larger SSD.
becca system redeploy
Option 2: In the Clone section, choose the Hard Disk Clone/Clone System Disk option. This ensures a sector-by-sector copying of the entire disk, preserving the structure and data.
renee becca disk clone
Step 5: Choose Source and Destination Disks.
Select your existing SSD as the source disk and the new, larger SSD as the destination disk. Double-check to ensure you have selected the correct drives to avoid data loss.
For selecting System Redeploy:
select a destination to redeploy system with renee becca
For selecting disk clone:
clone system disk
Step 6:  (Optional) Configure Partition Sizes if choose clone system disk.
On the next screen, you will have the option to adjust partition sizes on the new SSD. By default, Renee Becca might automatically allocate the extra space proportionally. However, you can manually resize the partitions as needed. For example, allocate additional space to the C: drive to accommodate more applications and system files.
adjust partitions
Step 7: Start the Cloning Process.
Click the “Clone” or “Redeploy” button to begin the cloning process. This may take some time depending on the amount of data being cloned. For instance, cloning 500GB of data may take around an hour. During this time, avoid using your computer to prevent data corruption.
Step 8:Verify the Clone.
Once the cloning process is complete, shut down your computer and replace the old SSD with the new one if it was connected externally. Boot from the new SSD and verify that all data, applications, and settings are intact.
Congratulations! You have successfully cloned your SSD using Renee Becca. To make the most out of the additional space on your new SSD, refer to the subsequent chapters about how to make full use of the rest space in target SSD.

Post-Cloning Checks

After successfully cloning your SSD, it’s crucial to perform several post-cloning checks to ensure that everything works as expected. These checks will help you verify the integrity of the cloned data, configure the BIOS to boot from the new SSD, and ensure the system runs smoothly from the newly installed SSD. Follow the detailed instructions below to complete these steps efficiently.
Step 1: Verify the Integrity of the Cloned Data
Once the cloning process is complete, you need to verify that all the data has been accurately transferred to the new SSD.
1. Boot your computer using the new SSD and log in to your operating system.
2. Open the file explorer and navigate through various files and folders to ensure all your documents, media, and applications are intact.
3. Check the functionality of critical applications by launching them to see if they work correctly.
4. You can use disk management tools to compare the partition sizes and structures between the new and old SSDs. This helps verify that the cloning process preserved the disk layout accurately.
Step 2: Configure the BIOS to Boot from the New SSD
To ensure your system boots from the newly cloned SSD, you might need to adjust the boot order in the BIOS settings.
1. Restart your computer and enter the BIOS setup. This is typically done by pressing a key like F2, Del, or Esc repeatedly during startup. The specific key depends on your motherboard manufacturer.
Common Server:
Server TypeEnter boot menu method
DELLPress the F12 key repeatedly before the Dell logo appears on the screen.
HPPress the F9 key multiple times when the HP logo is displayed.
Common Computers:
BIOS NameEnter boot menu method
ASRockDEL or F2
ASUSDEL or F2 for PCs, DEL or F2 for Motherboards
AcerDEL or F2
DellF12 or F2
ECSDEL
Gigabyte / AorusDEL or F2
Lenovo (Consumer Laptops)F2 or Fn + F2
Lenovo (Desktops)F1
Lenovo (ThinkPads)Enter then F1
MSIDEL
Microsoft Surface TabletsPress and hold Power and Volume Up buttons
Origin PCF2
SamsungF2
ToshibaF2
ZotacDEL
HPEsc, F9 for "Boot Menu", Esc, F10, Storage tab, Boot Order, Legacy Boot Sources
INTELF10
2. Once you’re in the BIOS menu, navigate to the Boot or Boot Order section using the arrow keys.
3. Locate your new SSD from the list of bootable devices. It might be listed with its model number.
4. Change the boot order to prioritize the new SSD. This is usually done by moving the new SSD to the top of the list using the arrow keys or function keys, as specified in the BIOS interface.
5. Save your changes and exit the BIOS setup. Your computer should now restart and boot from the new SSD.

Conclusion

In conclusion, successfully cloning your SSD to a larger one involves careful preparation, the right tools like Renee Becca, and following a detailed step-by-step guide. By maximizing the additional space and conducting post-cloning checks, you can ensure a seamless transition to the new SSD and maintain optimal system performance. Your data integrity and system functionality are preserved throughout the process.