author avatar
    Senior Program Developer
 

Summary
Discover what delivery optimization files are and how they may be hogging valuable computer space. Learn how to delete the delivery optimization files and avoid losing critical files with our data recovery tips.


delete delivery optimization files

I. What is a delivery optimization file? Can it be deleted?

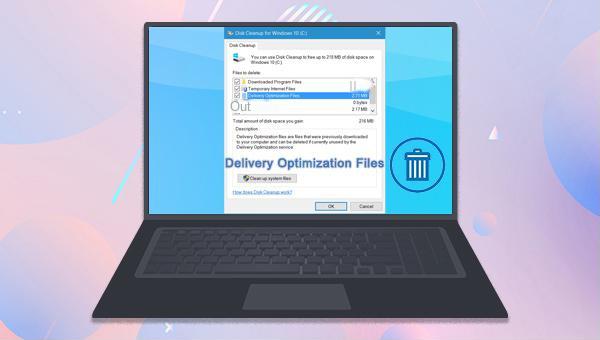
Delivery Optimization in Windows 10 allows for faster updates by delivering them to other networked computers. However, it may require more bandwidth and take up disk space, impacting computer performance.
Delivery Optimization files can be deleted in Windows 10 as they are automatically cleared from the cache when taking up too much disk space. Additionally, users can manually clear Delivery Optimization files for more disk space.

II. How to clean up Windows 10 Delivery Optimization files?

The method of cleaning delivery optimization files is very simple, just need to operate through the “Disk Cleanup” function. Two ways to access the Disk Cleanup feature are described below.

1. Search for Disk Cleanup and clean up Delivery Optimization files

Step 1: Start the Windows 10 computer, enter "Disk Cleanup" in the search box on the lower left corner of the taskbar, and then double-click to open it.
disk cleanup
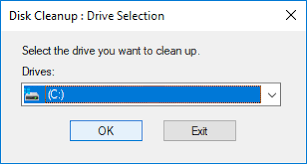
Step 2: In the “Disk Cleanup: Drive Selection” window, select the system disk (usually the C drive) and the disk where the system is located. Click (OK).
disk cleanup
After selecting the disk, Disk Cleanup will scan and calculate the available space that can be freed on the target disk. Please wait patiently.
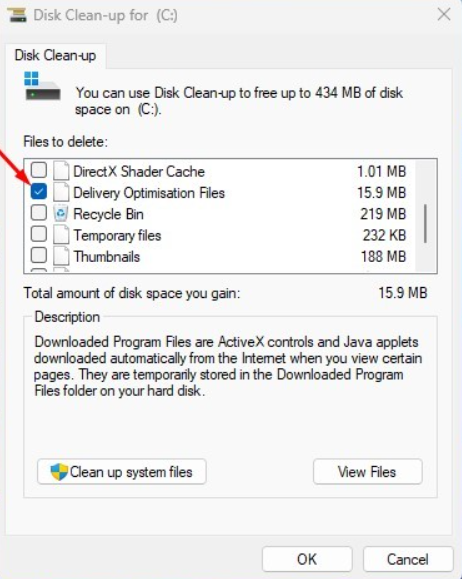
Step 3: Select "Delivery Optimisation Files" in the list of files to delete, then click "OK" to clear them.
delivery optimization files disk cleanup

2. Through the disk cleanup function in the disk properties

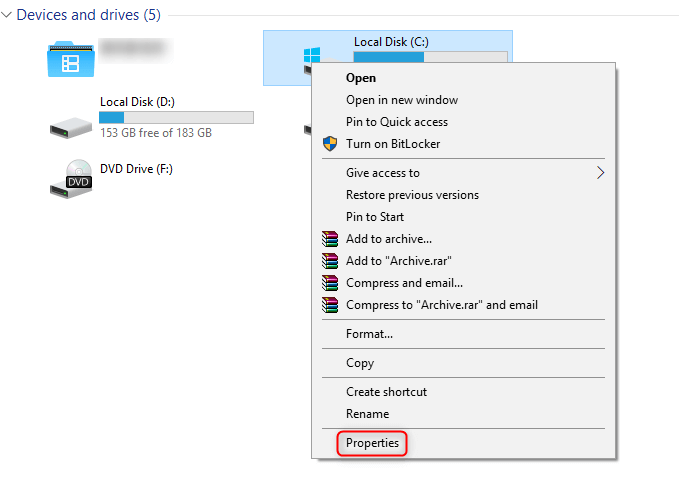
Step 1: Open (This PC) on the desktop, right-click the system disk (C disk), and select the (Properties) option from the menu.
select properties
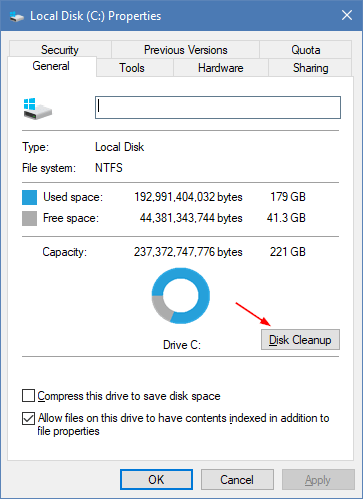
Step 2: After opening the properties interface, click the (Disk Cleanup) button under the (General) tab.
lauch disk cleanup from drive properties
Step 3: Check (Delivery Optimisation Files) and click the (OK) button to clean up.
delivery optimization files disk cleanup
That’s all for deleting/cleaning up Delivery Optimization files. If important data is lost during daily computer use, refer to the following methods for data recovery.

III. (Extended information) Use Renee Undeleter to recover lost data

1. What is Renee Undeleter?

Renee Undeleter is professional data recovery software that supports recovery of various types of data including documents, photos, videos, and compressed files. Whether files were accidentally deleted, the recycle bin emptied, hard disk formatted, or partitions deleted by mistake, this software can help scan and recover files as long as the lost data has not been overwritten. With four functional modules – file recovery, format recovery, partition recovery, and image creationRenee Undeleter can meet most data recovery needs.
Hot Topic - ADsRenee Undeleter – Simple & Powerful Software for Data Recovery

Easy to use Recover data by 3 steps;

Multiple scan modes Fast partition scan, whole partition scan and whole disk scan;

Supported file types Image, video, audio, text, email and so on;

Image creation Create a partition image to read and back up data;

Supported devices SD card, SDHC, SDXC, USB flash drive, hard disk and computer.

Easy to use Recover data by 3 steps;

Multiple scan modes Fast partition/whole partition/whole disk scan;

Supported devices SD card/USB/hard disk.

Free TrialFree TrialFree Trial 800 people have downloaded!
2. How to recover lost files with Renee Undeleter?

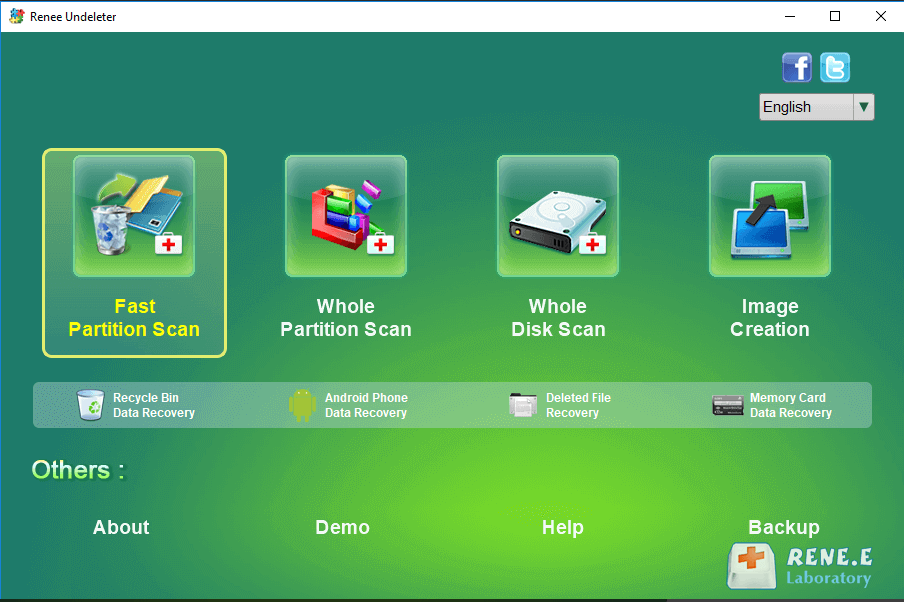
Step 1: Download, install, and run Renee Undeleter on a Windows computer. Select the (Fast Partition Scan) option on the main interface.
Note: Avoid installing the software on the disk requiring data recovery to prevent data overwriting. Also, refrain from saving new data to the same disk partition after file loss to avoid damaging or permanently losing the lost file.
data recovery in renee undeleter
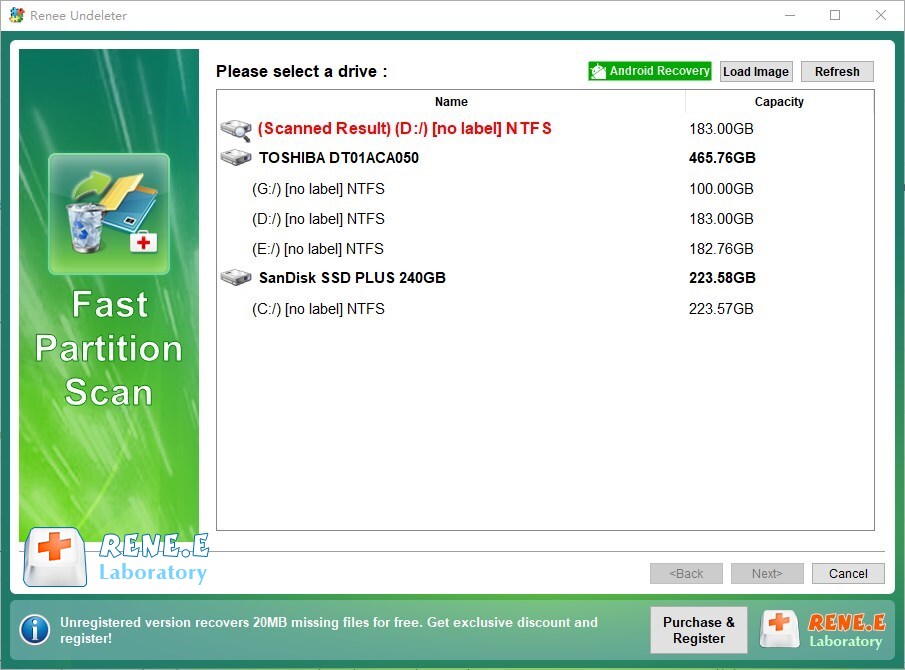
Step 2: Select the partition where the lost data is located and click on (Next).
scan disk with Renee Undeleter
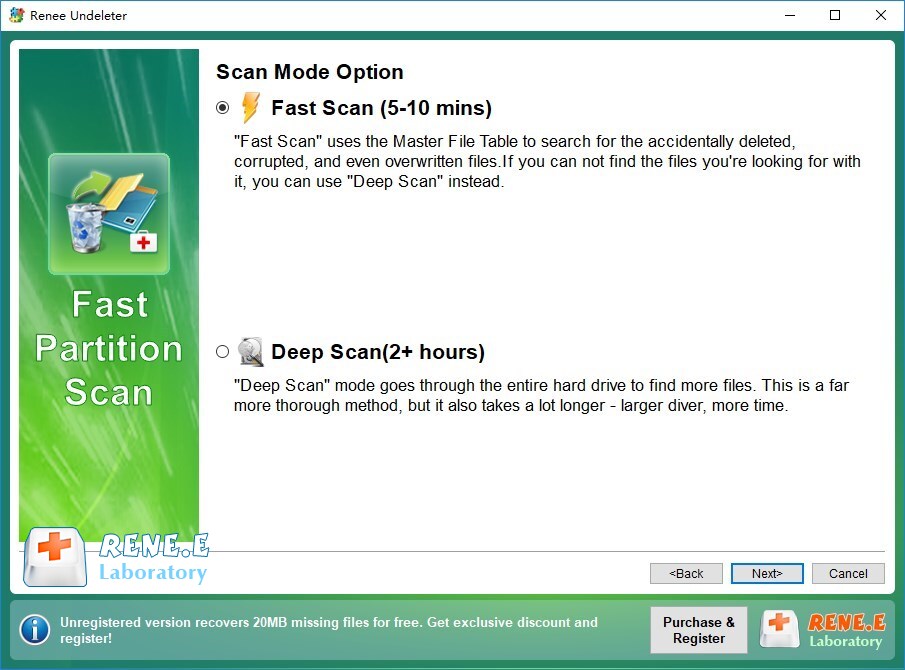
Step 3: Select the (Fast Scan) option and click the (Next) button.
Tips: The fast scan mode only scans the first 30GB of the remaining space of the selected disk. If the desired file is not found after scanning, you can use the deep scan mode to try to scan the hard disk partition again. It will take more time, but more data can be scanned.
fast scan lost data
Step 4: Wait for the scan to complete, double-click the file to preview, then check and recover by clicking the (Recover) button to restore the file to another disk.
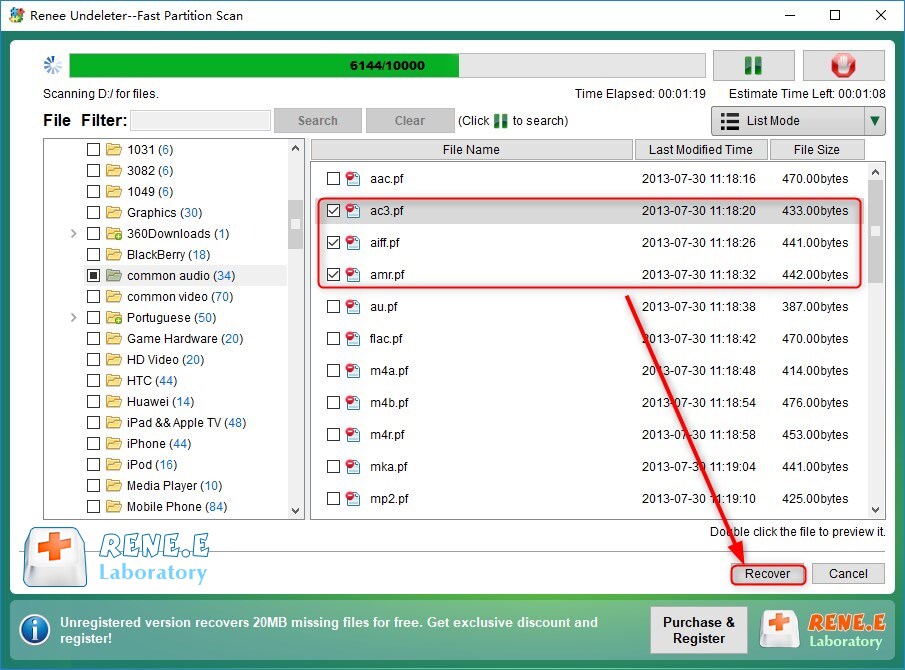
recover files with Renee Undeleter