author avatar
    Senior Product Manager
 

Summary
Learn about the causes for the problem of disk signature collision, including errors during disk cloning and discover common solutions to fix them. You can also know to recover the data with Renee Undeleter.


disk offline signature collision

I. What is a disk signature, and why do disk offline signature conflicts occur?

Disks are an essential part of a computer system for saving, transferring and retrieving data files. To distinguish disks on a computer system, each disk is marked with an identifier called a disk signature.
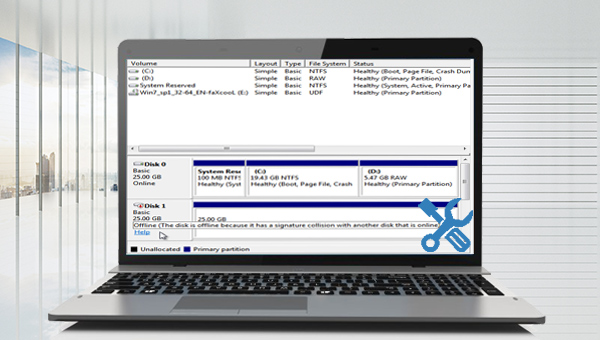
However, when Windows detects that there are two disks with the same signature, a signature conflict occurs, and the prompt “The disk is offline because it has a signature conflict with another online disk” will be displayed. This is due to Windows not allowing two disk drives with the same signature to run at the same time, so Windows 7, 8, 8.1 and 10 disable the second drive and prevent it from mounting, keeping it offline until the signature conflict is resolved. In older versions of Windows (such as Windows Vista and XP), the disk signature was automatically changed when a signature conflict occurred.
Typically, disk offline signature conflict issues can occur when the following scenarios occur.
● The original disk and the clone disk are started in the same system.
● Created a virtual hard disk from a physical hard disk.
● Use virtualized backup software.
disk offline signature collision
Now that we understand the reasons that may cause disk offline signature conflicts, let’s learn how to solve this problem.

II. How to solve the problem of disk signature collision?

1. Use the disk management program to change the disk signature

As mentioned above, when two disks have the same signature, there will be a disk offline signature conflict. Therefore, you can change the disk signature with the help of the disk management program, and the specific steps are as follows:
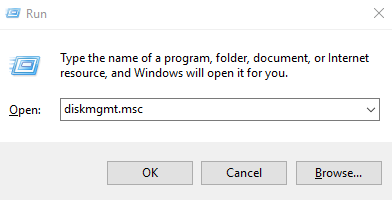
Step 1: Run the computer, press keys Windows and R at the same time to open the run window. Next type diskmgmt.msc and press OK or Enter to open the Disk Manager program.
run disk management
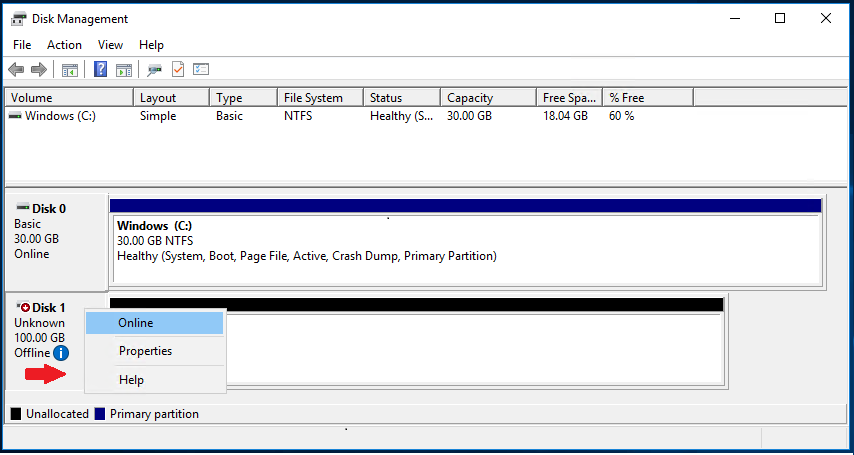
Step 2: Next, select the offline disk with the right mouse button in the Disk Management window and select the option Online. Windows will then automatically generate a new signature for your disk and bring it back online.
how to initialize a disk step 1

2. Use the Diskpart command to change the disk signature

When the disk offline signature conflict occurs, you can also use the Diskpart command to change the disk signature on the cloned disk. The specific steps are as follows:
Step 1: Run the computer, search cmd in the search box in the lower left corner, and select Run as administrator to open the command prompt tool.
run as administrator
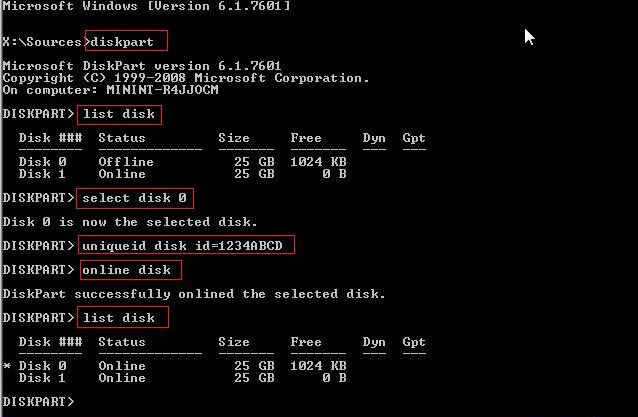
Step 2: In the opened command prompt window, enter the following commands, and press the key Enter each time you enter a command.
Diskpart
list disk (you can check the status of the computer disk)
select disk 0 (0 is the number of the offline disk)
uniqueid disk ID=1234ABCD (the value of ID is in hexadecimal format, which can be changed by yourself)
online disk (bring the disk online)
list disk (check the status of the disk and confirm whether the disk with the signature conflict is online)
Enter the corresponding diskpart command

3. Use the Windows built-in Startup Repair

The Windows Startup Repair feature can be used to detect and repair disk signature conflict errors. To use this function, you need to enter the Windows recovery environment first, the specific steps are as follows:
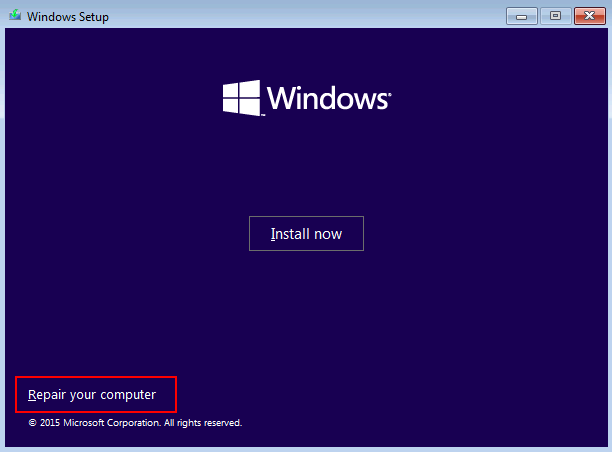
Step 1: Insert the Windows installation disk (DVD or U disk) into the computer. Continuously click F2 or F10 or DEL or ESC shortcut keys (varies with the computer brand) to enter the BIOS setting interface when starting up, set the first boot sequence to the Windows installation disk, and then save the settings to make the computer start from the installation disk and install Windows. Select the Repair Your Computer option on the program’s Install Now interface to enter the recovery environment.
Repair your computer
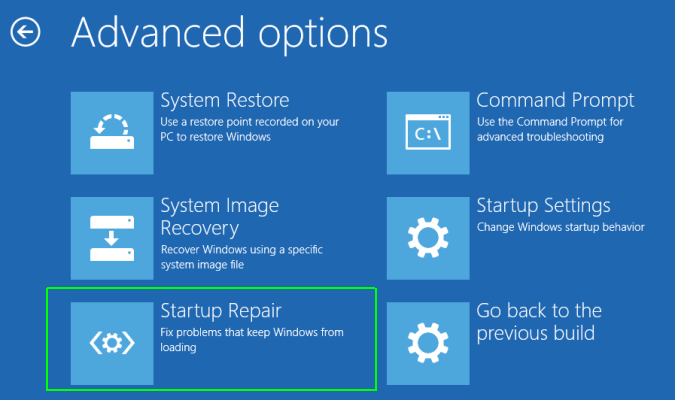
Step 2: After entering the recovery environment, select Troubleshooting > Advanced Options > Startup Repair. After waiting for Windows Startup Repair to complete, restart the computer to see if the problem is resolved.
startup repair in Windows
The above are several effective methods to solve the disk offline signature conflict. In the process of using the computer, we may also encounter data loss. Once there is a data loss problem on your disk, you can safely and effectively retrieve the lost data with the help of professional data recovery tools, let’s continue to learn.

III. Use Renee Undeleter to recover disk lost data

1. What is Renee Undeleter?

Renee Undeleter is a software specially designed to restore various data files. When you accidentally delete important files, empty the recycle bin, or format the disk/storage, you can use this tool to find the lost data back. This software covers four functional modules, including file recovery, format recovery, partition recovery and image creation, so it can help you solve many data loss problems that may occur during system use in an all-round way, which is very convenient.
Renee Undeleter - User friendly & Helpful Formatted Data Recovery Software

Easy to use 3 steps to recover formatted data back.

Multi Recovery Modes File recovery, Whole partition recovery and Whole disk recover are available.

Support Different File Types Photos, videos, audios, files, emails, etc.

Image Creation Creat image for disk or parititon.

Compatible with Different Devices SD card, SDHC, SDXC, USB disk, computer, etc.

Easy to go 3 steps for whole recovery.

Multi Recovery Modes Files/partition/disk recovery modes.

Support Different Devices SD card/USB disk/hard disk, etc.
Free TrialFree TrialFree Trial 800 users have downloaded and found data back!

2. How to restore disk lost data with Renee Undeleter?

Restoring data with Renee Undeleter is very simple, the specific steps are as follows:
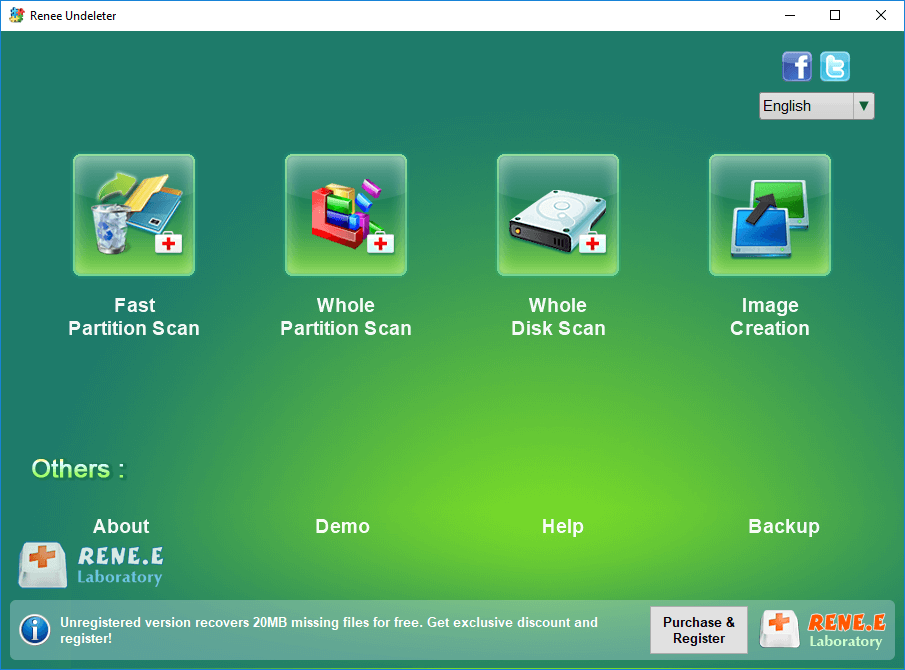
Step 1: Download, install and run Renee Undeleter, select the option Whole Disk Scan in the main interface. This option will scan the entire hard disk, so do not install the software to any partition of the hard disk that needs to be scanned. In the hard disk that does not need to be scanned, otherwise it will not be able to use Whole Disk Scan to scan. If the lost data is not much and the lost time is not long, you can also use Fast Partition Scan and Whole Partition Scan modes to save scanning time.
select whole disk scan in renee undeleter
Data recovery function introduction:

Fast Partition Scan: Quickly retrieve files lost due to accidental deletion or emptying the recycle bin.

Whole Partition Scan: Quickly recover files lost due to inaccessible or formatted partitions.

Whole Disk Scan: It can analyze and obtain partition information, and fully scan the entire partition.

Image Creation: You can create a mirror image for a partition to back up the current partition state.
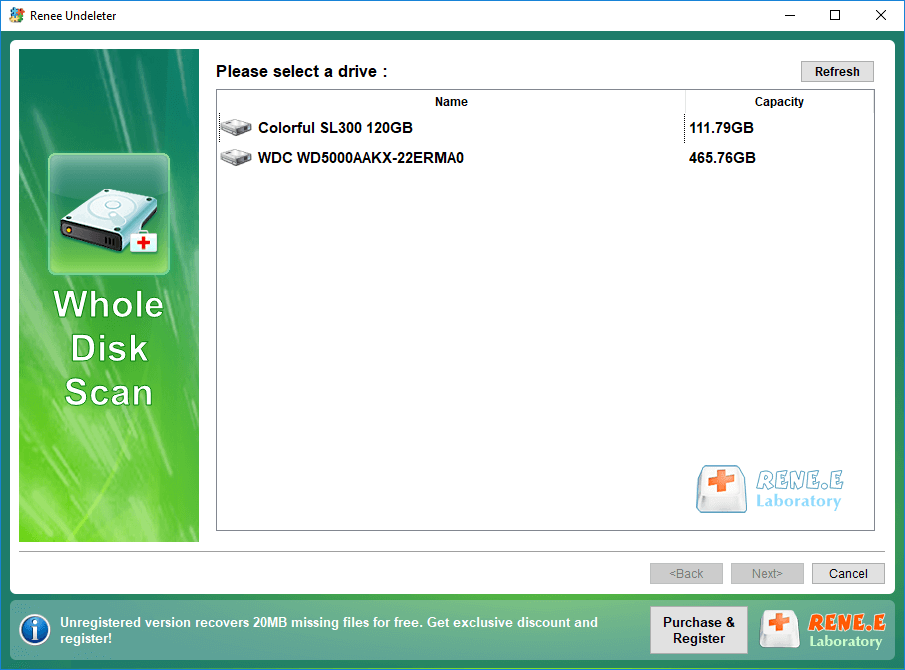
Step 2: Next, select the disk device to be scanned and then click Next. Select default setting on the advanced setting interface.
select a disk to recover in renee undeleter
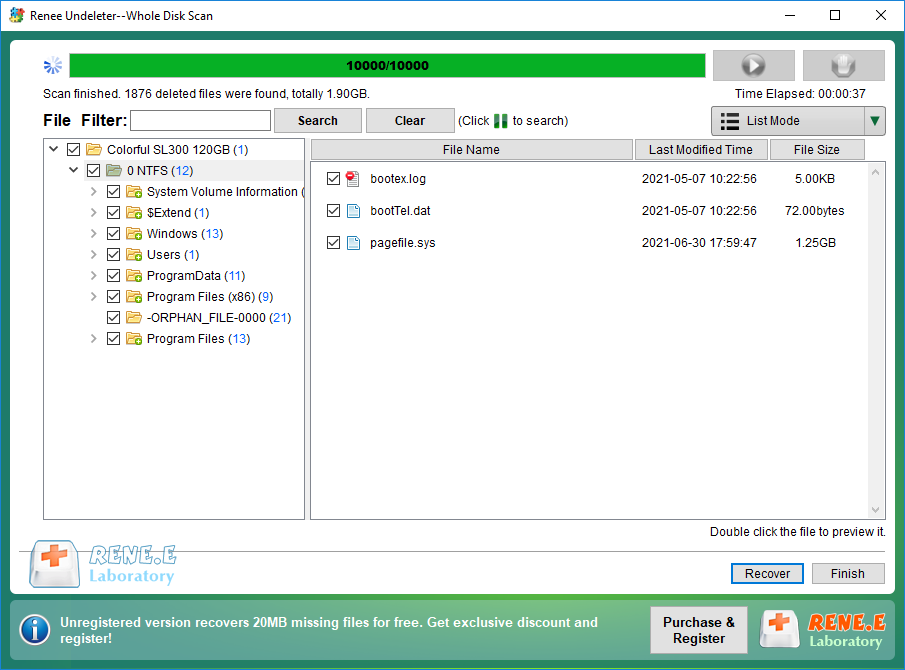
Step 3: After that, the software will analyze the disk device. After scanning, you can double-click the file in the preview window on the right to preview it, then select the file you want to restore, and click the Recover button in the lower right corner to restore the selected file.
select taget files to recover with renee undeleter
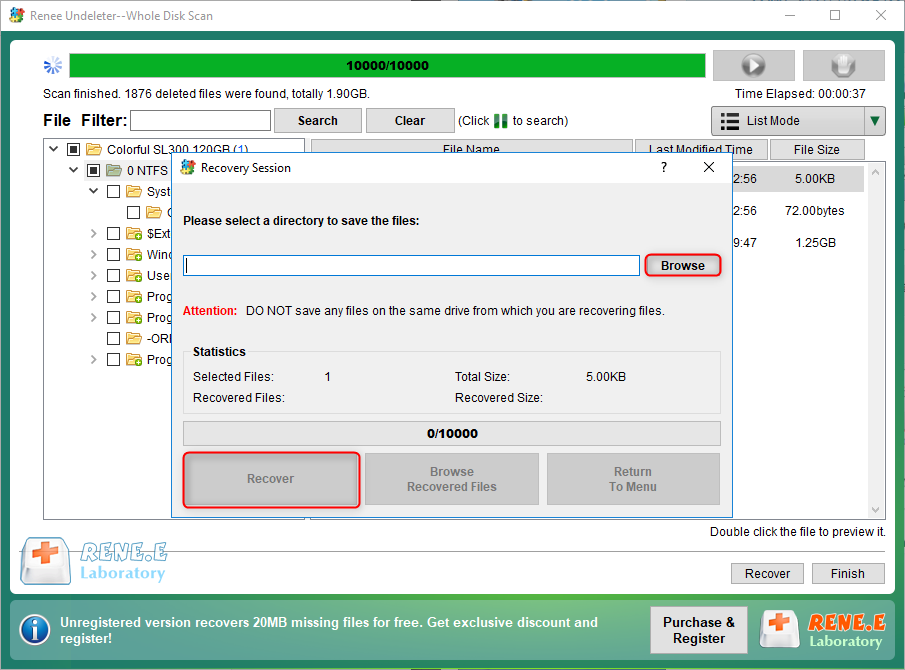
Step 4: Next, select the target folder, click Browse to select another disk to save the recovered files, and then click the Recover button to start the file recovery command, you just need to wait patiently.
recover files from whole disk scan with renee undeleter