author avatar
    Specialist of Customer Service Dept.
 

Summary
Learn how to solve the "Failed to enumerate objects in the container" error message in Windows. Before it, you can recover lost data with effective solutions.
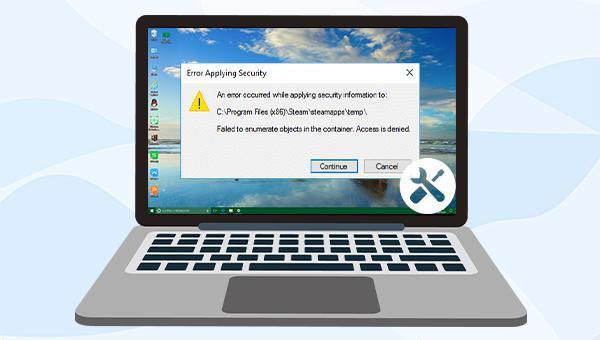


failed to enumerate objects in the container

I. What is the error: Failed to enumerate objects in the container

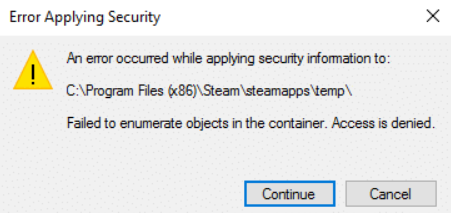
Setting permissions on files or folders in Windows devices protects private content. The administrator account has the authority to alter permissions, effectively managing content sharing among users. Nevertheless, should a user account be without modification permissions, the error "Failed to enumerate objects in the container. Access is denied." may manifest, often due to misconfiguration or permission conflicts.
Cannot enumerate objects in the container
Next, let’s learn the solutions to this problem.

II. How to solve the problem: Failed to enumerate objects in the container?

1. Change all permissions of a file or folder

In past implementations, changing the ownership of the file or folder was seen as the most effective solution. Let’s learn how to change all permissions of a file or folder.
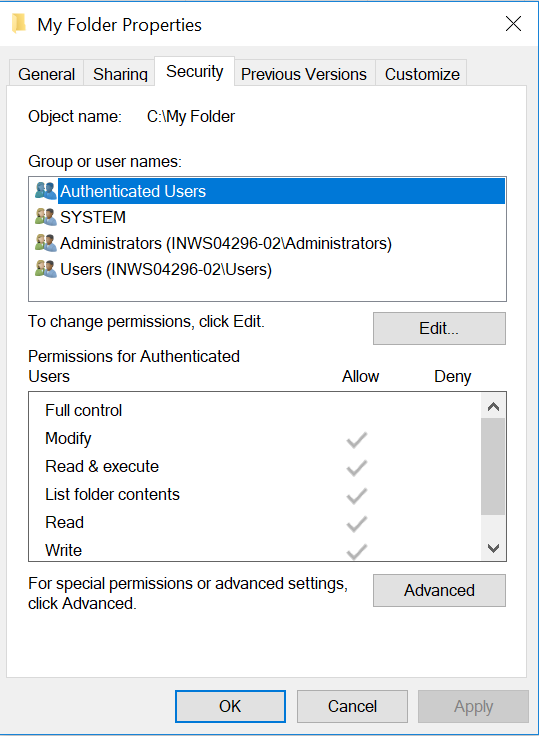
Step 1: Right-click the file or folder that you want to change all permissions, and select (Properties). Switch to the (Security) tap and click the (Advanced) button below.
 Change permissions of a file or folder
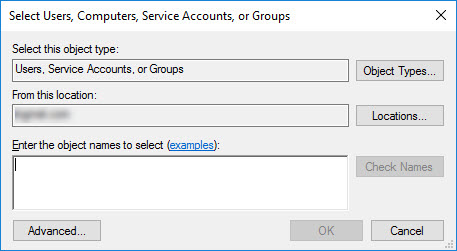
Step 2: Click on the (Change) button. Next, click the (Advanced) button in the “Select Use, Computers, Service Accounts, or Groups” window.
Select User or Group
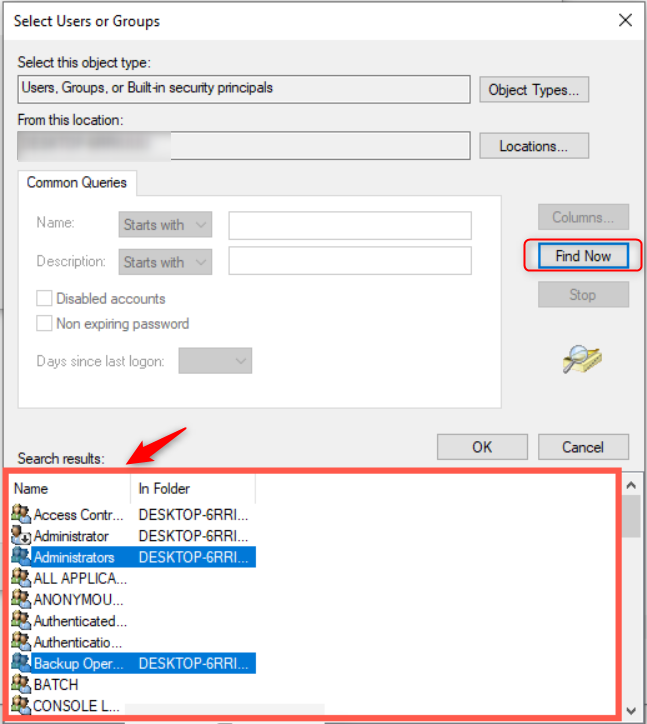
Step 3: Click the (Find Now) button, and double-click to select the desired user account. Next, click (OK).
Select User or Group
Step 4: In the “Advanced Security Settings” window, check both the “Replace owner on subcontainers and objects” and “Replace permission entries on all child objects with inheritable permission entries from this object” options. Then click the (OK) button.
At this time, if the issue is still not resolved, please proceed to the steps below.
Step 5: On the “Advanced Security Settings” page, click the (Add) button.
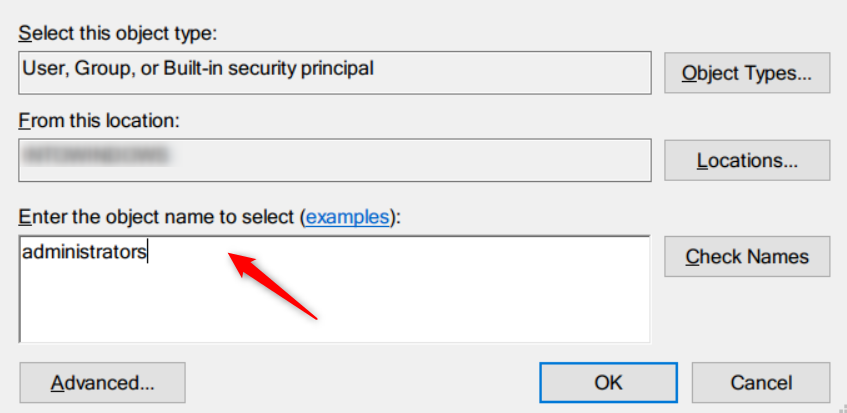
Step 6: Click the (Select a principal) button. Next, enter (everyone) in “Enter the object name to select”, then click on the (Check Names) and (OK) button.
Enter the object name to select
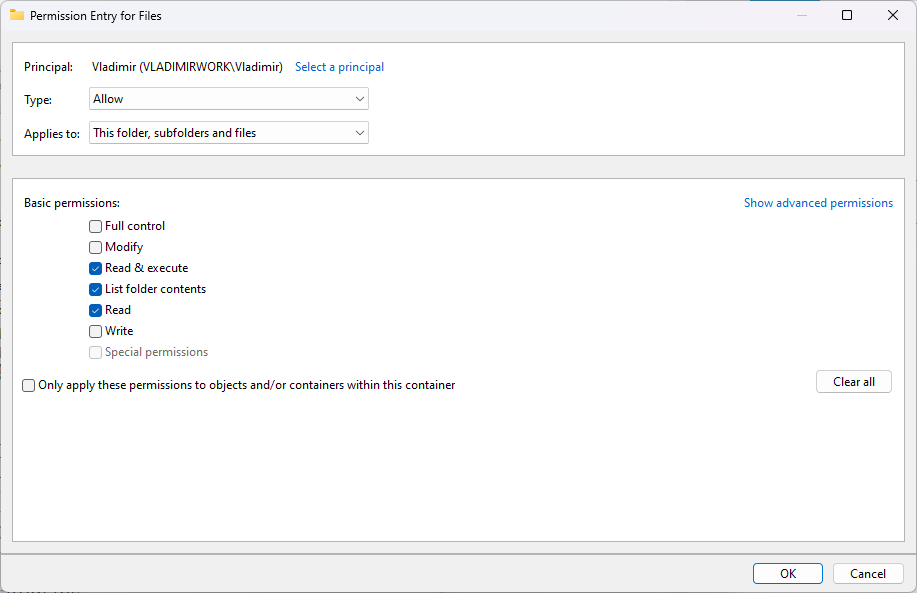
Step 7: Finally, check all the options from the Basic permissions and click (OK).
Change all permissions of a file or folder

2. Change User Account Control Settings

By changing the setting of a feature on the “User Account Control Settings” page, you can effectively prevent the “Failed to enumerate objects in the container. Access is denied” error. The specific steps are as follows:
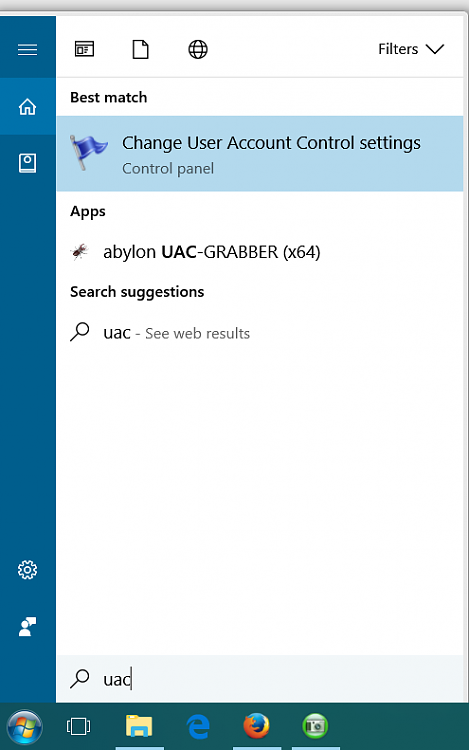
Step 1: Enter (Change User Account Control Settings) in the search box and open it.
Change User Account Control Settings
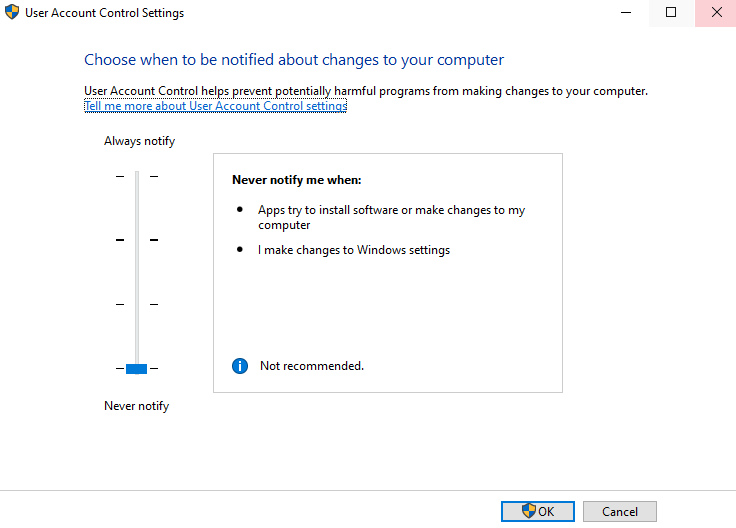
Step 2: Use the mouse to drag the square module to the bottom (Never notify) and click (OK). Finally, restart the computer to see if the problem is resolved.
Change User Account Control Settings
Kind tips Some users reported that entering Safe Mode and then deleting and modifying files can successfully solve the problem of “Failed to enumerate objects in the container. Access is denied”.
To resolve the “Failed to enumerate objects in container. Access is denied” error, follow the guidelines provided. If you’ve accidentally deleted files, you can recover them using professional data recovery tools. We suggest using Renee Undeleter for this purpose. Continue reading if you require assistance.

III. Use Renee Undeleter to recover data when files are accidentally deleted

1. What is Renee Undeleter?

Renee Undeleter is a data recovery software designed to retrieve various data files lost due to accidental deletion, emptied recycle bin, or disk/memory card/USB disk formatting. It features four key modules: file recovery, format recovery, partition recovery, and image creation, offering a comprehensive solution for diverse data loss issues encountered during system use. Its convenience and functionality make it a valuable tool for restoring lost data.
Hot Topic - ADsRenee Undeleter – Simple & Powerful Software for Data Recovery

Easy to use Recover data by 3 steps;

Multiple scan modes Fast partition scan, whole partition scan and whole disk scan;

Supported file types Image, video, audio, text, email and so on;

Image creation Create a partition image to read and back up data;

Supported devices SD card, SDHC, SDXC, USB flash drive, hard disk and computer.

Easy to use Recover data by 3 steps;

Multiple scan modes Fast partition/whole partition/whole disk scan;

Supported devices SD card/USB/hard disk.

Free TrialFree TrialFree Trial 800 people have downloaded!

2. How to recover accidentally deleted files with Renee Undeleter?

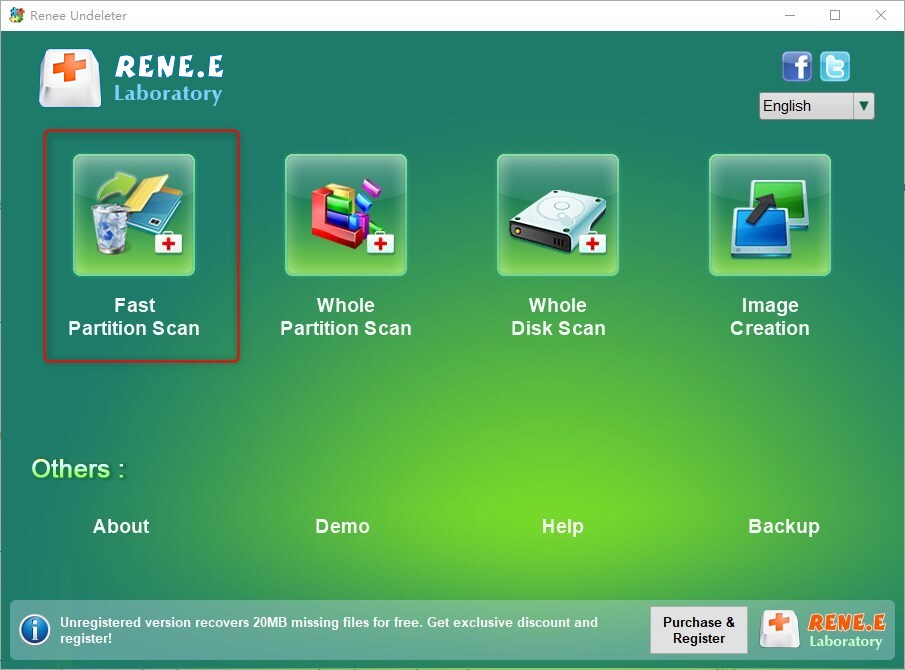
Step 1: Download, install, and run Renee Undeleter. Select the (Fast Partition Scan) option in the main interface.
Note: Avoid installing on the disk from which you intend to recover data to prevent overwriting. For recently deleted files on an internal disk, use Fast Partition Scan. If the disk has been formatted, files are long deleted, or you need to recover data from an external disk, employ Whole Partition Scan or Whole Disk Scan functions.
fast partition scan with Renee Undeleter
Data recovery function introduction:
Fast Partition Scan – Quickly retrieve files lost due to accidental deletion or emptying the recycle bin.
Whole Partition Scan – Quickly recover files lost due to inaccessible or formatted partitions.
Whole Disk Scan – Analyze and get partition information and perform a full scan of the entire partition.
Image Creation – You can create a mirror image for a partition to back up the current partition state.
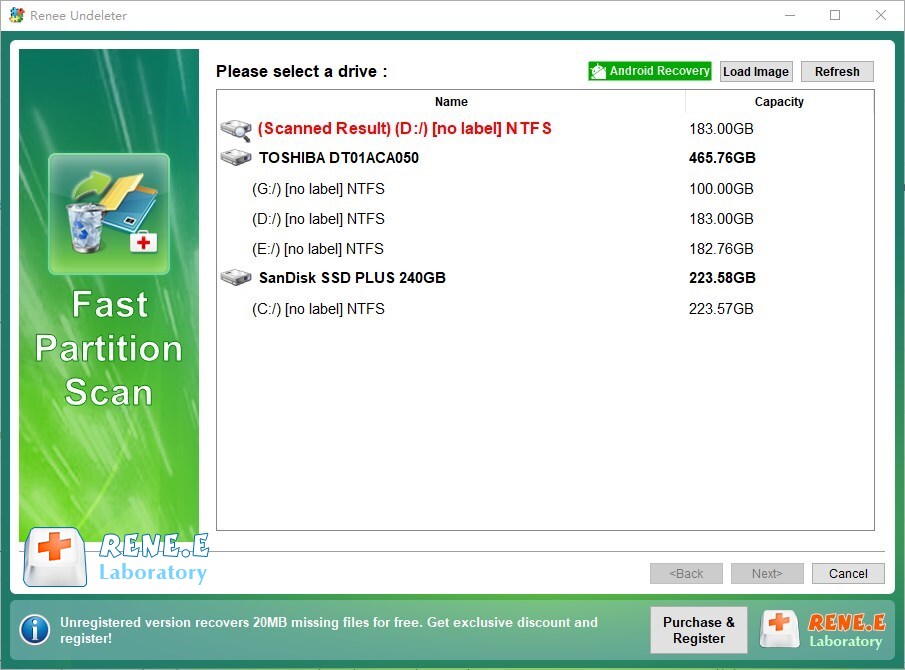
Step 2: Next, select the partition where the lost data is located and click on (Next).
scan disk with Renee Undeleter
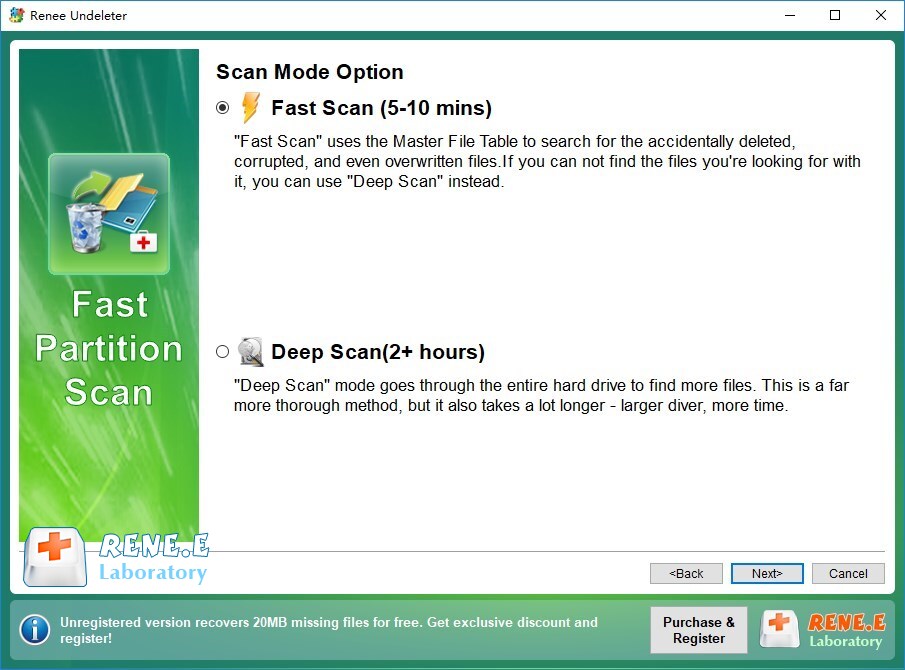
Step 3: Select the (Fast Scan) option and click the (Next) button to scan.

It should be noted that “Fast Scan” only scans the first 30GB of the remaining space of the selected disk. If the desired file is not found after scanning, you can use “Deep Scan” to try to scan the hard disk partition again, but it will take more time and more file data can be scanned.

fast scan lost data
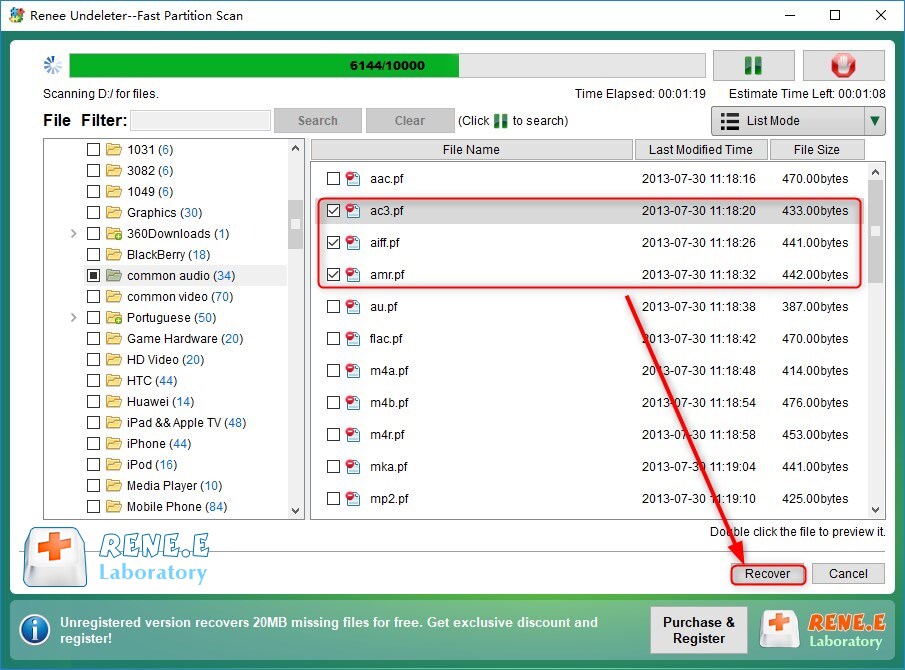
Step 4: Wait for the scan to complete. You can double-click the file to preview, then check the desired files. Finally, click the (Recover) button.
recover files with Renee Undeleter