After knowing the reasons why the hard disk access is denied, let’s take a look at the corresponding solutions.
II. The solution to the hard disk access denial
1. Use the Chkdsk command to detect and repair the hard disk
The complete name of Chkdsk is Microsoft Check Disk, a program designed to check disks. Its primary purpose is to scan the file system’s integrity and fix any errors; Chkdsk also has the capability to scan disk sectors and attempt to repair any bad ones. For further details, refer to “What is CHKDSK? Use your expertise to showcase.”
Step 1: Search (cmd) in the computer search box, right-click (command prompt), and select (run as administrator).
Step 2: In the command prompt window, enter the command (chkdsk H: /f) (H: is the hard drive letter, /f is the repair parameter), and then press the (Enter) key.
The repair process will take some time. After the repair is complete, you can check if the problem is fixed.
Kind tipsIf this command does not repair the hard disk, you can also try the (chkdsk H: /r) command (/r is also a repair parameter, which can find bad sectors and restore readable information).
2. Set the permission to use the disk
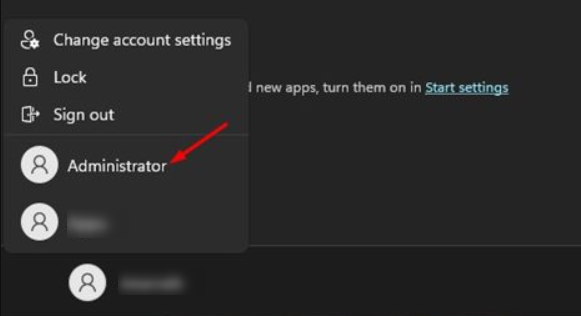
Step 1: Click the Windows icon, and then click the Sign In account icon in the left column. Find the administrator account in the list, and switch to the administrator account.
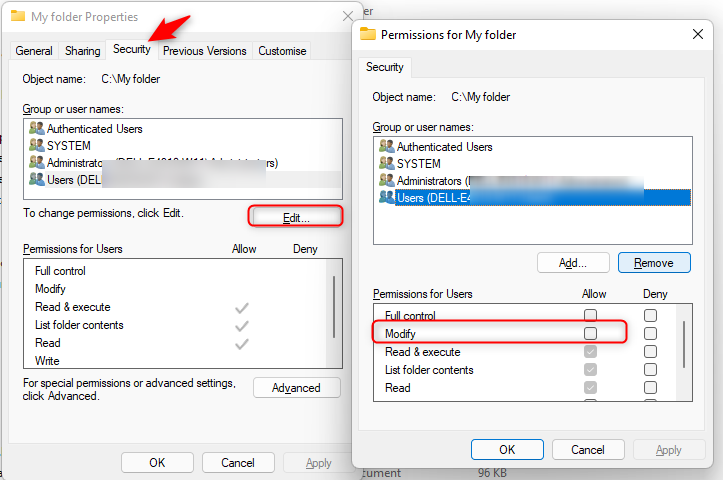
Step 2: Please click the hard disk that is being denied access, then select (Properties). Under the “Security” tab, click the (Edit) button to adjust the permissions for an account on the disk. This includes options such as full control, modification, read and execute, read, write, and more. Once you have completed the changes, click (OK). Now, try accessing the hard disk again using the designated account to see if the issue has been resolved.
3. Modify the hard drive letter
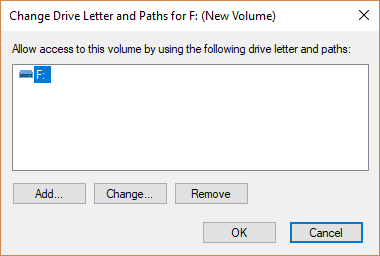
You can also try to change the drive letter of the partition, for example, change E to F.
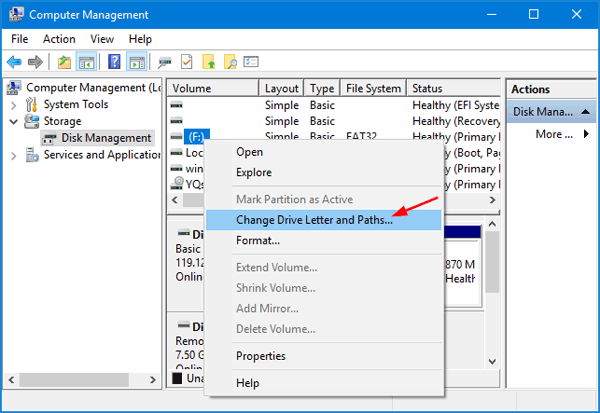
Step 1: Press the Windows icon + X key at the same time, select (Disk Management) in the menu, right-click the target hard disk, and select (Change Drive Letter and Paths).
Step 2: Click (Change), change the drive letter for the hard disk, and then click (OK). Then open the file explorer, select (this computer), and check whether the hard disk can be accessed.
4. Restore the data in the hard disk, and then format the hard disk
If the above three methods fail to fix the problem, you can try to use Renee Undeleter to recover the data in the hard disk. As long as the hard disk can be displayed in the disk management, you can use this software to scan and recover files, and then format the hard disk. Formatting will erase all data in the hard disk, reset the file system, etc.
①How to use Renee Undeleter to recover hard disk data?
Renee Undeleter is a software specially used to restore various data files. When you accidentally delete important files, empty the recycle bin, or format the disk/storage, you can use this tool to retrieve the lost data. The software covers four functional modules, including file recovery, format recovery, partition recovery and image creation, which can help you solve all data loss problems in an all-round way.
Hot Topic - ADsRenee Undeleter – Simple & Powerful Software for Data Recovery
Easy to use Recover data by 3 steps;
Multiple scan modes Fast partition scan, whole partition scan and whole disk scan;
Supported file types Image, video, audio, text, email and so on;
Image creation Create a partition image to read and back up data;
Supported devices SD card, SDHC, SDXC, USB flash drive, hard disk and computer.
Easy to use Recover data by 3 steps;
Multiple scan modes Fast partition/whole partition/whole disk scan;
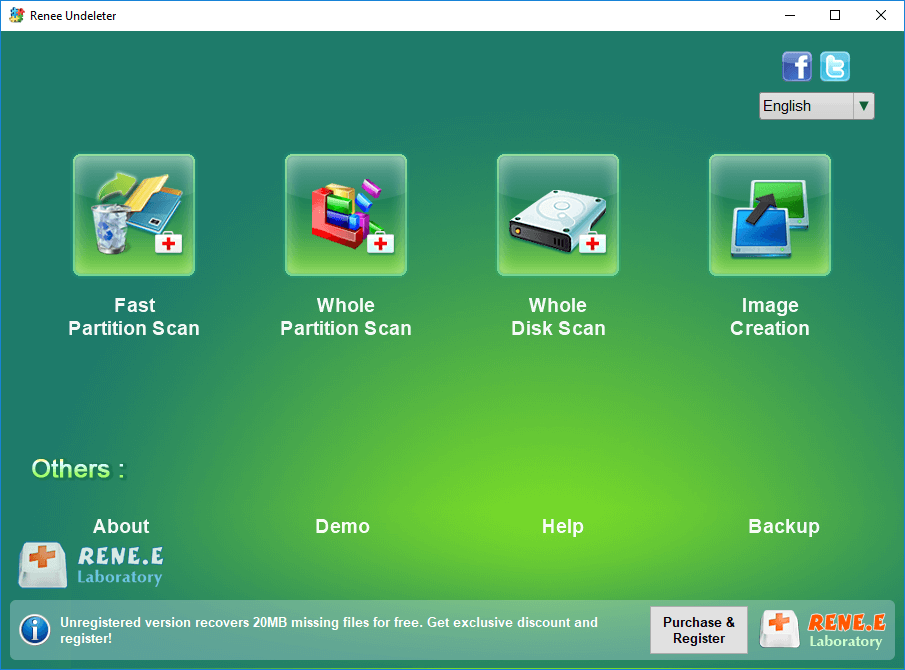
Step 1: Download, install, and run Renee Undeleter on the computer. Select the (Whole Disk Scan) option on the main interface.
Note: Do not install on the disk that needs to restore data, so as not to cause data overwriting.
Data recovery function introduction: Fast Partition Scan – Quickly retrieve files lost due to accidental deletion or emptying the recycle bin. Whole Partition Scan – Quickly recover files lost due to inaccessible or formatted partitions. Whole Disk Scan – Analyze and get partition information and perform a full scan of the entire partition. Image Creation – You can create a mirror image for a partition to back up the current partition state.
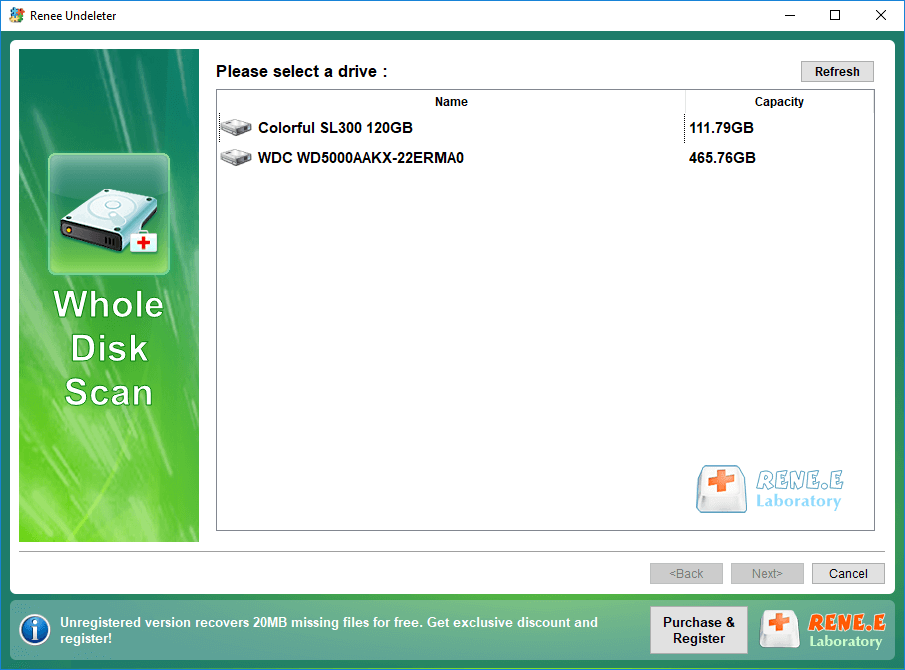
Step 2: Next select the hard drive that needs to recover data, and click (Next).
Step 3: Please wait patiently for the scan. This process will find out all the partitions that exist on the hard disk, and then the “Select the partition you need to scan” window will pop up. You can select a specific partition to scan. If not selected, all partitions will be scanned and it will take longer.
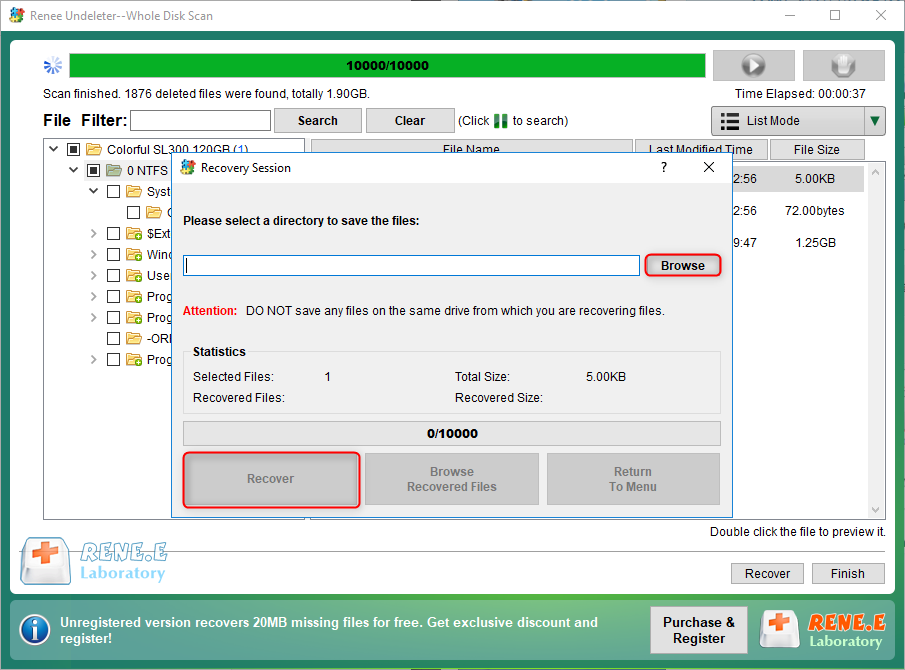
Step 4: You can preview the files during the scanning process. If all the required files have been found, you can check the target files and click the (Recover) button to restore the hard disk data to other disks of the computer.
②How to format the hard disk?
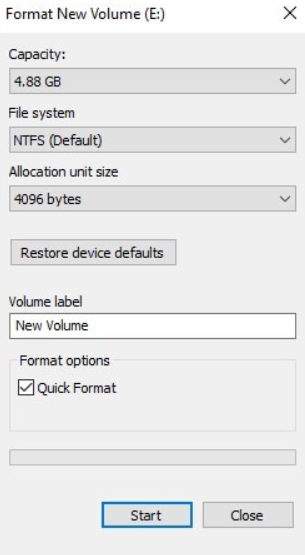
Step 1: After data recovery or backup, right-click on the inaccessible hard disk partition and click (Format).
Step 2: Manage the settings, such as file system, unit size, etc. Click (Start) to start formatting. After formatting, the drive should be accessible.