author avatar
    Senior Product Manager
 

Summary
Discover how to remove the read-only attribute from your hard disk without data loss, alongside data recovery methods. Solve the "hard drive read only" problem efficiently here.


hard drive read only

I. What are the reasons for the hard disk to be read-only?

The permission restriction of hard disk read-only only allows users to read or copy the saved data on the storage device, without the ability to write new data or edit existing data. This status can be applied to individual files, folders, or entire disks, including memory cards, USB flash drives, hard drives, solid-state drives, and external hard drives.
There are various reasons for hard disk read-only. Here, we’ll list some common causes:
● Device is locked
● The account does not have write permission to the current hard disk
● The hard drive or file is set to read-only
● The hard drive is write-protected
After understanding what a read-only property is and what causes it to appear, let’s take a look at the solution to this problem.

II. How to solve the hard disk read-only error

Some of the solutions described below may result in data loss, we recommend that you first Back up important data on the hard drive , you can also use the data recovery methods introduced in the third part to extract important data.

1. Solution under Windows system

Method 1: Log in as an administrator and modify disk read and write permissions
At times, accessing a computer with a non-administrator account may result in limited read and write permissions for storage devices. If your computer has a read-only hard disk, consider logging in as an administrator to adjust the permissions accordingly. Here’s how:
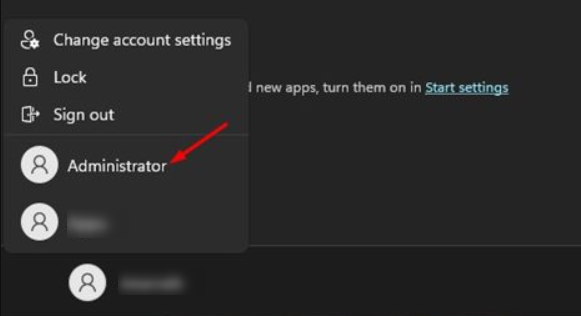
Step 1: Click the Windows icon, and then click the Sign In account icon in the left column. Find the administrator account in the list, and switch to the administrator account.
Find the administrator account
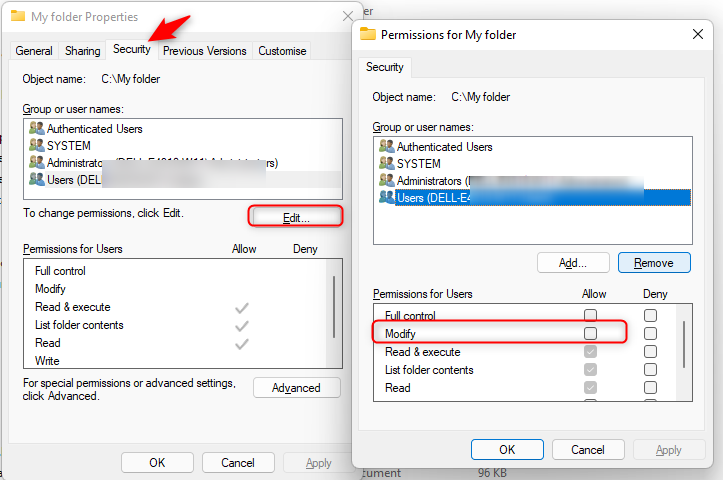
Step 2: After that, right-click the read-only hard drive and click (Properties).

Switch to the (Security) tab, click the (Edit) button below, and select the target account. Then check the box “Modify” and “Write” under (Allow), and finally click (OK).
Allow permissions for modification and writing
After that, you can try to open the read-only drive again and check if you can write data to it. If it can be written, then the problem is solved, if it still cannot be written, then you can try the following method.
Method 2: Use the diskpart command to clear the read-only attribute of the hard disk
Step 1: Enter (cmd) in the search box, right-click (Command Prompt), select (Run as administrator).
run as administrator
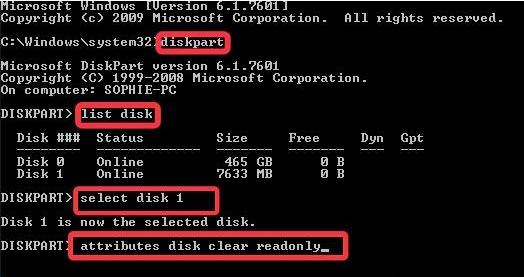
Step 2: Please enter the following commands in sequence, and press the (Enter) key once for each line of command input:
diskpart
list disk (will list all disks in the computer)
select disk 1 (1 indicates the number of the hard disk)
attributes disk clear readonly (clear the read-only attribute of the disk)
exit (exit)
input the command
Kind tipsIf the prompt “Diskpart failed to clear disk attributes” appears after entering the command (attributes disk clear readonly), it could be due to bad sectors or file system errors on the hard disk. In this case, you can use Windows error checking tools to check and fix the issue.

Diskpart cannot clear disk properties

If the above two methods do not solve the problem, you can also modify some settings in the registry or the local group policy editor to solve the problem, click here for details.

2. The solution under the Mac system

If the Mac system is only able to read the hard disk files, but not write to them, it may be due to the file system being NTFS. NTFS, or New Technology File System, is a journaling file system created by Microsoft. This means that not only does it write information to the disk, but it also keeps a log of all changes made. This feature makes it simpler to recover the NTFS file system in case of an error, such as a system crash or power outage.
The Mac OS X kernel has limited capabilities when it comes to reading NTFS files. This means that if your hard disk is formatted with NTFS, your Mac system will only be able to read it, but not write to it. Fortunately, there are solutions to this issue, such as reformatting the hard drive or using third-party software that allows for read and write capabilities on NTFS hard drives. For more information on how to repair the mobile hard disk that can only be read but not written on Mac? please refer to this article.
If you lose important data during the process of removing the read-only attribute, you can check the following data recovery methods, which are applicable to Windows and Mac systems.

III. How to restore important data in the hard disk?

1. What is Renee Undeleter?

Renee Undeleter is a software specially used to restore various data files. When you accidentally delete important files, empty the recycle bin, or format the disk/storage, you can use this tool to retrieve the lost data. The software covers four functional modules, including file recovery, format recovery, partition recovery and image creation, which can help you solve all data loss problems in an all-round way.
Hot Topic - ADsRenee Undeleter – Simple & Powerful Software for Data Recovery

Easy to use Recover data by 3 steps;

Multiple scan modes Fast partition scan, whole partition scan and whole disk scan;

Supported file types Image, video, audio, text, email and so on;

Image creation Create a partition image to read and back up data;

Supported devices SD card, SDHC, SDXC, USB flash drive, hard disk and computer.

Easy to use Recover data by 3 steps;

Multiple scan modes Fast partition/whole partition/whole disk scan;

Supported devices SD card/USB/hard disk.

Free TrialFree TrialFree Trial 800 people have downloaded!

2. How to use Renee Undeleter to restore the data in the hard disk?

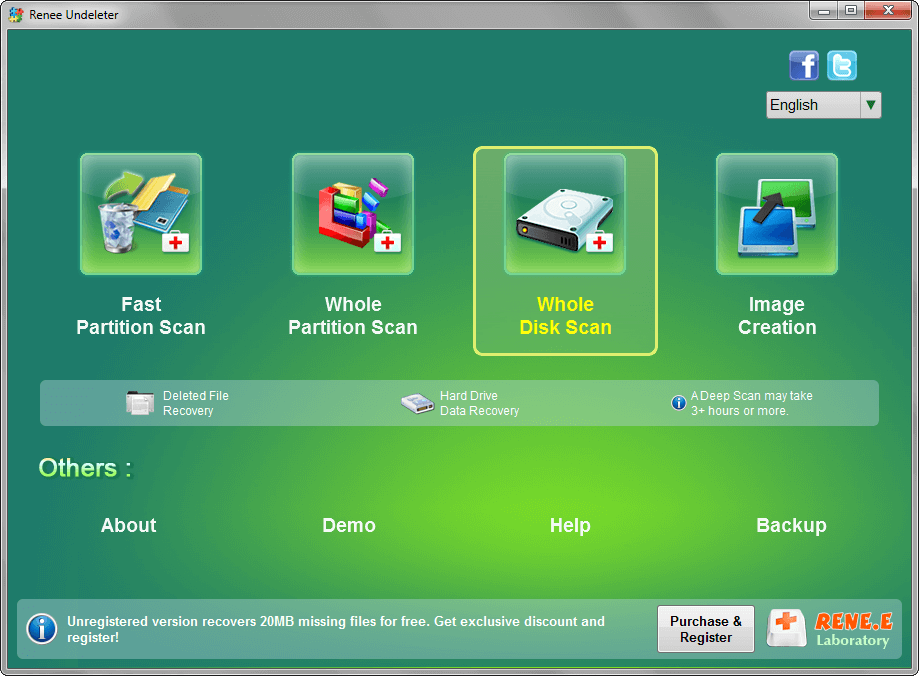
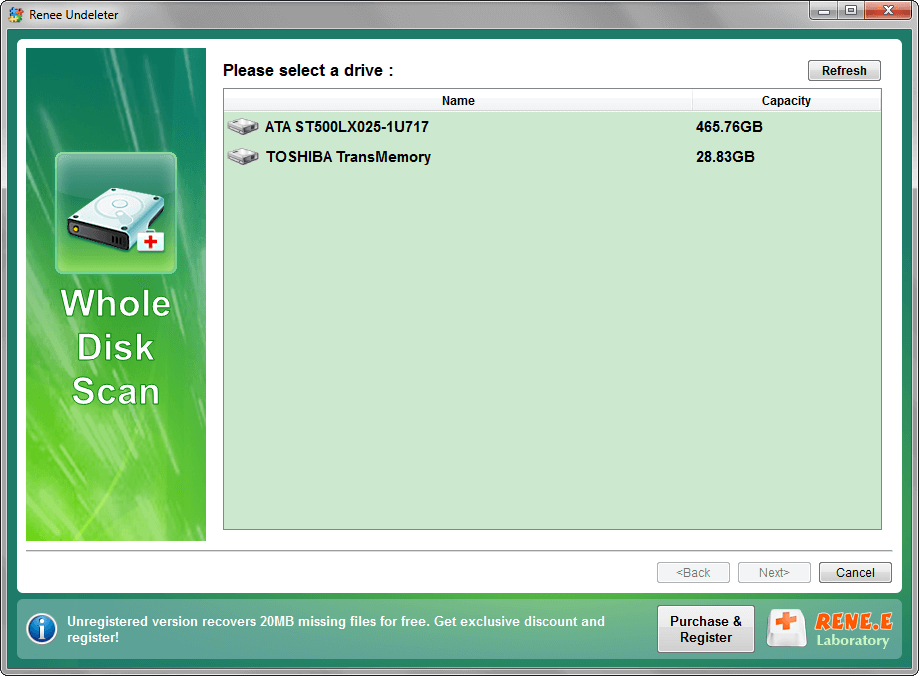
Step 1: Download, install and run Renee Undeleter on the computer. Select the (Whole Disk Scan) option on the main interface.

Note: Do not download and install the software on the hard disk that needs to restore data.

select whole disk scan to scan disk in renee undeleter
Data recovery function introduction:
Fast Partition Scan – Quickly retrieve files lost due to accidental deletion or emptying the recycle bin.
Whole Partition Scan – Quickly recover files lost due to inaccessible or formatted partitions.
Whole Disk Scan – Analyze and get partition information and perform a full scan of the entire partition.
Image Creation – You can create a mirror image for a partition to back up the current partition state.
Step 2: Select the hard disk that needs to recover data, and click (Next).
select target disk in whole disk scan in renee undeleter
Step 3: Please wait patiently for the scan. This process will find out all the partitions in the hard disk, and then the “Select the partition you need to scan” window will pop up, and you can select a specific partition to scan. If not selected, all partitions will be scanned automatically, and more files can be found, but it will take longer.
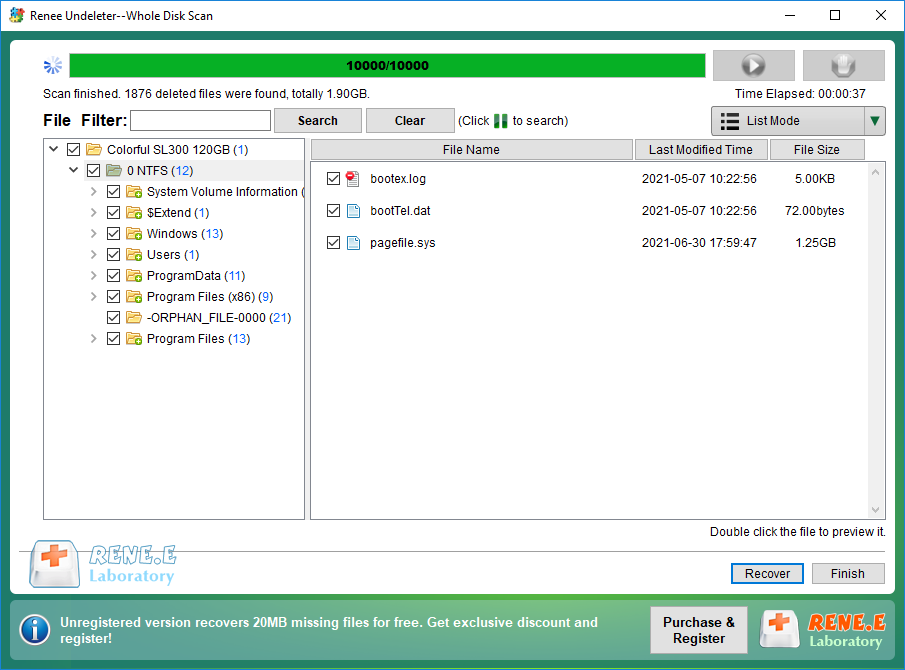
Step 4: You can preview the files during the scanning process. If all the required files have been found, you can check the files to be restored, and then click the (Recover) button to restore the files to other disks of the computer.
select taget files to recover with renee undeleter