author avatar
    Specialist of Customer Service Dept.
 

Summary
Learn how to how to recover deleted photos from external hard drive with practical methods. Get back your important data effortlessly.

how to recover deleted photos from external hard drive

I. Several reasons for the loss of photos on the external hard disk

Before recovering photos from a external hard drive, it’s helpful to understand the common reasons for photo loss to better address the issue.

1. Photos are hidden

If photos on the external hard disk are missing, first check if they are hidden due to virus infection or other reasons. Modify options in Control Panel to view hidden files.
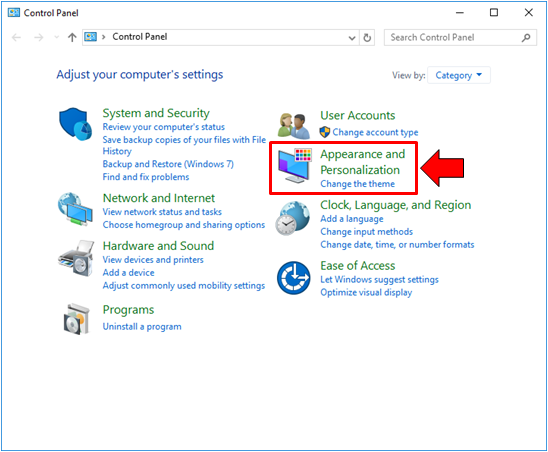
Press Windows + R, enter “Control Panel”, and press Enter. Click “Appearance and Personalization.”
appearance and personalization in control panel
Click (Show hidden files and folders), check (Show hidden files, folders, and drives), and click (OK).
check hidden files in file explorer options
After doing the above, if you still can’t find the photos, they may have been deleted.

2. Accidental deletion or virus

Accidental deletion is a common cause of data loss. To prevent this, regularly back up your external hard drive. Virus infections can also lead to photo loss, as some viruses automatically delete files. To mitigate this, connect the external hard disk to a computer and use anti-virus software to scan and remove the virus.

3. External hard disk failure

When a external hard disk fails due to file system errors, becoming RAW, disappearing partitions, or bad sectors, photo files may be lost. This often occurs in aging or low-quality hard disks. Refer to the third part for repair methods. Before repairing, use data recovery software to restore the photos.

II. Use Renee Undeleter to recover lost photos from external hard drive

1. What is Renee Undeleter?

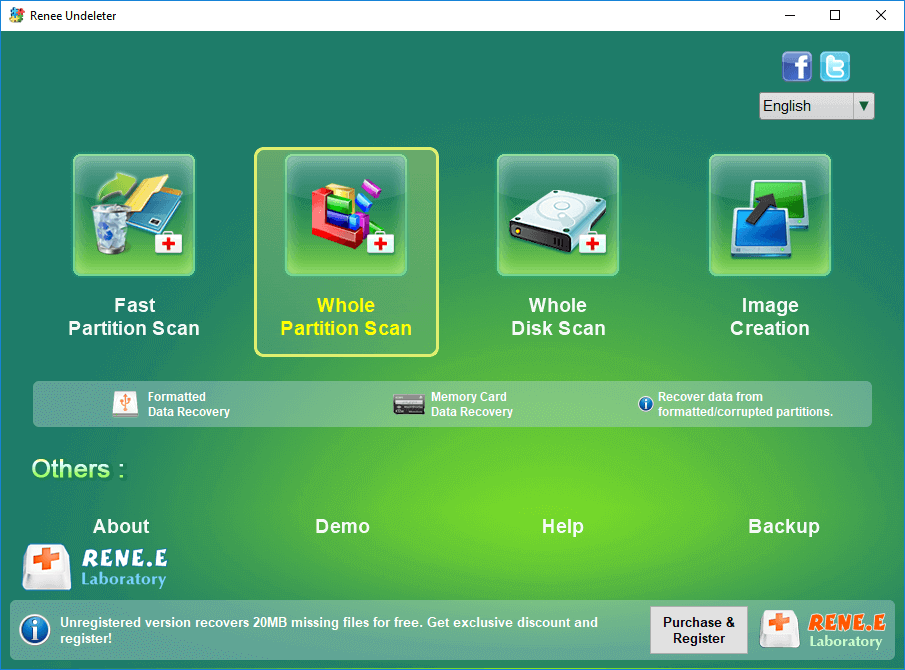
Renee Undeleter is designed to restore various data files. Whether you’ve accidentally deleted important files, emptied the recycle bin, or formatted a disk/storage, this tool can retrieve your lost data. It features four modules: Fast Partition Scan, Whole Partition Scan, Whole Disk Scan, and Image Creation, providing a comprehensive solution to all data loss problems.
Hot Topic - ADsRenee Undeleter – Simple & Powerful Software for Data Recovery

Easy to use Recover data by 3 steps;

Multiple scan modes Fast partition scan, whole partition scan and whole disk scan;

Supported file types Image, video, audio, text, email and so on;

Image creation Create a partition image to read and back up data;

Supported devices SD card, SDHC, SDXC, USB flash drive, hard disk and computer.

Easy to use Recover data by 3 steps;

Multiple scan modes Fast partition/whole partition/whole disk scan;

Supported devices SD card/USB/hard disk.

Free TrialFree TrialFree Trial 800 people have downloaded!
2. How to use Renee Undeleter to recover lost photos from external hard disk?

Step 1: Connect the external hard disk to the computer. Download, install, and open Renee Undeleter. Select (Whole Partition Scan).
Note: Do not install on the disk that needs to restore data, so as not to cause data overwriting.
select whole partition scan in renee undeleter to recover deleted video from sd card
Data Recovery Function:

  • Fast Partition Scan – Quickly retrieve files lost due to accidental deletion or emptying the recycle bin.
  • Whole Partition Scan – Recover files from inaccessible or formatted partitions.
  • Whole Disk Scan – Analyze partition information and fully scan the entire disk.
  • Image Creation – Create an image of a partition to back up its current state.
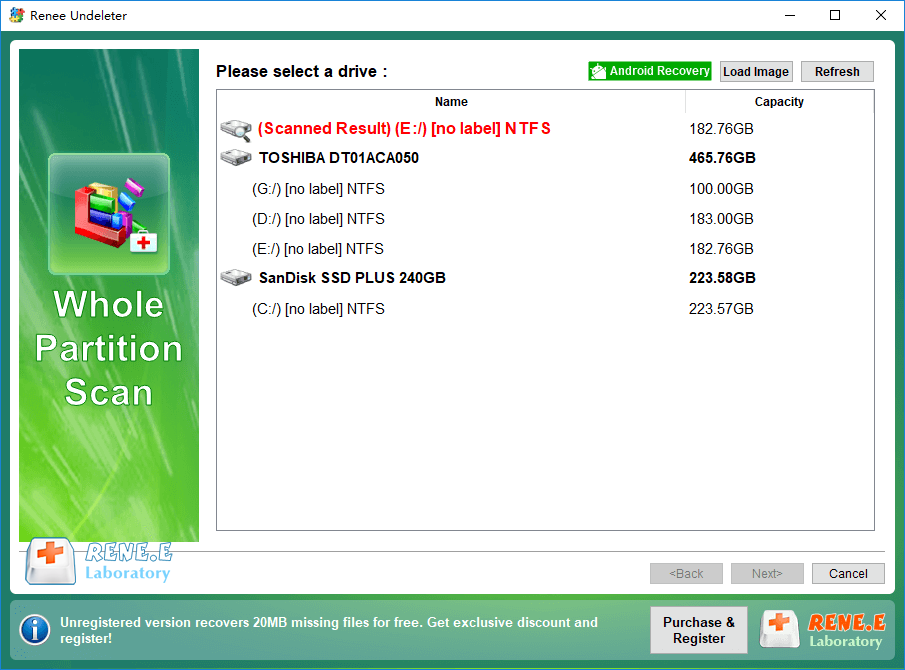
Step 2: Select the external hard disk partition where the photos are lost and click Next. The scan time depends on the partition size, so please wait patiently.
Renee Undeleter Whole Partition Scan
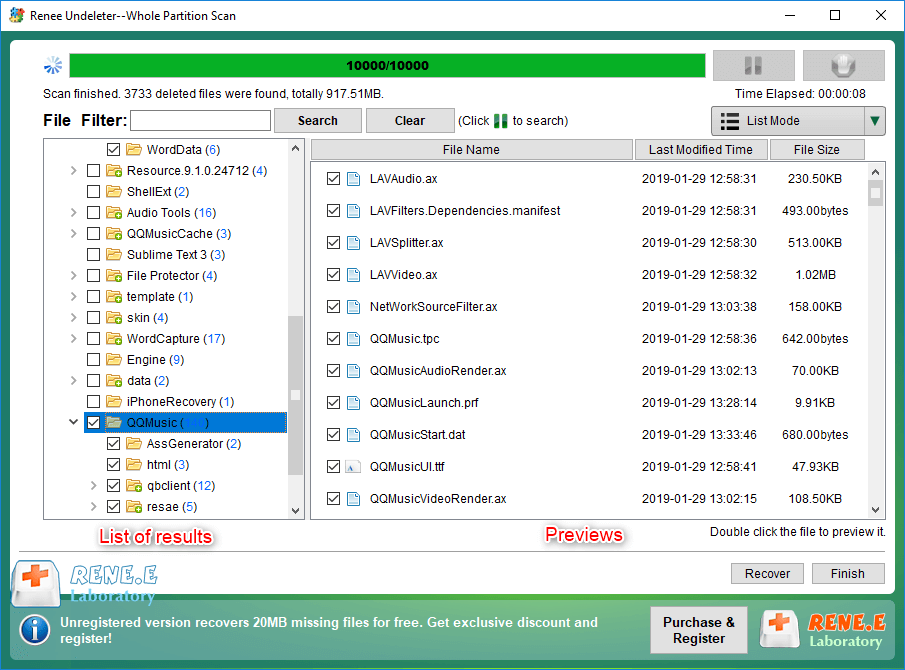
Step 3: After the scan is over, select the photos you want to recover, and click the (Recover) button.
preview and select the files to recover in renee undeleter
After recovering the lost photos on the external hard disk, you can further repair the external hard disk. The following are some repair methods.

III. Detailed introduction of external hard disk repair methods

1. Check the system file error of the external hard disk

Use Windows’ built-in file system error-checking function to check and repair the external hard disk. Ensure the hard disk is visible in File Explorer; if not, perform this operation in Disk Management.
Specific steps are as follows:
Step 1: Connect the external hard disk to the Windows computer.
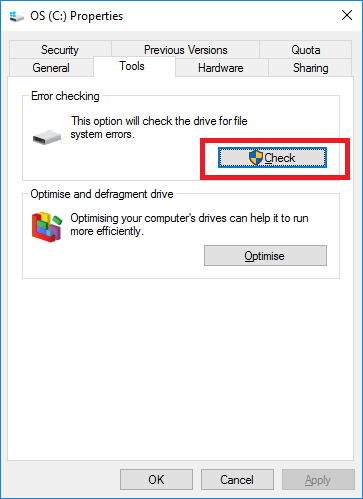
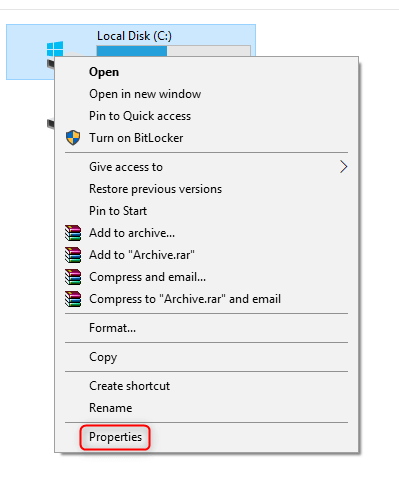
Step 2: Open the file explorer, right-click the external hard disk, select (Properties) > (Tools), and click (Check) in the Error checking section.
check disk
device properties Windows
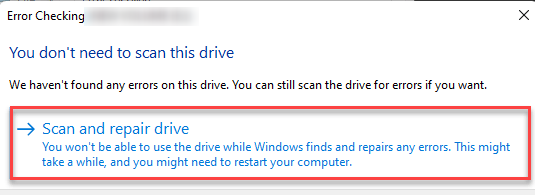
Step 3: Click (Scan and Repair Drive). If errors are found, the computer may need to be restarted to repair the file system.
scan drive

2. Format the external hard disk

Formatting a portable hard drive can resolve various issues. If the drive isn’t visible in File Explorer, right-click the Start menu, select Disk Management, and format the drive.
Specific steps are as follows:
Step 1: Connect the external hard disk to the computer. Copy the data of the entire external hard disk to other disks for data backup.
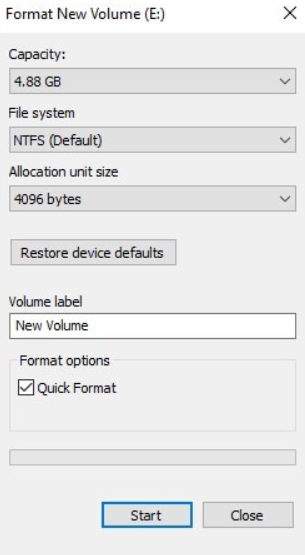
Step 2: Open File Explorer, right-click on the external hard drive, and select (Format).
format the hard disk
Step 3: In the format window, select the appropriate file system: FAT32, NTFS, or exFAT. For Windows, NTFS is recommended.
Step 4: Click (Start) to format the external hard drive.
format the hard disk

3. Use Chkdsk to repair damaged external hard disk

If the external hard disk is undamaged and recognized by the computer, use the Chkdsk tool to fix logical errors. Back up important files before repairing.
Specific steps are as follows:
Step 1: Connect the external hard disk to the computer.
Step 2: Once connected, search for “cmd” in the computer’s search box, right-click “Command Prompt”, and select Run as administrator.
run as administrator
Step 3: In the command prompt window, enter chkdsk H: /f (H: is the drive letter of the external hard disk, /f is the repair parameter), and press Enter. The repair process duration depends on the damage severity and storage size. Exit Command Prompt when complete.
TipsIf this command does not repair the external hard disk, try chkdsk H: /r. The /r parameter finds bad sectors and restores readable information, including the functionality of /f with additional analysis for physical disk errors.