author avatar
    Senior Product Manager
 

Summary
Ensure the external hard drive is properly connected; troubleshoot physical issues first. Learn how to recover files from external hard drive not detected.


How to recover files from an external hard drive not detected

I. What are the reasons why the mobile hard disk cannot be recognized?

There are many reasons why an external hard drive cannot be detected in Windows, the reasons mainly include the following aspects.
● The USB cable is faulty.
● The USB port is faulty, and another port needs to be replaced.
● The hard drive is damaged or has a bad file system.
● The partition table or boot sector on the disk is corrupted.
● The hard disk drive cannot be recognized due to external force damage.
● There is a problem with the driver in Windows.
● Virus infection and malware attack.
To troubleshoot the issue with your mobile hard disk not being detected, begin by replacing the USB cable and connecting it to a different USB port on your computer. After you’ve reconnected, check if the hard disk appears in the file explorer. If it’s still undetected, proceed to open Disk Management to review its status. Should the hard disk display as RAW, uninitialized, or unallocated, it’s crucial to use data recovery software first to safeguard your data. After successfully recovering your files, you can then explore repair options for the disk.

II. Use Renee Undeleter to recover mobile hard disk data

1. What is Renee Undeleter?

Renee Undeleter is a comprehensive data recovery tool designed to recover various file types after accidental deletion, recycle bin emptying, or disk formatting. Its four key features—file recovery, format recovery, partition recovery, and image creation—address a wide range of data loss scenarios, offering a convenient solution for restoring lost data during system use.
Hot Topic - ADsRenee Undeleter – Simple & Powerful Software for Data Recovery

Easy to use Recover data by 3 steps;

Multiple scan modes Fast partition scan, whole partition scan and whole disk scan;

Supported file types Image, video, audio, text, email and so on;

Image creation Create a partition image to read and back up data;

Supported devices SD card, SDHC, SDXC, USB flash drive, hard disk and computer.

Easy to use Recover data by 3 steps;

Multiple scan modes Fast partition/whole partition/whole disk scan;

Supported devices SD card/USB/hard disk.

Free TrialFree TrialFree Trial 800 people have downloaded!
2. How to use Renee Undeleter to recover hard disk data?

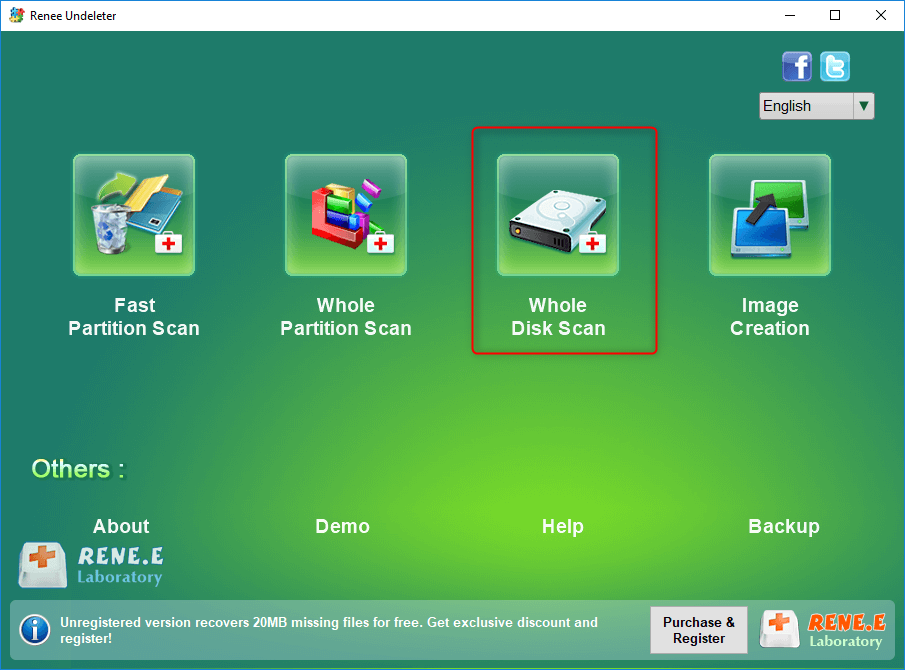
Step 1: Download, install and run Renee Undeleter, select the (Whole Disk Scan) option on the main interface.
Note: Do not install on the disk that needs to restore data, so as not to cause data overwriting.
select whole disk scan in renee undeleter
Data recovery function:

  • Fast Partition Scan – Quickly retrieve files lost due to accidental deletion or emptying the recycle bin.
  • Whole Partition Scan – Quickly recover files lost due to inaccessible or formatted partitions.
  • Whole Disk Scan – Analyze and get partition information and perform a full scan of the entire partition.
  • Image Creation – You can create a mirror image for a partition to back up the current partition state.
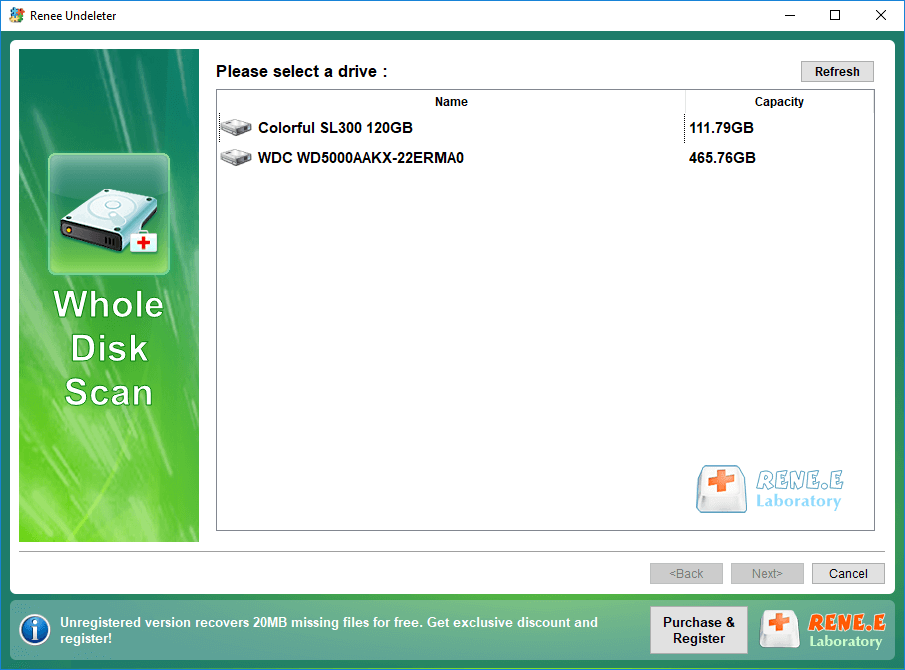
Step 2: Select the drive device to be scanned, and click (Next). Select (default setting) on the advanced setting interface.
select a disk to recover in renee undeleter
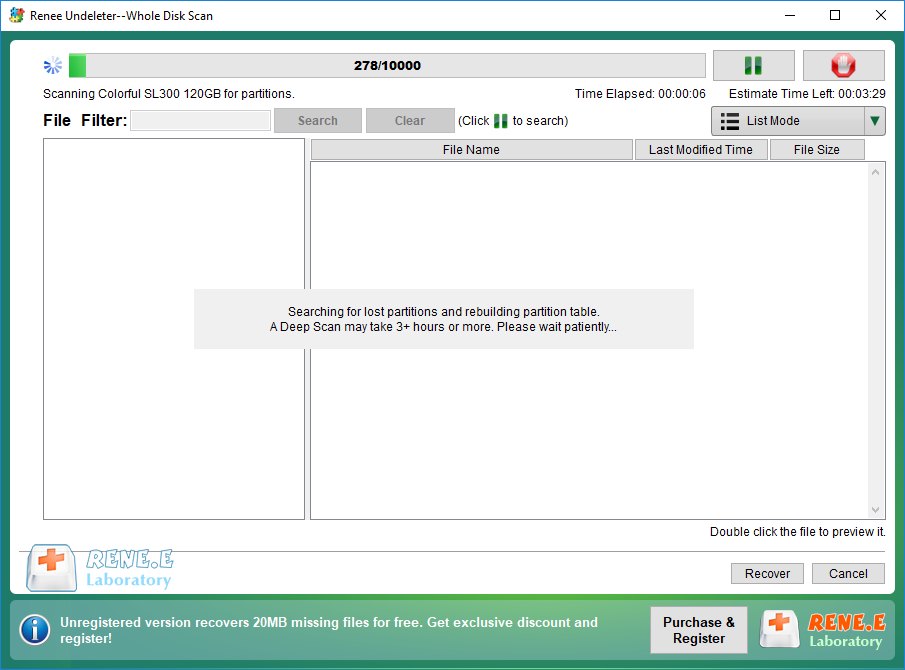
Step 3: After that, the software will analyze the drive device. After the analysis, a prompt window of “Select the partition you need to scan” may pop up.
scanning the whole disk in renee undeleter
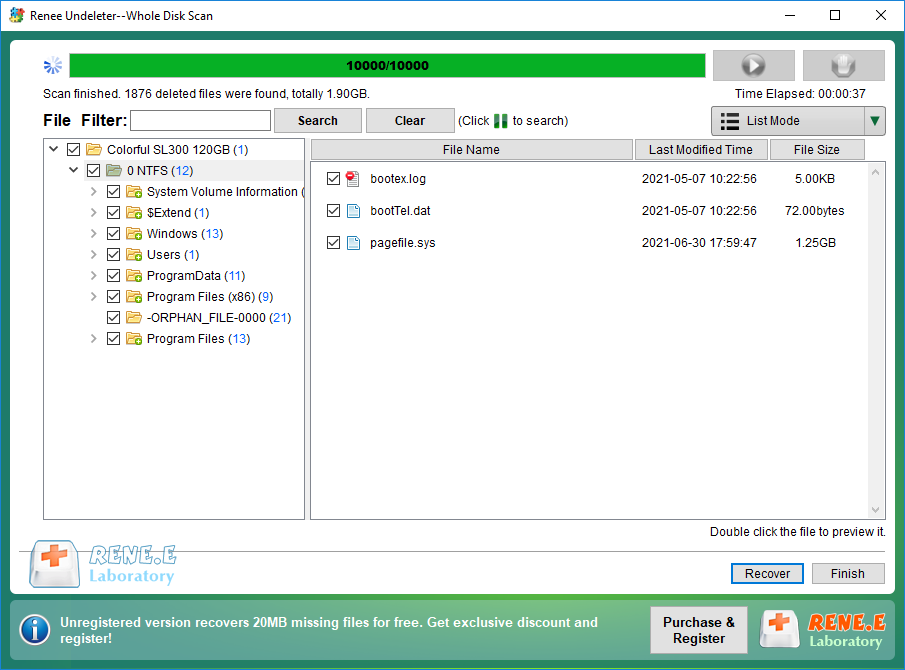
After scanning, you can preview the files in the preview window on the right, then select the files you need to restore, and click the (Recover) button in the lower right corner to restore the selected files.
select taget files to recover with renee undeleter
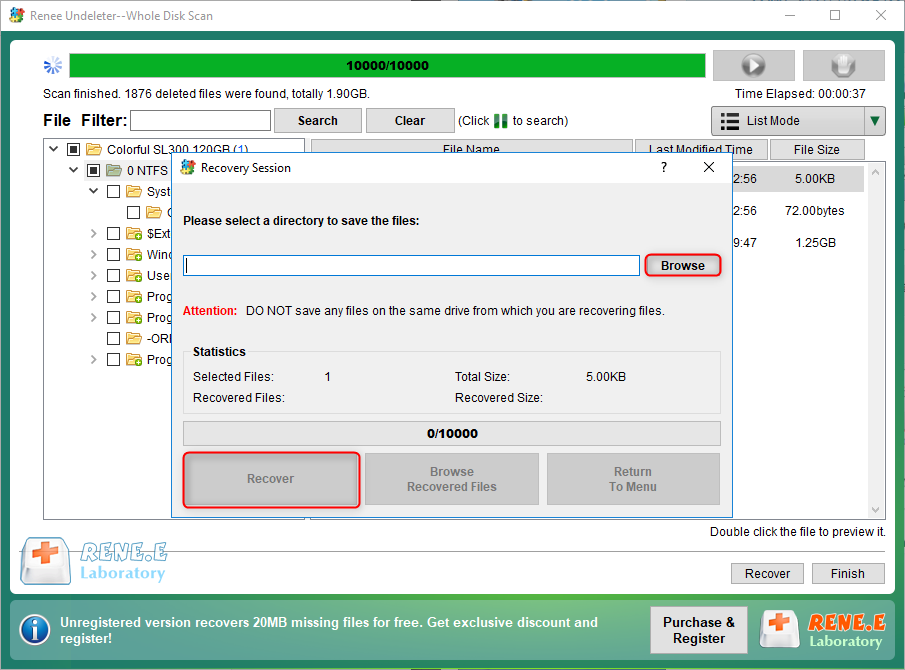
Step 4: Next, select the target folder, click (Browse) to select another disk to save the recovered files, and then click the (Recover) button to start the file recovery.
recover files from whole disk scan with renee undeleter
The above are the detailed operation steps of recovering data with the help of Renee Undeleter. When the data is recovered completely, we can proceed to the next step of repairing the faulty hard disk.

III. How to fix the fault that the mobile hard disk cannot be recognized?

1. Format the mobile hard disk

If Disk Management shows the mobile hard disk’s file system as RAW, Windows cannot recognize it, preventing file access. To fix this, format the mobile hard disk to a Windows-compatible file system using Disk Management. Follow the specific steps below:
Step 1: Connect the mobile hard disk to the computer, and then press the (Windows+X) keys on the keyboard at the same time. Then in the pop-up list, select the (Disk Management) option.
open windows disk management
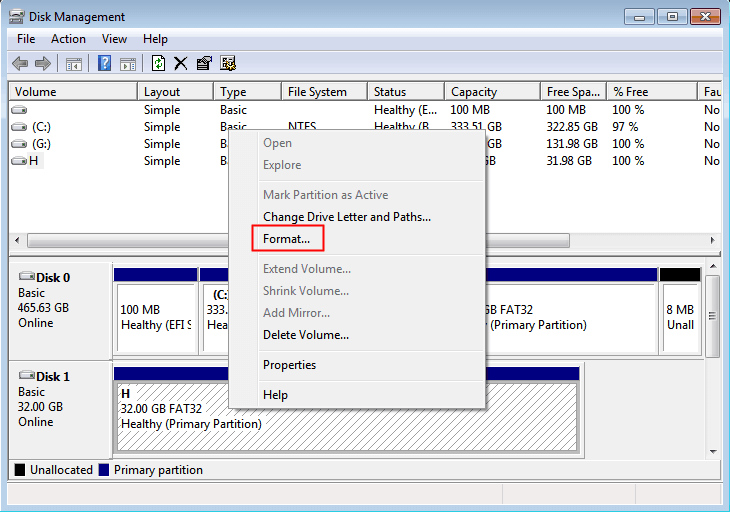
Step 2: Next, find the removable hard drive that needs to be formatted, right-click it, and select the (Format) option.
format drive
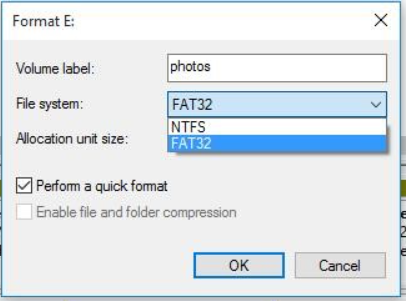
Step 3: Choose a file system: FAT32, NTFS, or exFAT (learn more). Select Execute quick format, click OK, and follow the prompts to finish formatting. Afterward, restart your computer and reconnect the external hard drive to verify if the issue is resolved.
Select the required file system
Tips

If your mobile hard disk is displayed as ‘Not Initialized’ and ‘Unallocated’ in Disk Management, follow these instructions to initialize the disk and create partitions. This process will make the disk recognizable and ensure it displays correctly in File Explorer.

  • Right-click on the Start button and select Disk Management.
  • Locate the disk that is marked as Not Initialized and Unallocated.
  • Right-click on the disk and select Initialize Disk.
  • Choose the correct disk to initialize and select the partition style: MBR (Master Boot Record) or GPT (GUID Partition Table), then click OK.
  • Once the disk is initialized, right-click on the Unallocated space and select New Simple Volume.
  • Follow the New Simple Volume Wizard to create a new partition.
  • Assign a drive letter and format the partition with a file system like NTFS or FAT32.
  • Complete the wizard to create the new volume.

After these steps, your mobile hard disk should now appear in File Explorer and be ready for use.
2. Update the driver of the mobile hard disk

If your external hard drive is still not recognized using the above methods, then you can also try updating the drivers to fix it. The specific operation steps are as follows:
Step 1: Connect the unrecognized external hard disk to the computer.
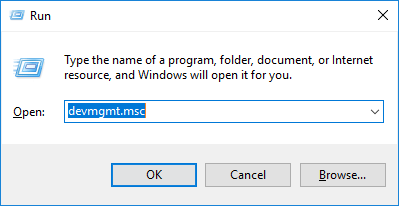
Step 2: Next, press the (Windows + R key) at the same time to open the Run window. After entering the command (devmgmt.msc), click the (OK) button to enter the Device Manager.
open device manager
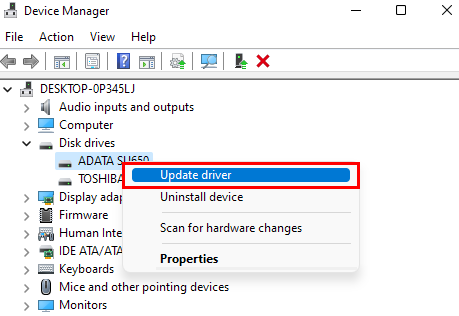
Step 3: Next, expand the “Disk drives” list, right-click to select the unrecognized mobile hard disk, and select the (Update driver) option.
update driver disk
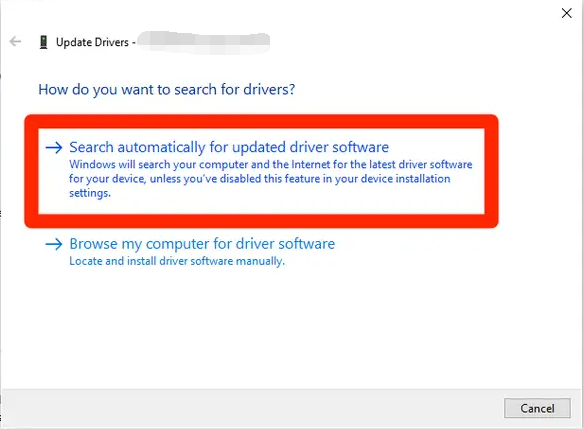
Step 4: Next, select the (Search automatically for updated driver software) option, and then follow the instructions to complete the update for the external hard disk driver.
update Driver Confirm