iTunes won’t Sync Music or Other Media to iPhone? Find Solution Here
- Home
- Support
- Renee iPassFix
- iTunes won’t Sync Music or Other Media to iPhone? Find Solution Here
Summary
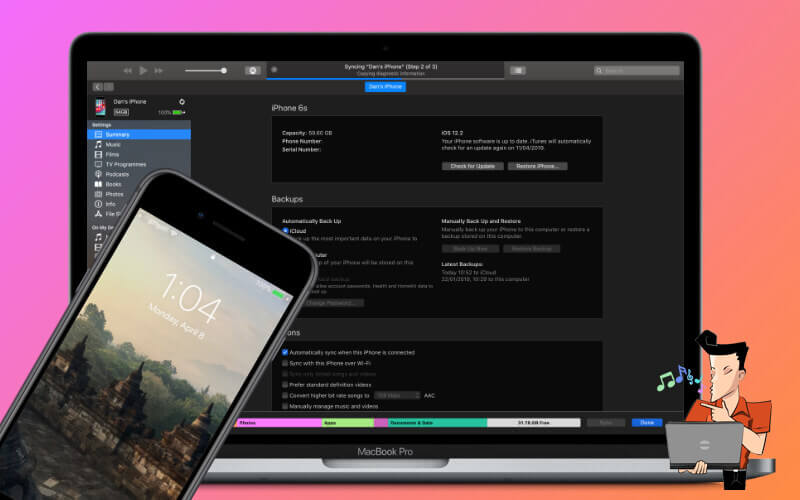
You can use iTunes to sync music, video, Apps, and other files to iPhone, iPad, and iPod. In addition, iTunes can sync these files from the device to computer. The sync function of iTunes greatly facilitates the transfer of data among various devices. However, during the use of iTunes, we sometimes encounter failed sync. Find out the solutions for the problem that iTunes won’t sync music or other files to iPhone.
- Part 2: Solution to Solve Error Code 54 when Syncing iTunes?
- ◆ Solution 1: Restart PC, iPhone, iPad and iPod
- ◆ Solution 2: Update iTunes and iOS
- ◆ Solution 3: Uncheck the “Read Only” Option
- ◆ Solution 4: Manage Media Files in iTunes Library
- ◆ Solution 5: Synchronize Fewer Files
- Part 3: How to Fix Other iTunes Sync Problems?
- ◆ Simple Methods to Check the Problem
- ◆ Solution 1: Change the Data Cable and USB Port
- ◆ Solution 2: Re-authorize iTunes on Computers
- ◆ Solution 3: Clear the Insufficient Storage Space
- ◆ Solution 4: Disable the Apple Music Function
- ◆ Solution 5: Synchronize Files with WiFi
- ◆ Solution 6: Check if the Files or Music are Selected Correctly
- ◆ Solution 7: Cancel and Select “Synchronize Music” Again
- ◆ Solution 8: Manually Sync iTunes to iPhone and iPad
- ◆ Solution 9: Update Driver Software
Part 1: About iTunes?
The most used function in iTunes is the sync of devices. After connecting the iOS device to computer, iTunes will sync files automatically, which completes syncing between iTunes and iOS devices.
● Albums, music, playlist, movies, TV series, podcasts, and audio books.
● Photos and videos.
● Contacts and calendars.
* iTunes functions may be different among countries and regions.

Remove Passcode Delete the passcode for iOS devices even locked out.
Fix iOS System Failure Recover frozen iOS devices from DFU mode, recovery mode or other system problems.
Factory Reset One click to restore iOS devices to factory status.
Full Support to iOS Devices Compatible with all models of iPhone, iPad and iPod Touch.
Well Compatibility Fully compatible with the latest version of iOS.
Remove Passcode Delete the passcode for iOS devices even locked out.
Well Compatibility Fully compatible with the latest version of iOS.
Full Support to iOS Devices Compatible with all models of iPhone, iPad and iPod Touch.
Free TrialFree TrialFree Trial 800 users have downloaded and fixed their devices!Part 2: Solution to Solve Error Code 54 when Syncing iTunes?
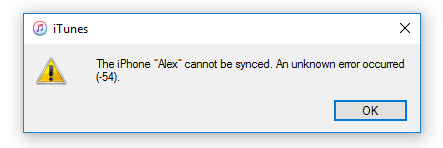
● The version of iTunes is out-dated.
● iTunes program files are deleted due to virus attack or operation error.
● Windows system files are damaged due to virus, malware or operation error.
● iTunes software is not downloaded correctly. The downloaded files may be damaged or the installation is not completed.
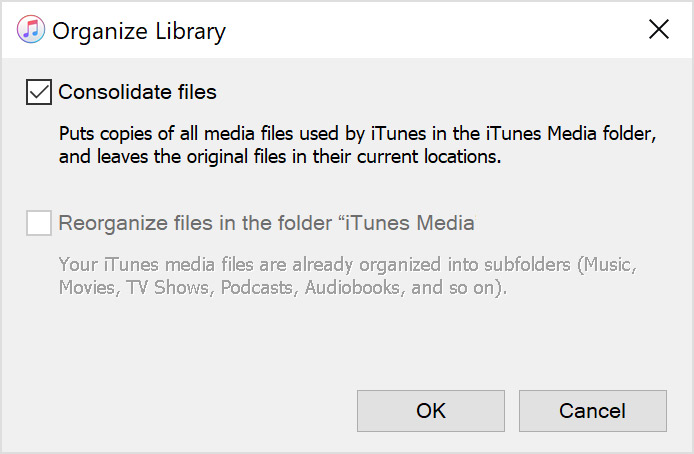
● Media files in iTunes (photos, videos, audio files, etc.) are not integrated.
● You sync too many files at once.
● Read-only files cannot be synced.
Solution 1: Restart PC, iPhone, iPad and iPod
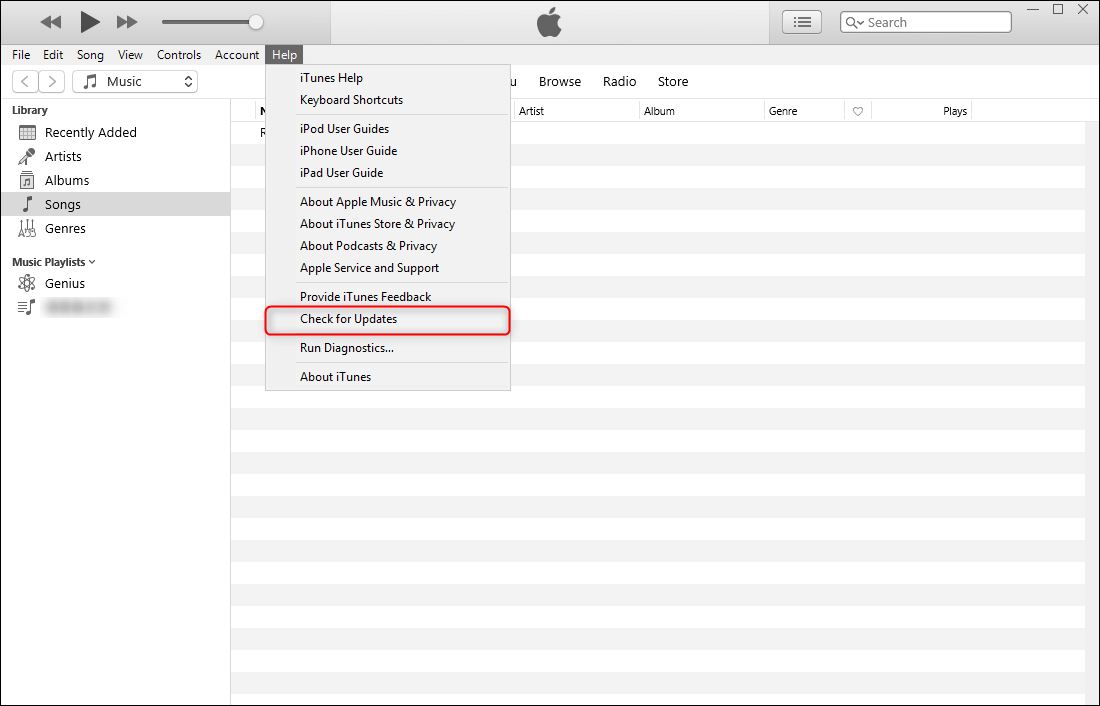
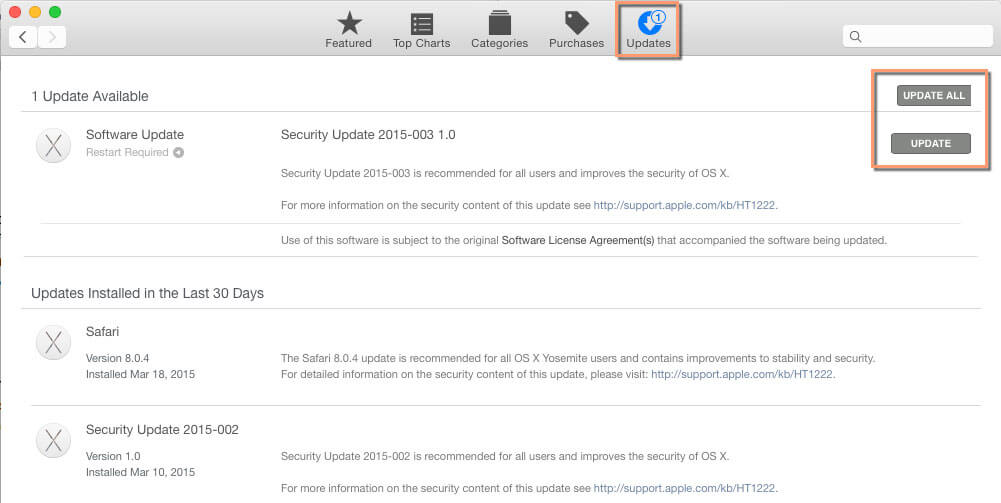
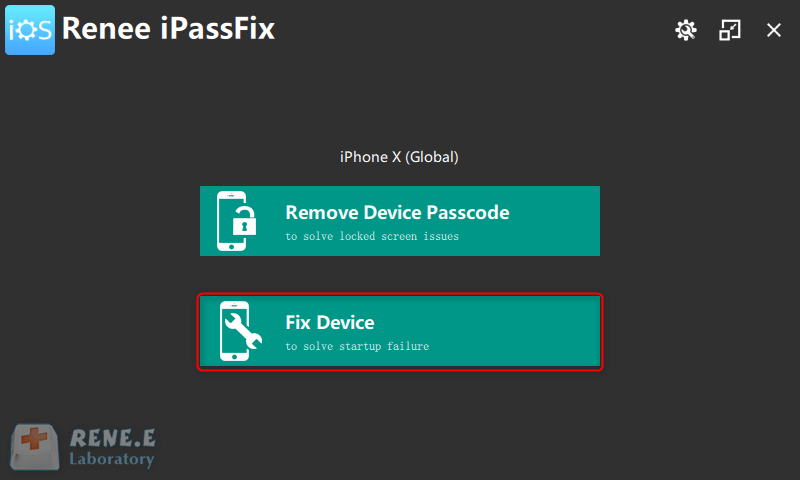
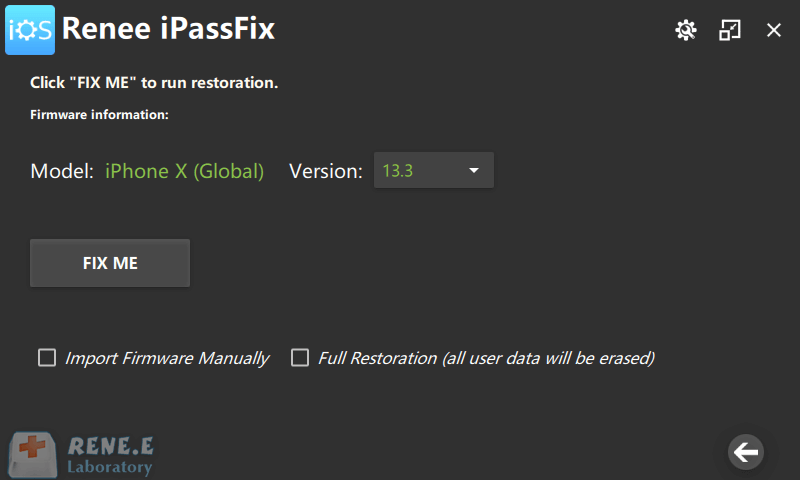
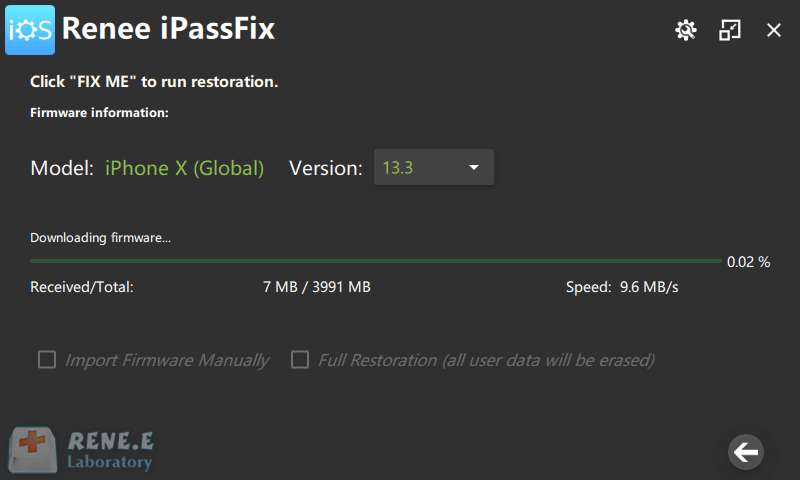
Solution 2: Update iTunes and iOS

Remove Passcode Delete the passcode for iOS devices even locked out.
Fix iOS System Failure Recover frozen iOS devices from DFU mode, recovery mode or other system problems.
Factory Reset One click to restore iOS devices to factory status.
Full Support to iOS Devices Compatible with all models of iPhone, iPad and iPod Touch.
Well Compatibility Fully compatible with the latest version of iOS.
Remove Passcode Delete the passcode for iOS devices even locked out.
Well Compatibility Fully compatible with the latest version of iOS.
Full Support to iOS Devices Compatible with all models of iPhone, iPad and iPod Touch.
Solution 3: Uncheck the “Read Only” Option
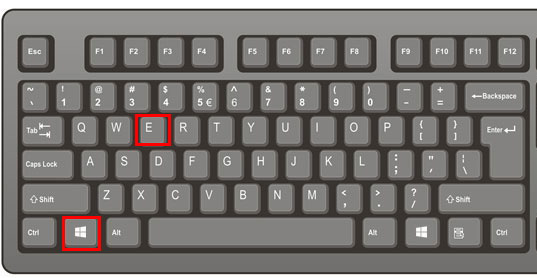
1. Press the Win and E keys to open the [File Manager].
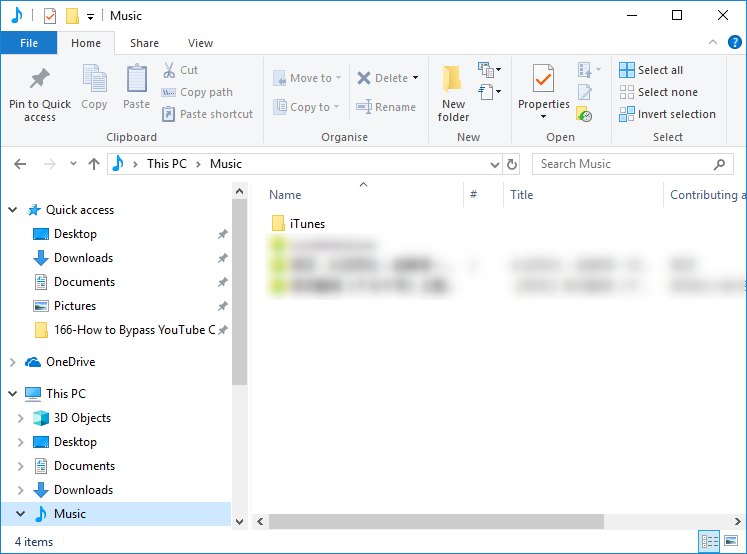
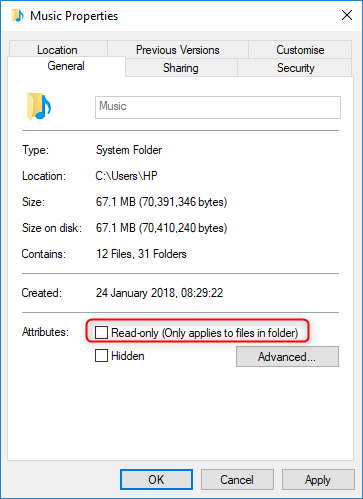
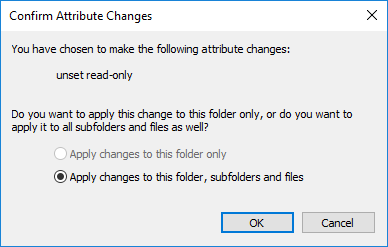
Solution 4: Manage Media Files in iTunes Library
Solution 5: Synchronize Fewer Files
Besides error code 54, there are other sync errors. Find the appropriate solutions below.
Part 3: How to Fix Other iTunes Sync Problems?

● The version of iTunes is expired or the USB cable has been damaged.
● The sync settings on iTunes are not configured correctly.
● The version of iTunes is out-dated.
● The iOS device is not recognized by iTunes.
● There is not enough storage space on the iOS device.
No matter what kind of the iTunes sync problems, you can fix it through the following methods.
Simple Methods to Check the Problem
● Check if the iPhone or iPad is locked and the main screen is displayed. And then reconnect the device to computer.
● When the [Trust this computer?] is displayed, click [Trust].
● Make sure you are using the latest version of iTunes. If you haven’t updated iTunes for a long time, check for updates in iTunes.
● Restart computer, iPhone, iPad and iPod.
If these steps do not fix the problem, try the methods below.
Solution 1: Change the Data Cable and USB Port
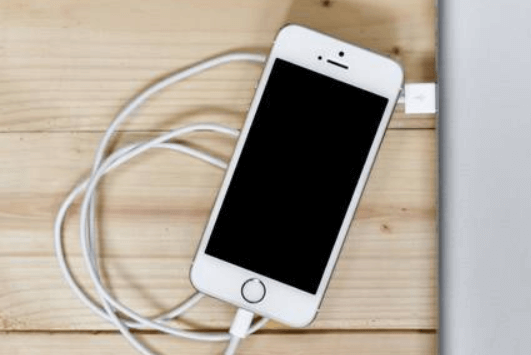
It is best to connect the iPhone, iPad and iPod to computer with the original USB cable. This is because the original Lightning cable is capable of both charging the device battery and transferring data. Data cables with MFi authorization (specially designed for iPhone, iPad and iPod and authorized by Apple) can also perform battery charging and data transfer. For USB cables without MFi authorization, they cannot transfer data even if the battery charging function is available. Before purchasing a USB cable, you need to know the details. Even for the authentic USB cable, data transfer cannot be done if it is damaged. In this case, you need to change a new USB cable.
If there are still connection problems after changing the USB cable, you can change the USB port. The problem could be caused by the USB port.
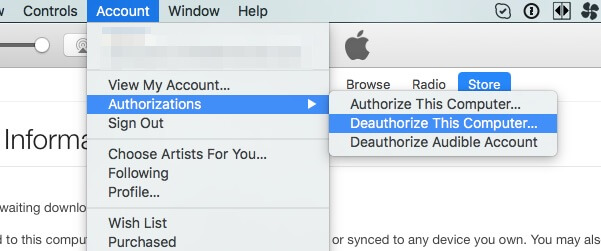
Solution 2: Re-authorize iTunes on Computers。
For Mac: In the menu bar at the top of the screen, select [Account], [ Authorization] and [Authorize this computer].
For Windows: Click the menu bar in the iTunes window. And then click successively on [Account], [Authorization] and [Authorize this Computer]. If the menu bar does not appear, press the Ctrl and B keys.
Solution 3: Clear the Insufficient Storage Space
In your iPhone or iPad, click [Settings], [General] and [iPhone Storage] to check the storage of the device. If there is not much free space on the device, you can delete unnecessary files and applications.
Solution 4: Disable the Apple Music Function
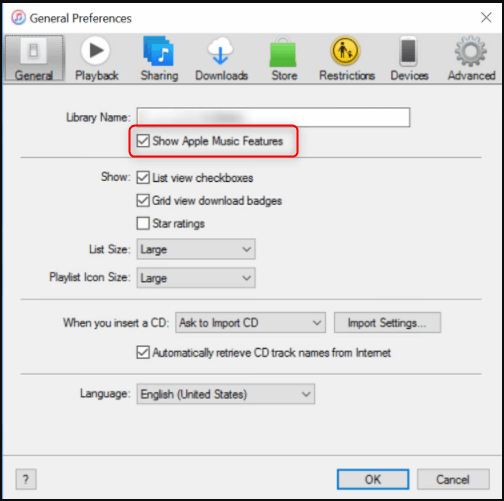
① For iPhone and iPad, click [Settings] and then [Music]. Then do not enable [Show Apple Music ].
② In iTunes, click [Edit] on the menu bar. And then click [Preferences]. In the [General] tab, uncheck the [Display Apple Music Features] box.
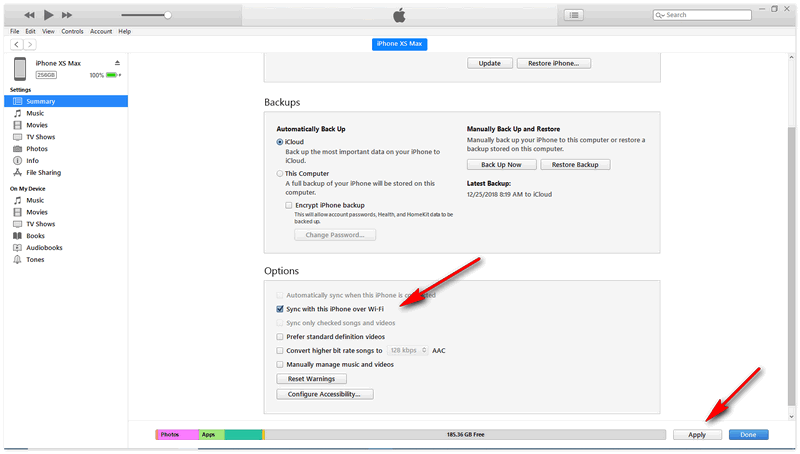
Solution 5: Synchronize Files with WiFi
② Click [Summary] on the left side. And then, check the box [Synch with this iPhone over Wi-Fi] and click [Apply].
Solution 6: Check if the Files or Music are Selected Correctly
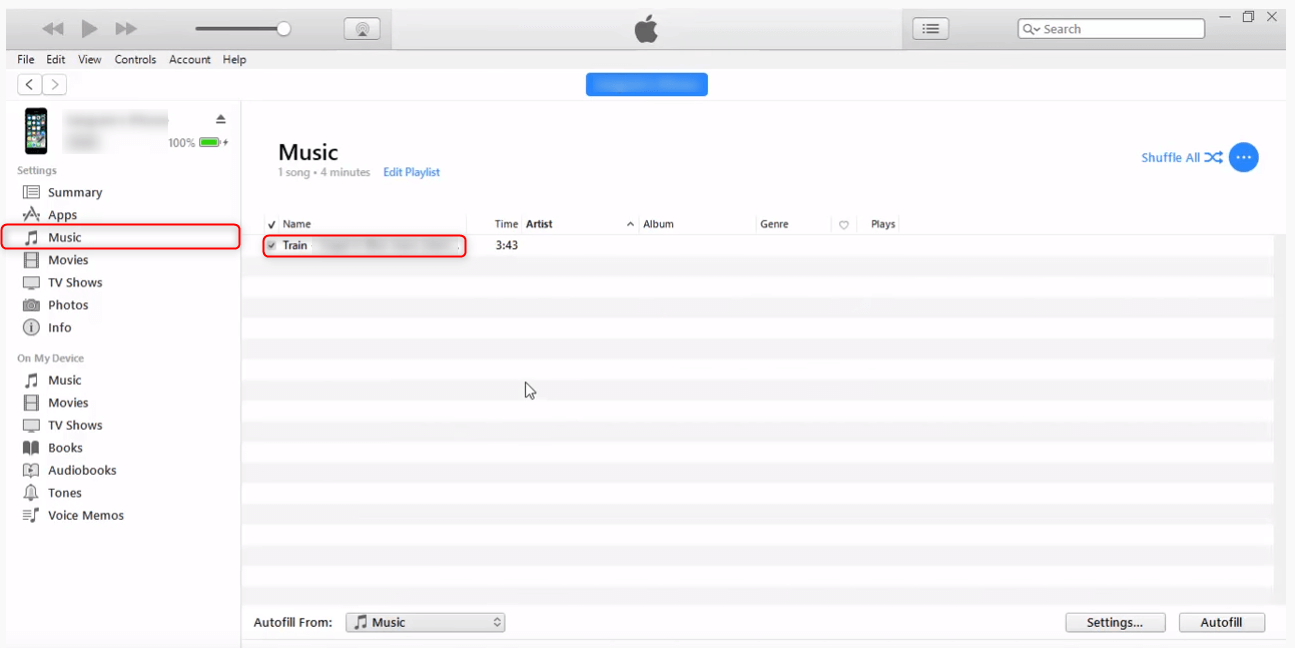
Solution 7: Cancel and Select “Synchronize Music” Again
① Connect iPhone or iPad to computer and launch iTunes.
② Click the device icon and then on [Music]. Uncheck the [Sync music] box.

Solution 8: Manually Sync iTunes to iPhone and iPad/iPod
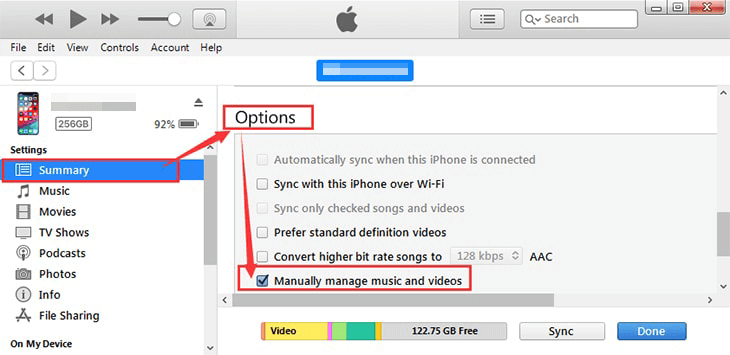
Solution 9: Update Driver Software
① Exit iTunes and disconnect the iPhone, iPad, or iPod from computer. And then reconnect the device to computer.
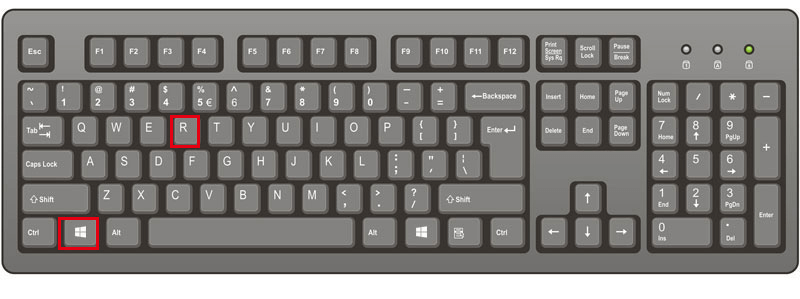
② Press the Win and R keys. In the [Run] window, type [devmgmt.msc] to access the [Device Manager].

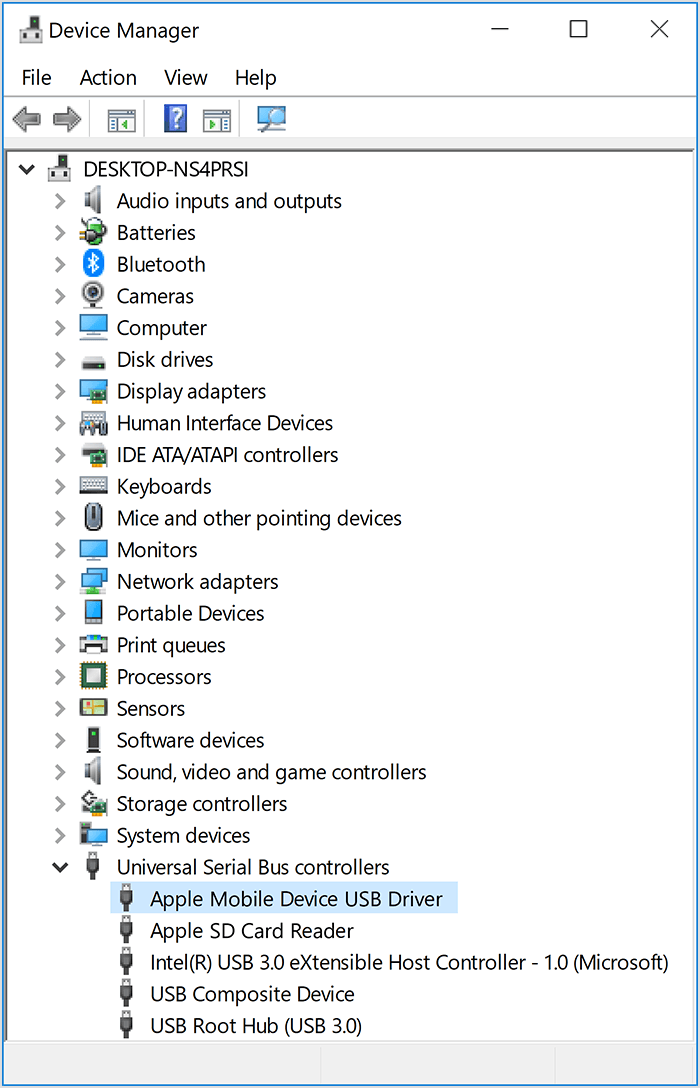
① Exit iTunes and disconnect the iPhone, iPad, or iPod from computer. And then reconnect the device to computer.
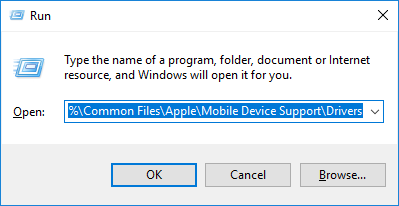
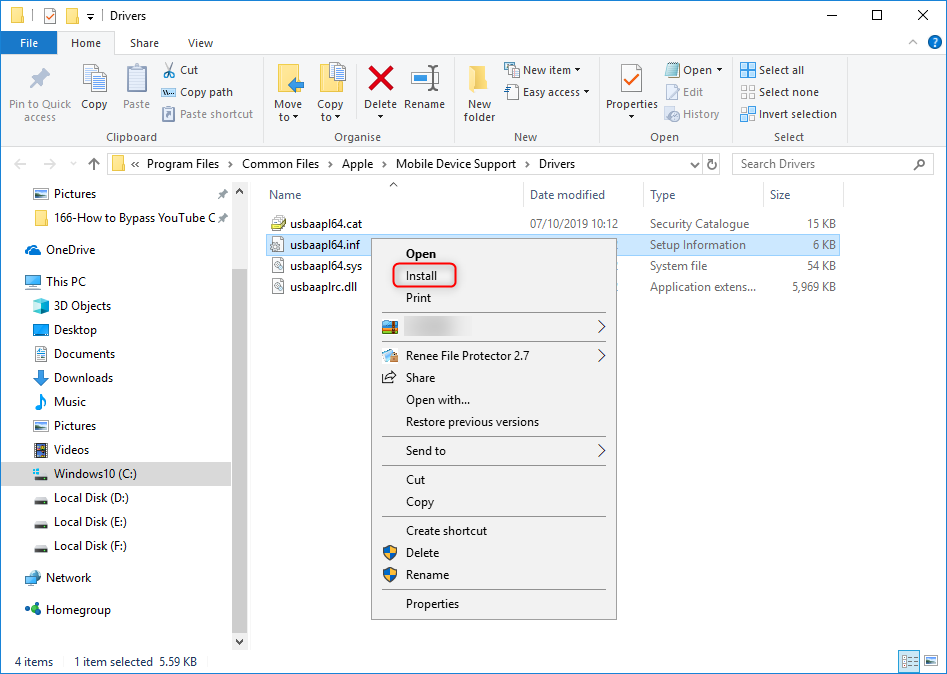
② Press the Windows and R keys. In the [Run] window, type % ProgramFiles% \ Common Files \ Apple \ Mobile Device Support \ Drivers and click [OK].

Part 4: Recover Lost Files with Renee iPhone Recovery
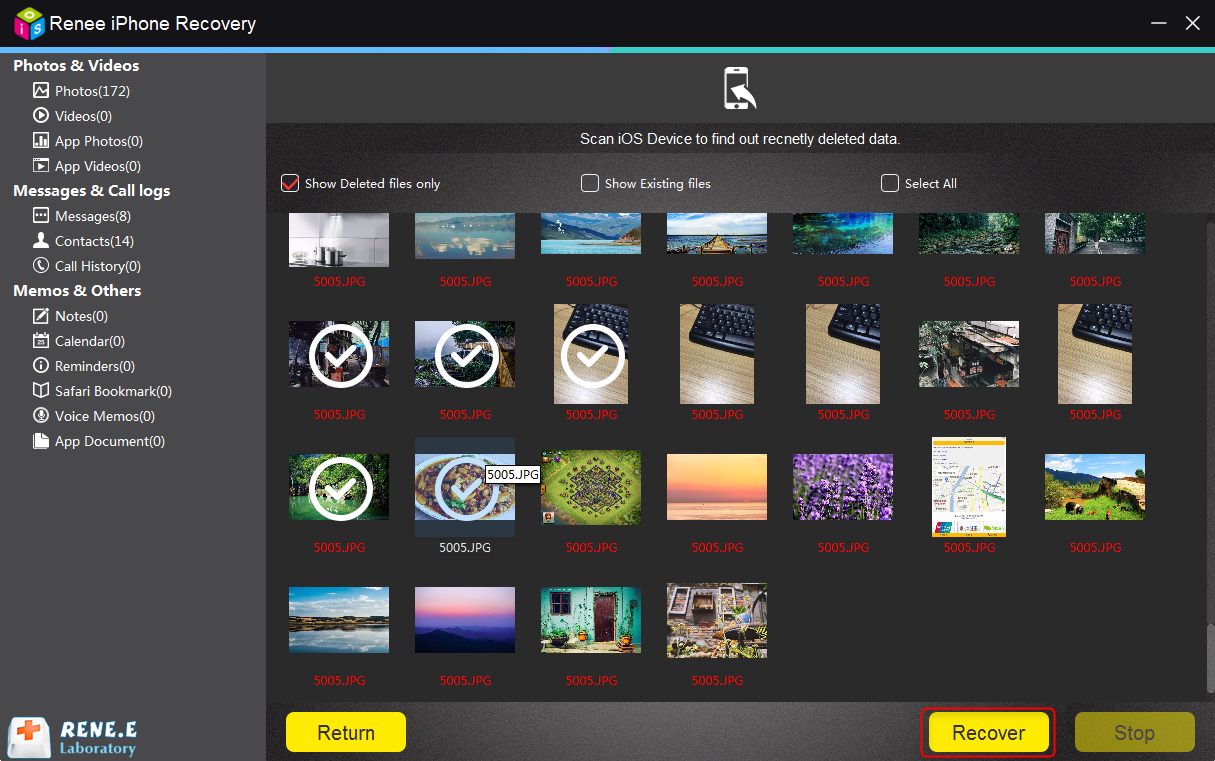
Renee iPhone Recovery allows iPhone users to recover photos, music, videos, Apps, contacts and other files from iPhone, iPad and iPod Touch. It only takes 3 steps to process the data recovery. This software is perfectly compatible with iOS devices, iTunes and iCloud backups.

Easy to GoOnly with a few steps, you can find back data from iOS devices.
3 Recovery SelectionsSupport to recover data from iOS devices, iTunes backup and iCloud backup files.
Multiple Files SupportedSupport to recover photos, videos, contacts, notes, call history, ect.
Compatible with: Windows 10 / 8.1 / 8 / 7 / Vista / XP (32bit/64bit)
Easy to GoOnly with a few steps, you can find back data from iOS devices.
3 Recovery SelectionsSupport to recvoer data from iOS devices, iTunes backup and iCloud backup files.
Multiple Files SupportedSupport to recover photos, videos, contacts, notes, call history, ect.
1. Download and install Renee iPhone Recovery.
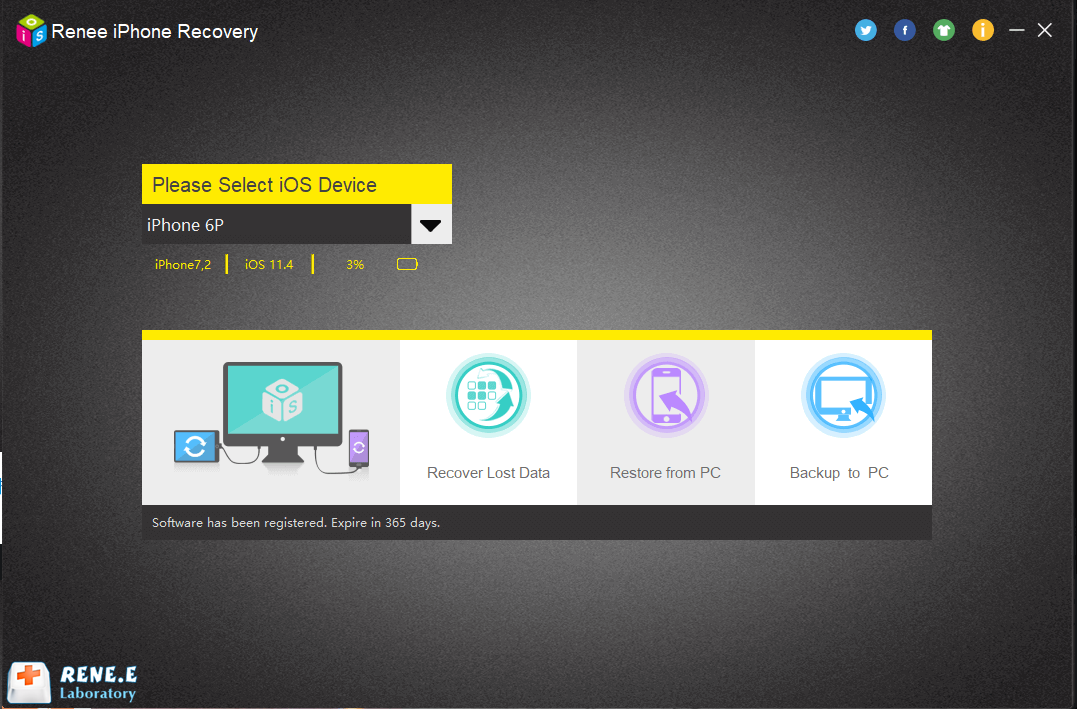
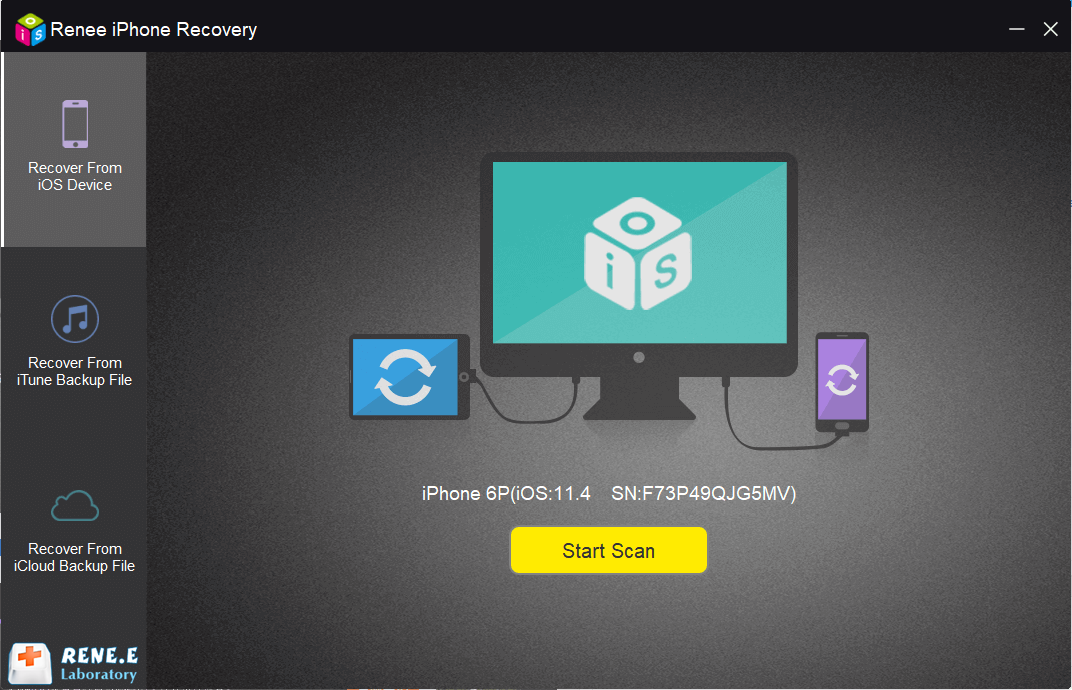
2. Connect iPhone to PC. Then, launch the software and select [Recover Lost Data].
If you connect several iOS devices, please select your target device in the menu [Please Select iOS Device].
Relate Links :
How to Restore Lost iPhone Photos / Video from iTunes Backup
06-01-2021
Ashley S. Miller : ICloud backup offers an excellent method for backing up data from iOS devices in order not to lose...
Update iPhone to iOS 12 and Get Bugs? Find Solution Here
19-04-2021
Amanda J. Brook : After update iPhone to iOS 12, many users complain that their iPhone has many problems. In this article,...


