author avatar
    Senior Product Manager
 

Summary
Learn how to clear up disk space on your Mac computer and recover deleted files using our comprehensive guide. Effortlessly optimize your Mac's performance and storage.


mac disk cleanup

I. How to check the Mac disk space usage?

Mac’s “Finder” functions similarly to Windows’ “File Explorer,” providing a means for users to navigate and organize files on their system. In contrast to Windows, which displays disk space usage more openly, Mac users must perform an additional step to access this information. To view the total capacity, available space, and used space of their disk on a Mac, users should right-click on "Macintosh HD" within the Finder’s sidebar, and then select "Get Info" from the context menu.
If your available capacity is too low, you can refer to the following methods to clear up Mac disk space.

II. How to clean up disk space on Mac?

1. Uninstall applications that have not been used for a long time

To free up disk space, uninstall unused applications by navigating to Finder > Applications, sorting by modification date, and right-clicking on old applications to select “Move to Trash” or dragging them to the trash icon.
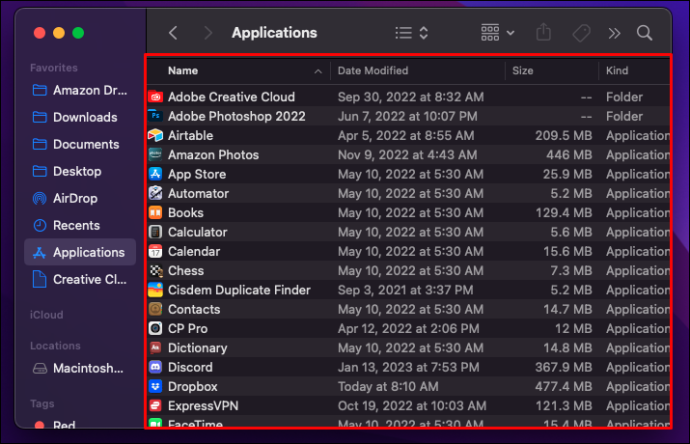
application list

2. Empty the Trash

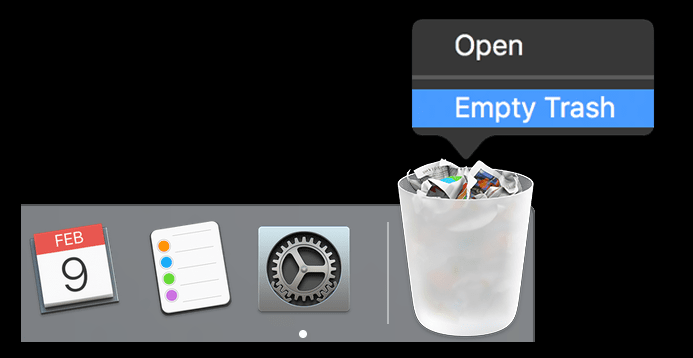
Files or applications that have been moved to the Trash will continue to consume disk space until they are permanently removed. To free up space, you can right-click the Trash icon and select “Empty Trash,” or you can empty the Trash immediately using the shortcut Command+Shift+Delete.
empty the trash

3. Use storage space management to clean up disk space

The Mac system provides a practical storage space management function, you can follow the steps below to optimize the disk space settings.
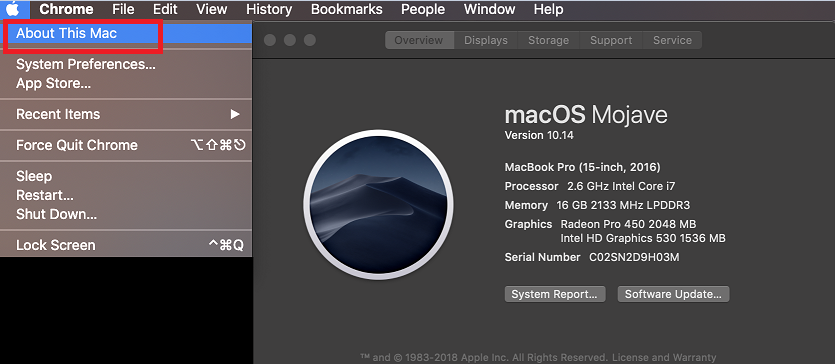
Step 1: Click the Apple icon in the upper left corner and select (About This Mac).
About this mac
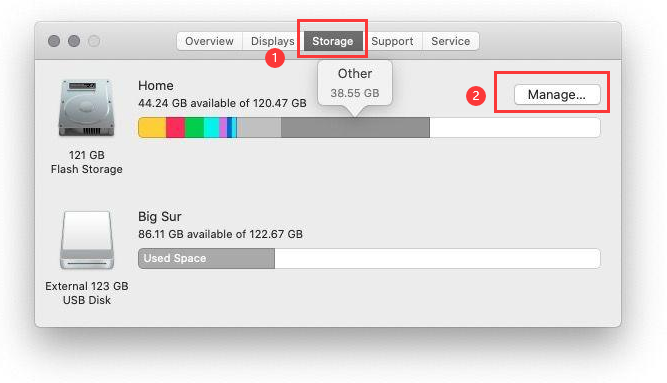
Step 2: Switch to the (Storage Space) option and click the (Manage) button.
storage space management
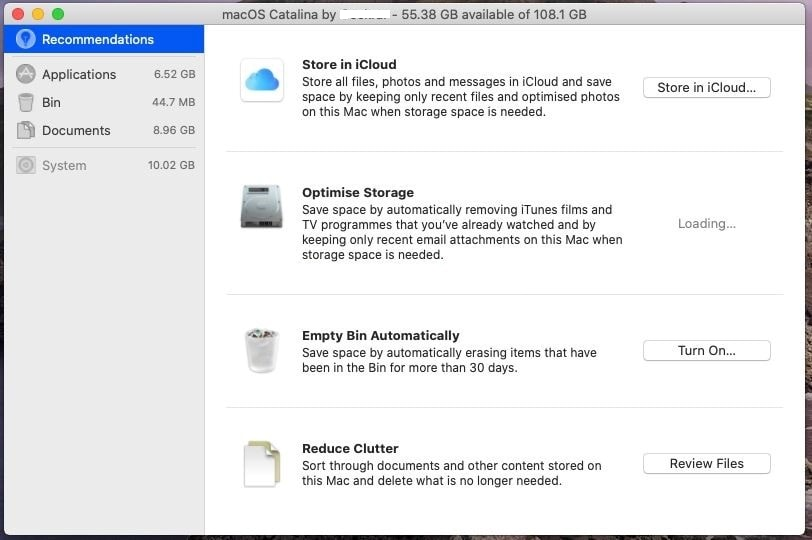
Step 3: In the (recommended) column, you can make some settings to optimize storage space.
Store in iCloud : You can select some files and photos to save to iCloud, and only keep the recently used files and optimized photos on the Mac.
Optimize storage space : Automatically remove watched movies and TV shows.
Automatically empty the trash : Automatically erase files that have been in the Trash for more than 30 days.
avoid clutter : You can organize large files, downloads, etc. stored on your Mac, and delete unnecessary content.
mac storage space management, Optimize storage settings

4. Delete the old DMG disk image

After successfully installing a software’s disk image (DMG file), you can safely delete it to free up space on your Mac. Open Finder, select 'Macintosh HD' from the sidebar, and utilize the search box at the top-right corner to locate files with a .dmg extension. Then, simply drag and drop the unnecessary DMG files to the Trash to remove them.

5. Delete unused language files

Your new Mac comes equipped ready for use in your preferred language straight from the start, thanks to macOS, which features a comprehensive selection of pre-installed localization files catering to a variety of regions, thus obviating the necessity for extra downloads. Should you wish to free up disk space, you have the option to delete any superfluous language files that are not in use.
Step 1: Open the Finder, click (Applications), right-click the application that comes with the system, and select (Show Package Contents).
Step 2: Navigate to Contents > Resources to locate directories ending with the “lproj” suffix. Inside, you’ll find language resources distinguished by prefixes such as 'en' for English, 'zh' for Chinese, 'fr' for French, and so on. To free up space, eliminate the unnecessary language files by transferring them to the Trash. Apply this method across different applications to discard any extraneous language data.
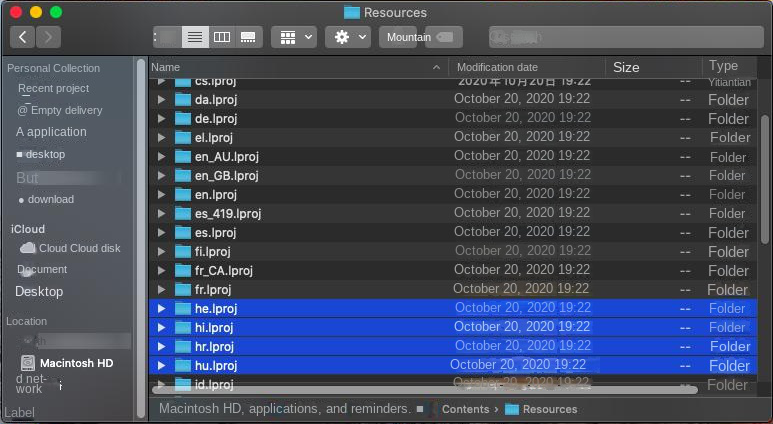
delete language files

III. Use Renee Undeleter to recover Mac data after accidentally deleting files

If you delete some files by mistake while cleaning up Mac disk space, please stop the Mac device immediately, and use professional data recovery software, such as Renee Undeleter , to scan and restore the disk.

1. What is Renee Undeleter?

Renee Undeleter is a comprehensive data recovery software designed to recover various data files. Whether you’ve accidentally deleted files, emptied the recycle bin, or formatted the disk/storage, this tool can help retrieve your lost data. It features four key functions: file recovery, format recovery, partition recovery, and image creation, providing a complete solution to all data loss scenarios.
Hot Topic - ADsRenee Undeleter – Simple & Powerful Software for Data Recovery

Easy to use Recover data by 3 steps;

Multiple scan modes Fast partition scan, whole partition scan and whole disk scan;

Supported file types Image, video, audio, text, email and so on;

Image creation Create a partition image to read and back up data;

Supported devices SD card, SDHC, SDXC, USB flash drive, hard disk and computer.

Easy to use Recover data by 3 steps;

Multiple scan modes Fast partition/whole partition/whole disk scan;

Supported devices SD card/USB/hard disk.

Free TrialFree TrialFree Trial 800 people have downloaded!
2. How to recover accidentally deleted files with Renee Undeleter?

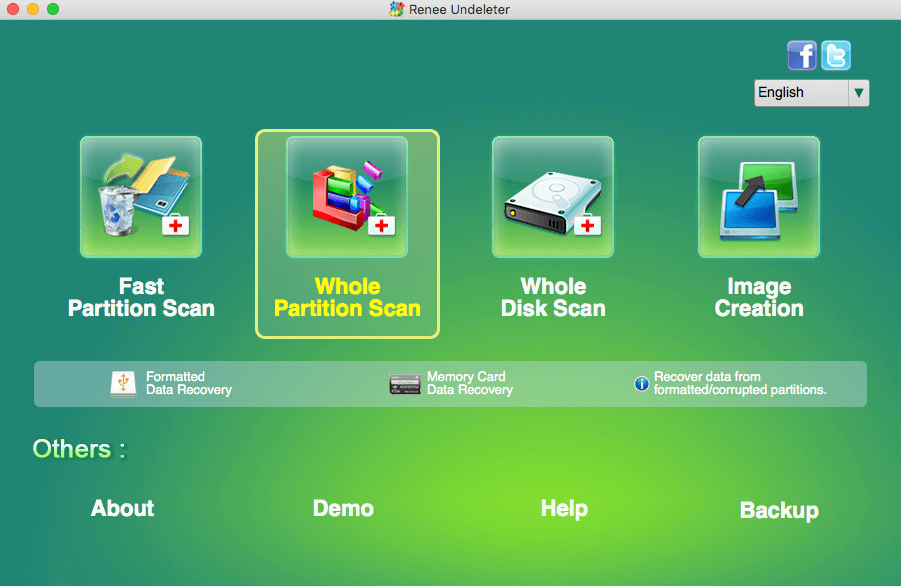
Step 1: Download, install and run Renee Undeleter on a Mac computer, and select the (Whole Partition Scan) option on the main interface.
Notice: To prevent data overwriting, it’s crucial not to install Renee Undeleter on the same disk where the data loss occurred. If you’re aiming to recover files from an internal hard disk, particularly if it’s the only disk in a Mac, ensure to download the software onto a separate external USB or portable hard drive. Conversely, when needing to recover from an external hard disk, proceed to download and install the software onto your Mac’s internal hard drive.
select whole partition scan in renee undeleter on mac
Data Recovery Features:

  • Fast Partition Scan: Rapidly recovers files deleted accidentally or from an emptied Recycle Bin.
  • Whole Partition Scan: Restores files from inaccessible or formatted partitions.
  • Whole Disk Scan: Analyzes partition data for a comprehensive scan.
  • Image Creation: Generates a partition mirror to preserve its current state.
Step 2: Select the desired hard drive partition from which you want to recover data and click Next. If you’re unable to choose the Mac’s built-in disk, this could be due to System Integrity Protection (SIP) being enabled. To proceed, you must disable SIP by running the command csrutil disable in Recovery Mode, use the data recovery software, and then ensure you re-enable SIP with csrutil enable once complete. For detailed instructions on how to manage SIP, visit this guide.
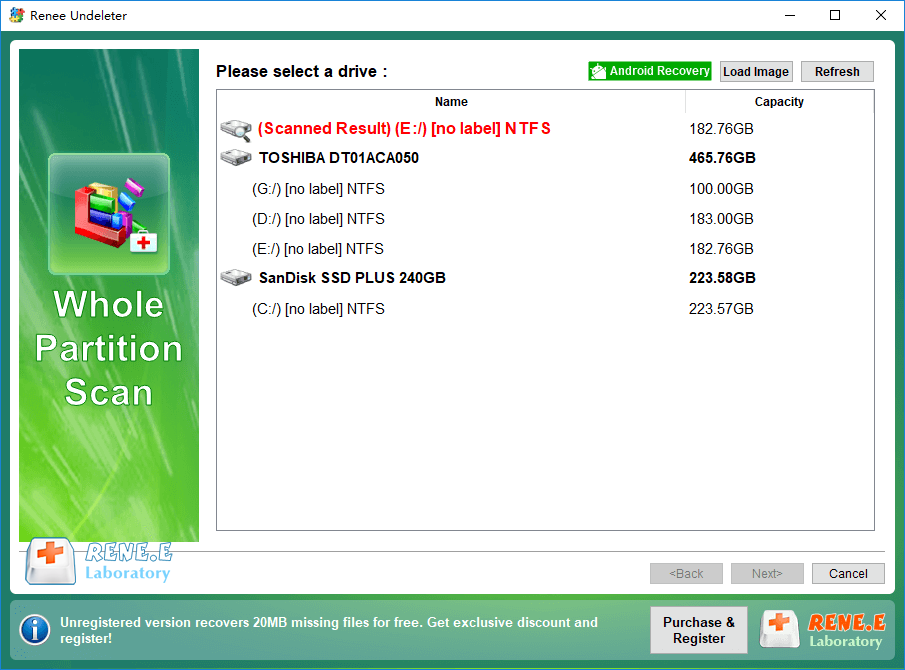
Renee Undeleter Whole Partition Scan
Step 3: Wait for the scan to complete; the time taken will depend on the size of your hard disk partition. While the scan is in progress, you can preview files by double-clicking on them. To recover a file, select the desired file and click Recover, which will halt the scan and begin the recovery process. Alternatively, once the scan has concluded, you can select the files you wish to recover from the results and press Recover to save them to an alternative disk.
preview before recovery