author avatar
    Specialist of Customer Service Dept.
 

Summary
Resolve the common Windows issue where the motherboard fails to detect the hard drive by following our straightforward troubleshooting guide. Plus, discover reliable techniques to retrieve any data that might have been lost amidst such errors.
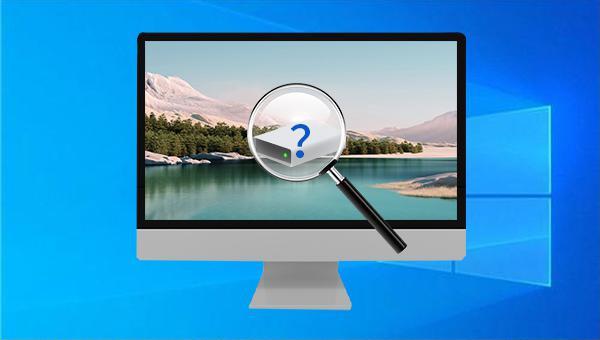

motherboard not recognizing hard drive

I. Why is there a problem that the Windows motherboard cannot detect the hard disk?

If the Windows motherboard doesn’t detect the hard disk, potential causes include hard disk failure (physical damage, rotation issues), incorrect BIOS settings, outdated/missing drivers, or damaged connection ports/data cables.
Upon identifying potential causes of the error, review the solutions provided for hard disk settings and connectivity issues. Should the hard disk incur physical damage, seek out a specialized repair service for evaluation and restoration.

II. How to solve the problem that the Windows motherboard cannot detect the hard disk?

1. Check hard disk cable and port

Sometimes, when the hard drive cable is loose, the computer may not recognize or detect the hard drive. Therefore, you can try the following two methods to have the computer detect and read your hard drive immediately:
a. In the off state, reconnect the hard disk to the data cable port, or connect the hard disk to another data cable on the computer;
b. Connect the hard drive with another desktop/laptop;
After that, check to see if the problem is resolved, if not, proceed to the method below.

2. Enable USB Controller and change SATA mode in BIOS

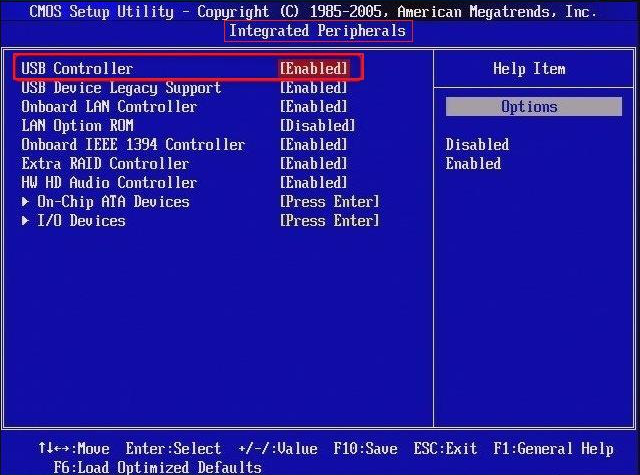
The USB Controller is the USB controller, which is a switch to control the USB. Enabled by default. If off, all USB devices cannot be used. So we need to check if this option is enabled. The specific operation steps are as follows:
Step 1: Shut down the computer. Restart it and immediately press the F2 key to access the BIOS settings. For different computer brands or motherboards, the key might vary; refer to startup prompts for the correct key.
Step 2: Use the arrow keys on the keyboard to select (Integrated Peripherals) and press the (Enter) key.
Step 3: Check the option on the right of (USB Controller), if it is (Disabled), please change it to (Enabled).
Step 4: Press (F10) to save the settings, press (ESC) to exit the BIOS. Next, restart the computer to see if the hard drive can be detected.
Change the USB Controller option
SATA controllers typically operate in two modes: AHCI and IDE. AHCI, designed for SATA, enables features like Native Command Queue (NCQ) and hot swapping, potentially boosting SATA hard disk performance by up to 30%. However, it may have compatibility issues with older motherboards and systems. IDE mode offers greater compatibility by not requiring SATA drivers but lacks support for newer SATA features. If a motherboard fails to detect a hard disk, switching from AHCI to IDE compatibility mode may resolve the issue.
Step 1: Restart the computer, press the F2 key (depending on the brand of the computer and the motherboard, you can check the prompts that appear when starting up) to enter the BIOS interface.
Step 2: Navigate to Config > Serial ATA (SATA) > SATA Controller Mode Option and switch AHCI to IDE compatibility mode, or vice versa if it’s already on IDE. Press F10 to save the changes and reboot your computer to apply the new settings.
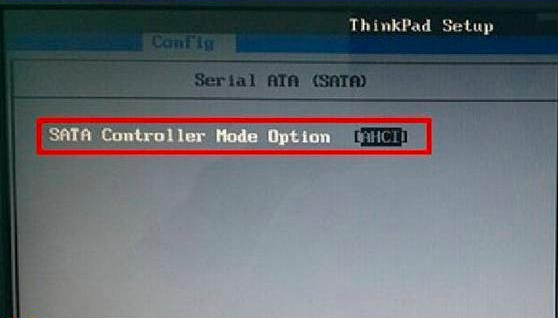
Change the SATA Controller MODE Option setting

3. Update the driver of the hard disk

To ensure your computer can read data from the hard drive, update or reinstall the hard drive drivers if they are outdated or missing. Download the latest drivers from the hard disk’s official brand website, or update them via Device Manager. To update through Device Manager, follow these steps:

Step 1: Connect the hard disk to the computer and boot into Windows. Press Windows+R to open the Run dialog. Type devmgmt.msc and click OK to open Device Manager.
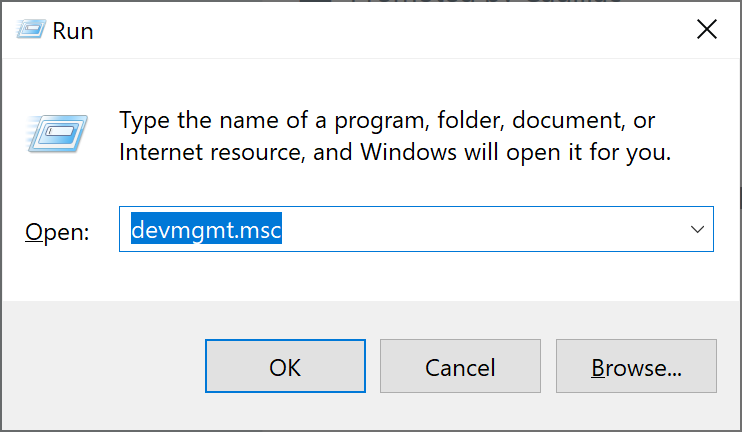
run the command devmgmt
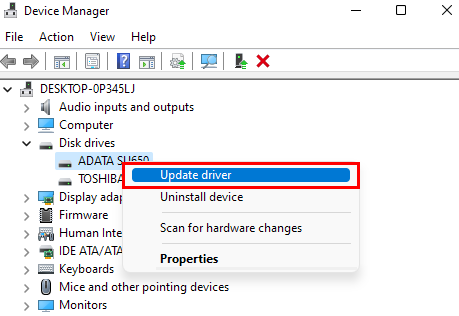
Step 2: Next, in the “Disk Drive“, right-click to select the target hard disk, and select the (Update Driver) option.
update driver disk
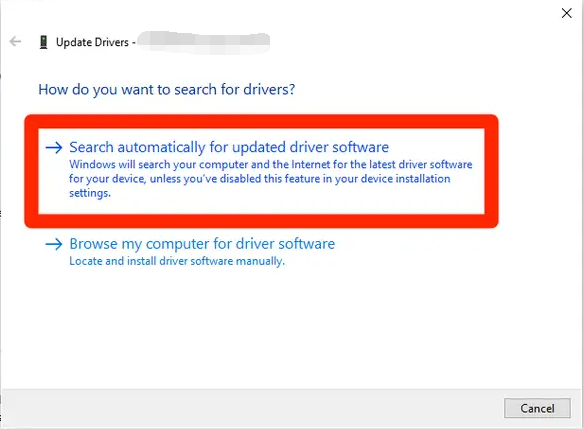
Step 3: Click on “Search automatically for updated driver software” and follow the on-screen instructions to update the hard disk driver. Once updated, restart your computer to check if the issue is resolved.
update Driver Confirm
If your hard disk is not recognized by the Windows motherboard, there are several methods to resolve this problem. After rectifying the issue, in the event of data loss, tools such as Renee Undeleter can be utilized to assist in the data retrieval process.

III. If the hard disk data is lost, you can use Renee Undeleter to restore the data

1. What is Renee Undeleter?

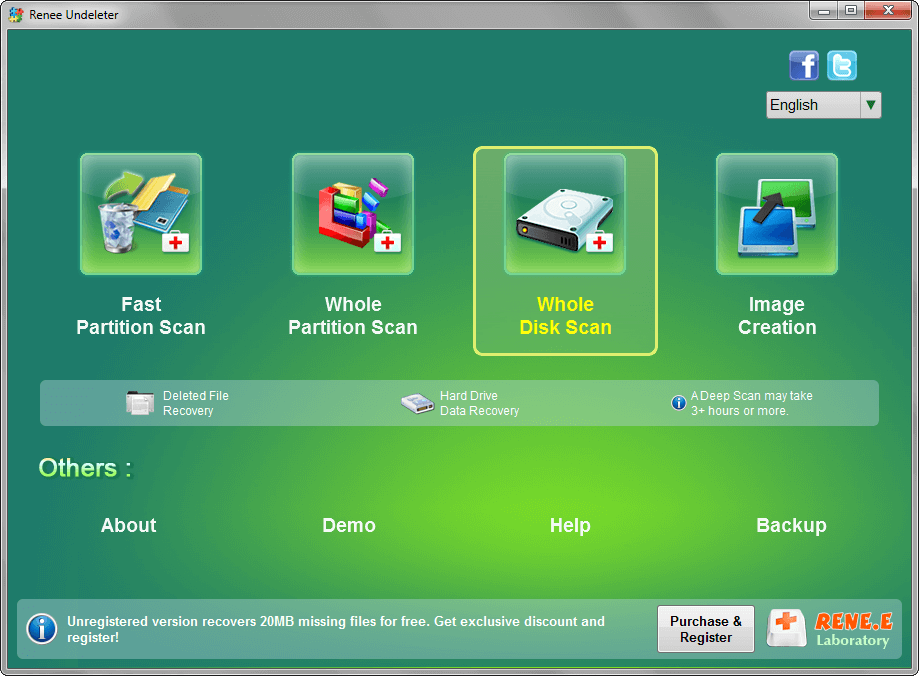
Renee Undeleter is a comprehensive data recovery software that can assist in retrieving a wide range of files that have been lost due to accidental deletion, recycle bin emptying, disk or memory card formatting, and various other data loss incidents. This robust tool includes four essential modules: Fast Partition Scan, Whole Partition Scan, Whole Disk Scan, and Image Creation, offering a multifaceted approach to restoring lost data during system operation.
Hot Topic - ADsRenee Undeleter – Simple & Powerful Software for Data Recovery

Easy to use Recover data by 3 steps;

Multiple scan modes Fast partition scan, whole partition scan and whole disk scan;

Supported file types Image, video, audio, text, email and so on;

Image creation Create a partition image to read and back up data;

Supported devices SD card, SDHC, SDXC, USB flash drive, hard disk and computer.

Easy to use Recover data by 3 steps;

Multiple scan modes Fast partition/whole partition/whole disk scan;

Supported devices SD card/USB/hard disk.

Free TrialFree TrialFree Trial 800 people have downloaded!
2. How to recover hard disk data with Renee Undeleter?

Restoring data with Renee Undeleter is very simple, the specific steps are as follows:
Step 1: Download, install and run Renee Undeleter, select the (Whole Disk Scan) option on the main interface.
Note: Do not install on the disk that needs to restore data, so as not to cause data overwriting.
select whole disk scan to scan disk in renee undeleter
Data Recovery Features:

  • Fast Partition Scan: Recovers files from accidental deletions or recycle bin clearance.
  • Whole Partition Scan: Restores files from inaccessible or formatted partitions.
  • Whole Disk Scan: Analyzes partition information for a comprehensive disk scan.
  • Image Creation: Generates a partition mirror image for backup purposes.
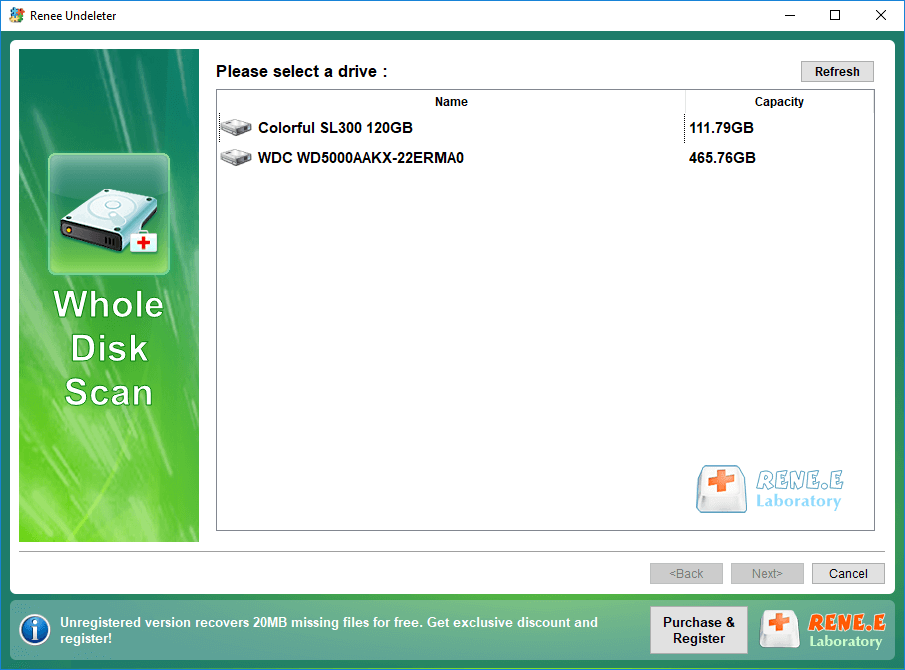
Step 2: Next, select the hard disk device to be scanned, and click (Next). Select (default setting) on the advanced setting interface.
select a disk to recover in renee undeleter
Step 3: The software will initiate a scan of the hard drive and present a “Select the partition you need to scan” message. Select the appropriate partition. After the scan, preview the files by double-clicking in the preview pane on the right. To recover a file, highlight it and click the Recover button located at the bottom-right corner.
preview before recovery
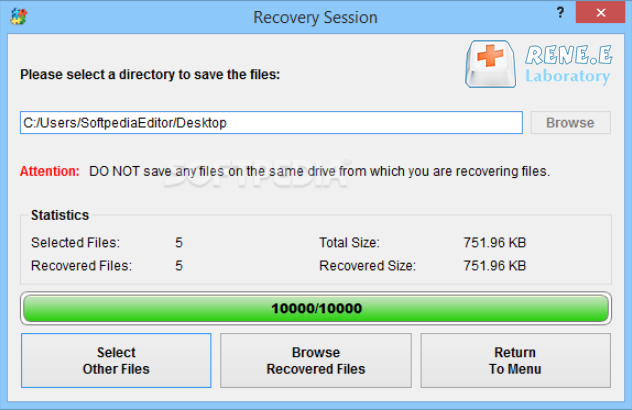
Step 4: Click (Browse) to select another disk to save the recovered files, and then click the (Restore) button to start the file recovery command, you just need to wait patiently.
recover the whole disk data