author avatar
    Technology Manager of Test Dept.
 

Summary
Discover how to troubleshoot the "NTLDR is missing" error during startup and get back up and running smoothly. Our guide provides you with straightforward fixes and recommends a reliable data transfer technique to safeguard your important files.


What to do if NTLDR is missing

I. What is NTLDR, why does the NTLDR is missing prompt appear?

NTLDR, the NT Loader, is the boot loader for the Windows operating system, commonly found in the root directory of the primary hard disk (C:). This file is designated as hidden, read-only, and system to prevent accidental modifications. Its main function is to interpret the Boot.ini file, which is crucial for the booting process.
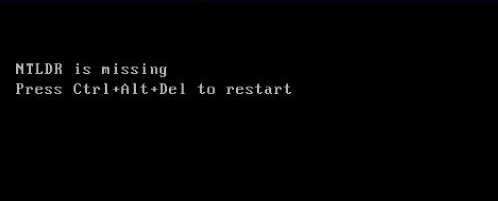
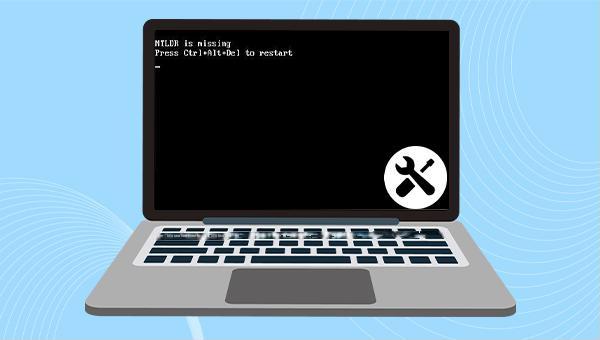
NTLDR is missing prompt
If the NTLDR file is missing or you attempt to boot a Windows device from an unbootable external hard drive, an “NTLDR is missing” error message will display, preventing normal system access. While this error is rare, there’s no need to panic if you encounter it. The following methods can assist you in resolving the issue. Continue reading for solutions.

II. How to fix the error that NTLDR is missing when booting?

1. Restart the Windows computer

Sometimes, the error can be due to a simple misconfiguration, so you can try the automatic fix of the failure by restarting Windows.

2. Unplug all external drive devices

Besides method 1, disconnect any external devices, like USB drives and external hard drives, from the computer. After removing these, reboot your computer to see if the 'NTLDR is missing' error has been fixed.
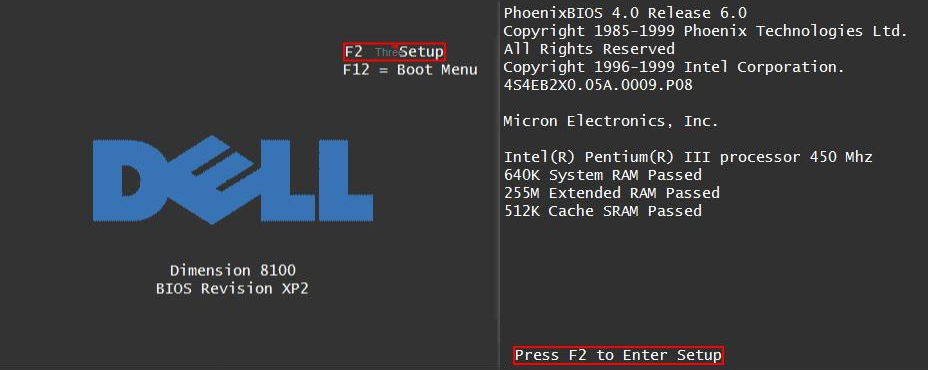
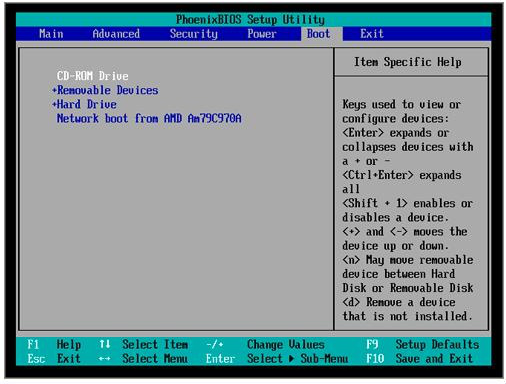
3. Check the boot order of BIOS

Alternatively, you may be able to resolve this issue by changing the computer’s BIOS boot order and selecting a valid disk or drive device that contains the system. The specific operation steps are as follows:
Step 1: Power on your computer and promptly press F2, F10, Esc, or Del multiple times to access the BIOS menu. The specific key may vary depending on your motherboard model; watch for the prompt on the startup black screen.
Shortcut key for booting into BIOS
Step 2: Use the arrow keys on your keyboard to navigate to the Boot tab. Set the system’s bootable hard drive as the primary boot device. Restart the computer to check if the issue is resolved.
switch boot priority

4. Use Windows Startup Repair

The Windows Startup Repair feature can fix many problems that prevent Windows from loading, and can replace missing or damaged files, such as NTLDR. Here are the detailed steps to perform a startup repair:
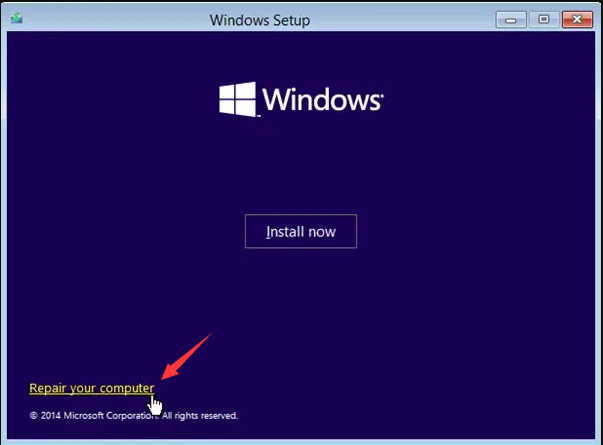
Insert the Windows installation disc or USB drive into your computer. Restart and enter the BIOS by pressing F2, F10, DEL, or ESC, as applicable for your PC brand. Configure the boot priority to boot from the installation media first, save the changes, and reboot. On the “Install Now” screen, choose “Repair Your Computer” to access the recovery environment.
windows installation repair your computer
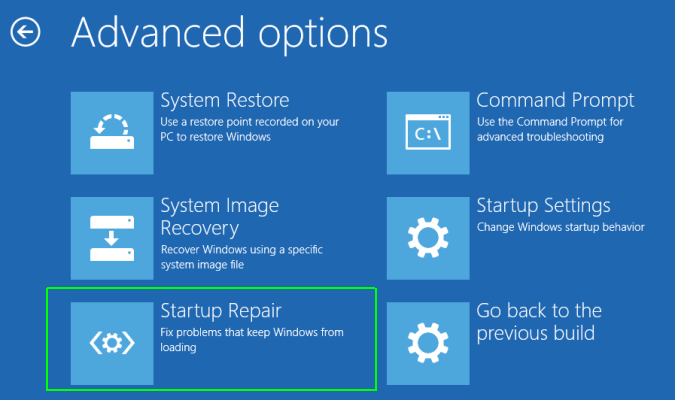
Step 2: After entering the recovery environment, select (Troubleshooting)>(Advanced Options)>(Startup Repair). After waiting for Windows Startup Repair to complete, restart the computer to see if the problem is resolved.
startup repair in Windows
Encountering the “NTLDR is missing” error can be quite daunting, especially when it prevents access to vital files on your hard disk. To address this issue, here are four effective solutions. Additionally, if you need to transfer or recover files without the ability to boot into Windows, Renee PassNow is a recommended tool. Follow the detailed instructions provided for a quick resolution.

III. When unable to enter the system, use Renee PassNow to transfer or recover important data

1. What is Renee PassNow?

Renee PassNow is a comprehensive system rescue tool for Windows users, offering solutions for password reset, administrator account setup, data recovery from formatted disks/memory cards, and secure file transfer. It also troubleshoots Windows system errors, including MBR boot record repairs, DBR error corrections, 0xc00000e, startup failures, and blue/black screen issues. Fully compatible with Windows 10/8.1/8/7/XP/Vista, it meets the system rescue requirements of various users.
Hot Topic - ADsRenee PassNow – 3 Steps to transfer data from the crashed system

Easy to use 3 steps to transfer the files.

Transfer the files Transfer the important files of the computer without system.

Preview the files Preview the files while transferring the data.

Multifuctional Data recovery, Windows password reset, bootable problem recovery can be run without system.

Highly compatible Windows 10/8.1/8/7/XP/Vista. Also supports UEFI boot mode.

Easy to use 3 steps to transfer the files.

Transfer the files Transfer the important files of the computer without system.

Preview the files Preview the files while transferring the data.

Free TrialFree TrialNow 2000 people have downloaded!
2. How to use Renee PassNow to transfer or recover data?

If your computer won’t start, create a boot disk with Renee PassNow. Once created, boot from it, and utilize the software’s features to transfer or recover data. Follow these steps:
Step 1 : To streamline your PC’s password recovery, download and install Renee PassNow on an accessible secondary computer. After installation, plug in your USB drive to this PC and choose “Create a rescue USB disk” in the “Step 1: Choose the creation method” menu. Ensure you back up any vital data on the USB drive beforehand, as this process will erase its contents.
Step 2: Next, select (x64) or (x86) according to the system type, click the (Download Now) button to download the ISO file, click the (Create Rescue USB) button after the file is downloaded, and click the (Eject USB) button.
use renee passnow to create usb to reset passnword
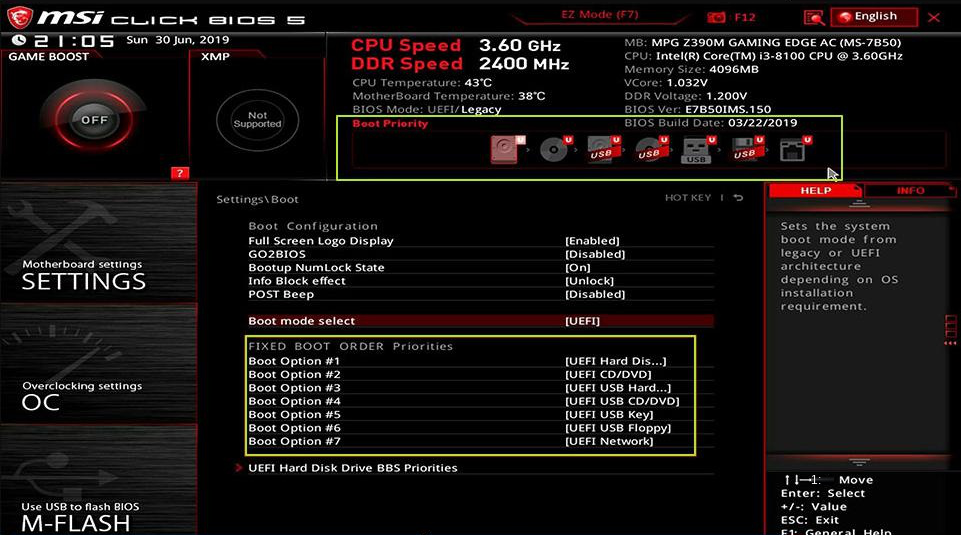
Step 3: Connect the boot device to the target computer, turn it on, and immediately press the BIOS access key displayed on the screen (note that it only appears for a short duration of 1-2 seconds). Continuously tap this key to access the BIOS settings. Within the Boot Priority menu, ensure the USB drive is set as the primary boot option, save your changes, and reboot the computer.
select boot order
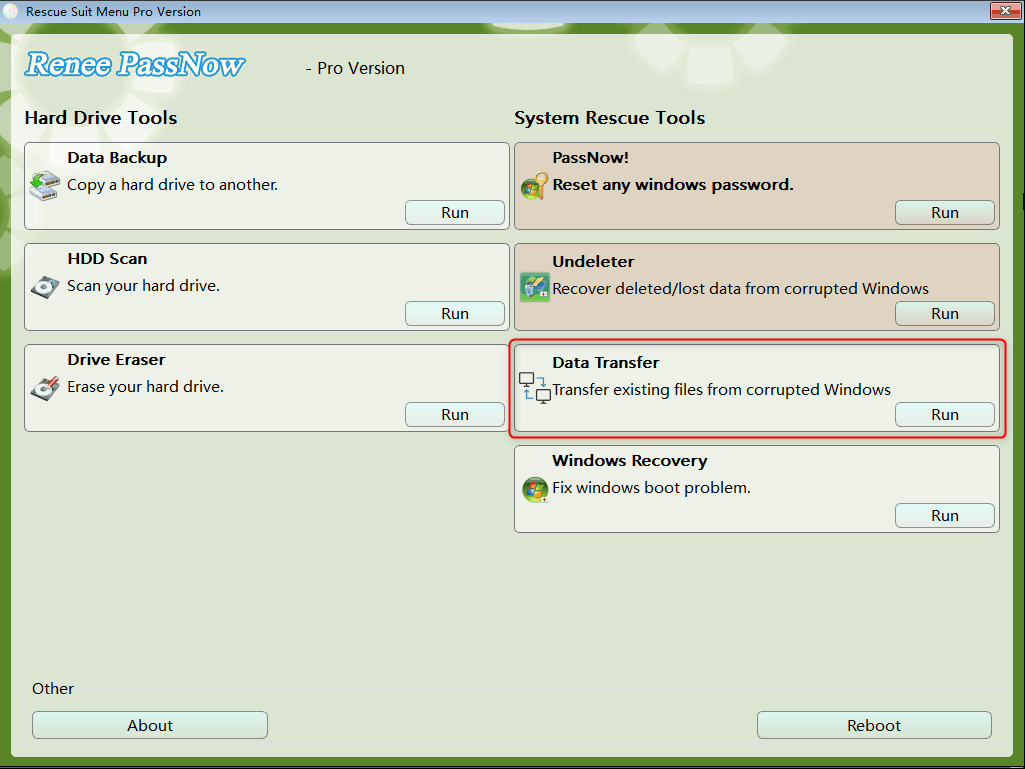
Step 4: Wait for a while, after Renee PassNow is loaded, select (Data Transfer). If you need to transfer the data of the entire hard disk, you can select the (data backup) option.
data transfer function in Renee Passnow
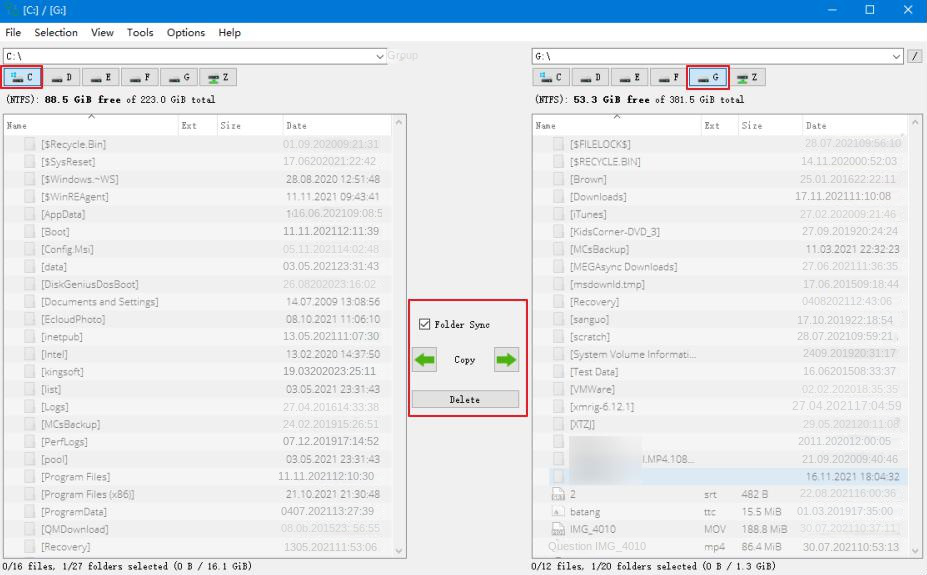
Step 5: Click on each disk drive letter (C/D/E/F, etc.) to verify if important files are intact. If they are, transfer them to an external drive for safety. To move data from the C drive to the G drive, select C on the top-left, G on the top-right, choose the desired files, and click the ‘Copy’ button in the center. Data transfer is straightforward. To delete a file, select it and press the ‘Delete’ button in the center; remember, deletion is irreversible, so proceed with caution.
transfer data interface
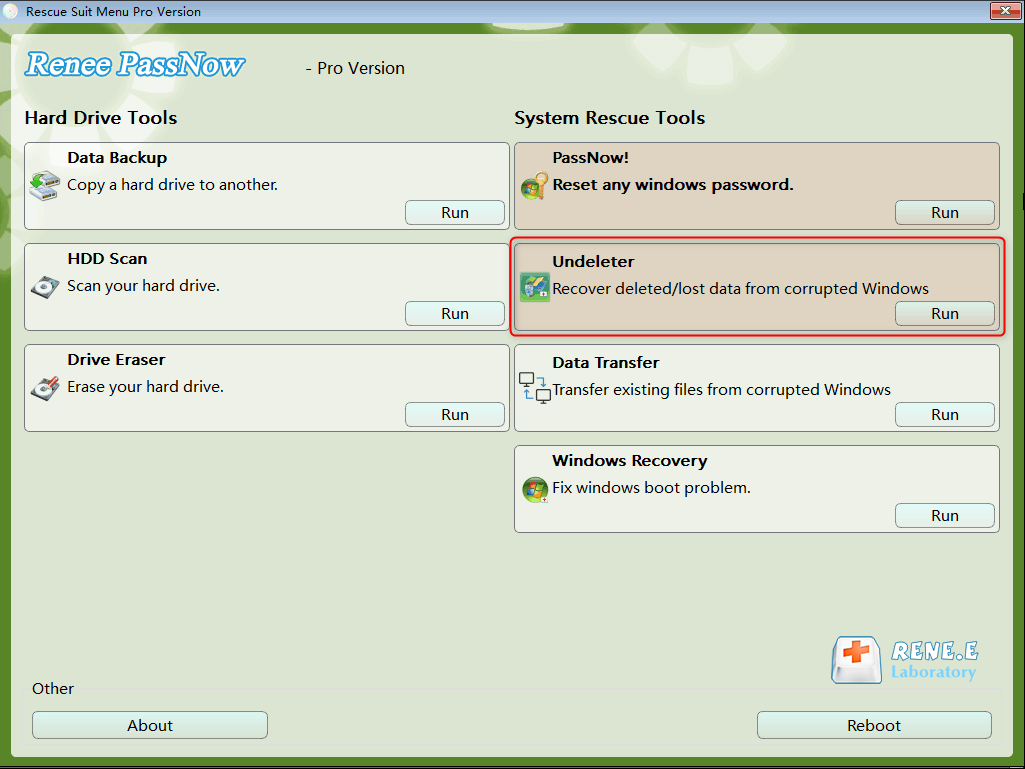
Step 6: If you find that there is data loss, please select the (Undeleter) option on the main interface of the function, and click the (Run) button.
data recovery function in Renee Passnow
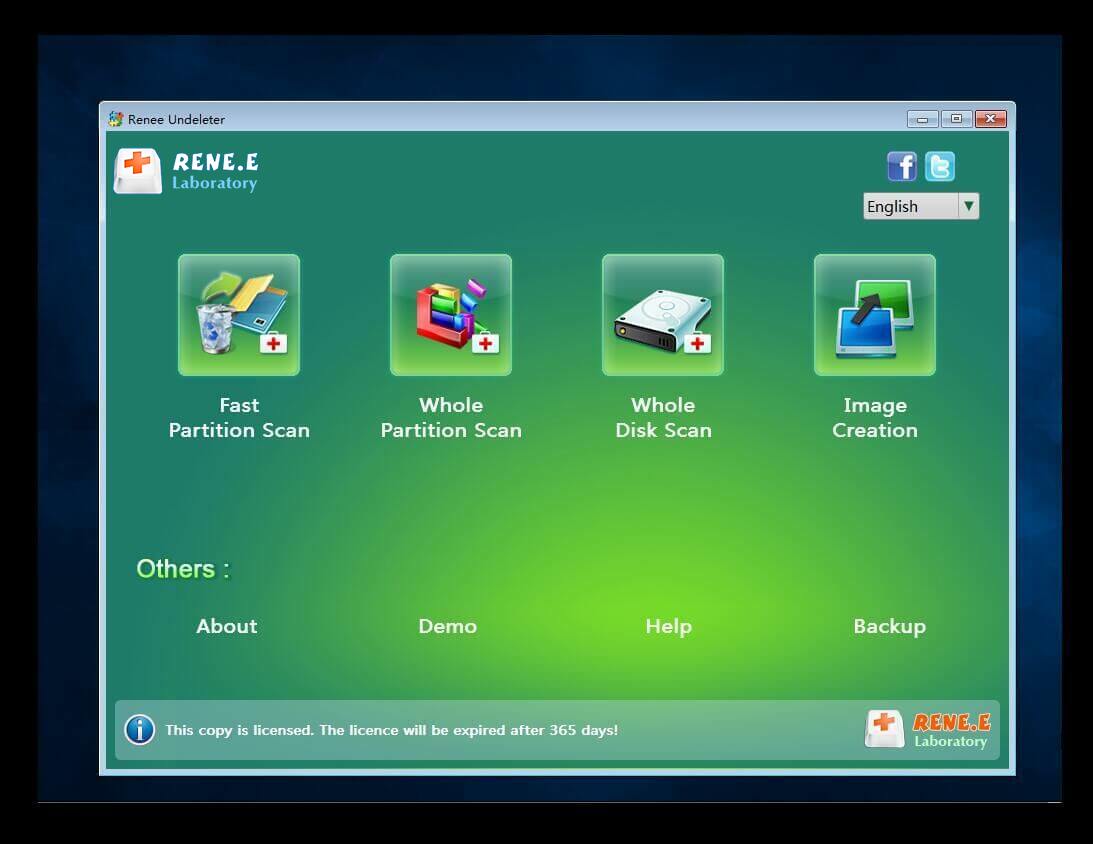
Step 7: Select (Whole Disk Scan) to scan the target hard disk.
scan the whole partition with renee passnow recovery function to reinstall windows 7
Step 8: After the scan is complete, select the file to be recovered, click the (Recover) button to execute the data recovery command, please save the file in another external disk, and eject the U disk after the recovery is complete.
preview before recovery