author avatar
    Specialist of Customer Service Dept.
 

Summary
Learn two proven techniques to quickly recover data from laptop hard drive and protect your valuable information.


recover data from laptop hard drive

I. What are the methods for recovering data from a laptop hard disk that cannot be turned on?

If your laptop shows a blue screen or black screen and cannot turn on normally, use Renee Passnow to restore or transfer important data from the hard disk. Here’s how to do it.

1. Use Renee Passnow to recover hard disk data

Renee PassNow is a professional tool for Windows users. It clears account passwords, creates new administrator accounts, restores disk/memory card data, recovers data post-formatting, transfers files, and erases or scans disk files. Additionally, it repairs Windows system issues like MBR boot records, DBR errors, 0xc00000e, startup failures, and black/blue screen problems. Compatible with Windows 10/8.1/8/7/XP/Vista, it meets diverse system rescue needs.
Renee PassNow – Professional Windows System Rescue Tool

Remove Windows Login Password 3 steps for whole password remove process.

Recover the files Recover the deleted files without Windows system.

Transfer the data Transfer the important files of the computer with system.
Fix Windows startup error Fix various Windows startup failures or crashes.

Erase disk Completely erase disk files which will not be restored.

Remove Windows Login Password 3 steps for whole password remove process.

Recover the files Recover the deleted files without Windows system.

Transfer the data Transfer the important files of the computer with system.

Free TrialFree TrialNow 2000 people have downloaded!
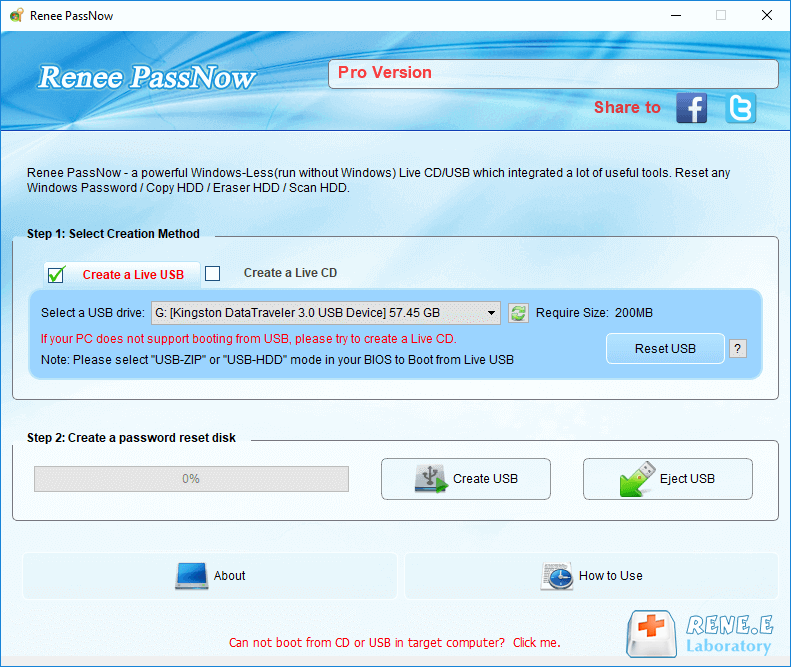
Step 1: Download and install Renee Passnow on a functional computer. Connect a USB stick to the computer, run Renee Passnow, and select “Create a Live USB.” Note: Ensure all important files on the USB stick are backed up as this process will delete all data.
create a boot media with renee passnow
Step 2: Select (x64) or (x86) based on your system type, click (Download Now) to download the ISO file, then click (Create USB) after downloading, and finally click (Eject USB).
use renee passnow to create usb to reset passnword
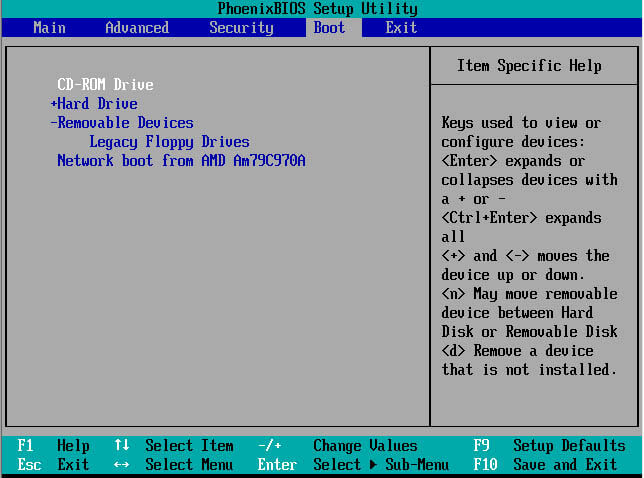
Step 3: Connect the boot device to the target computer, turn it on, and quickly press the BIOS shortcut key displayed on the screen (this prompt lasts only one or two seconds). Enter the BIOS setting interface and set the USB device or CD-ROM drive as the primary boot option. Save and exit. For guidance, refer to: How to enter BIOS and modify the boot order.
Note: If you create a rescue USB disk, select (Removable Devices) as the first boot item, and if you create a rescue CD, select (CD-ROM Drive) as the first boot item.
change boot order in BIOS menu
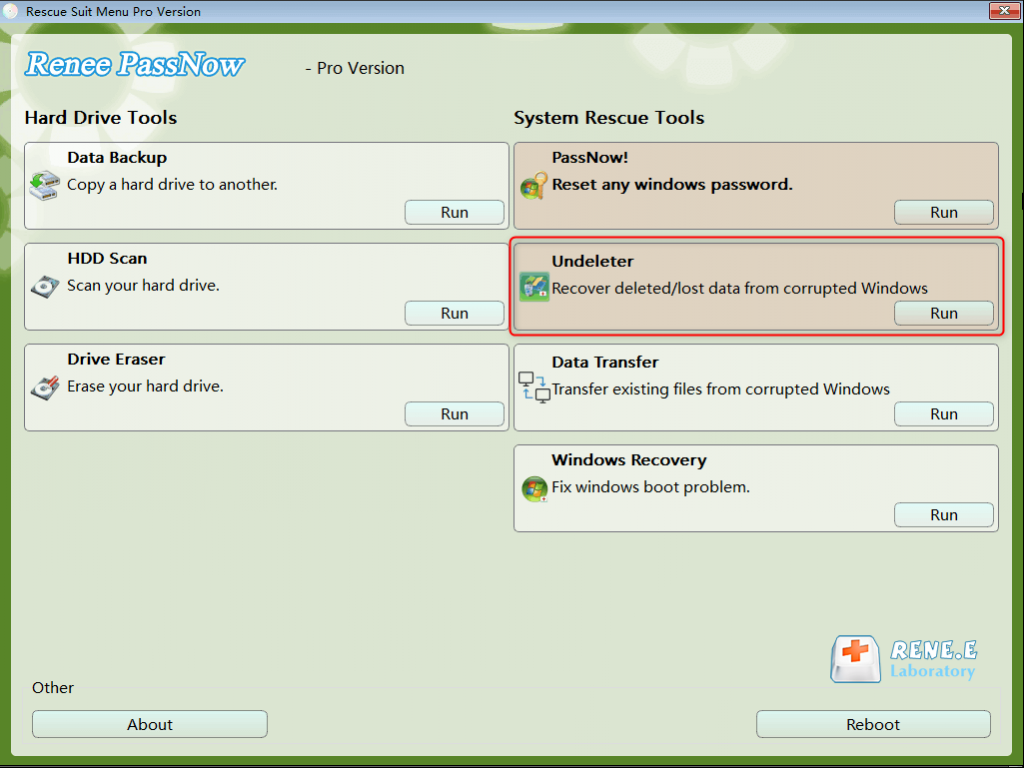
Step 4: Once Renee Passnow is loaded, select the Undeleter option and click Run. To transfer the entire hard disk data, use the Data Backup or Data Transfer function.
data recovery function in Renee Passnow
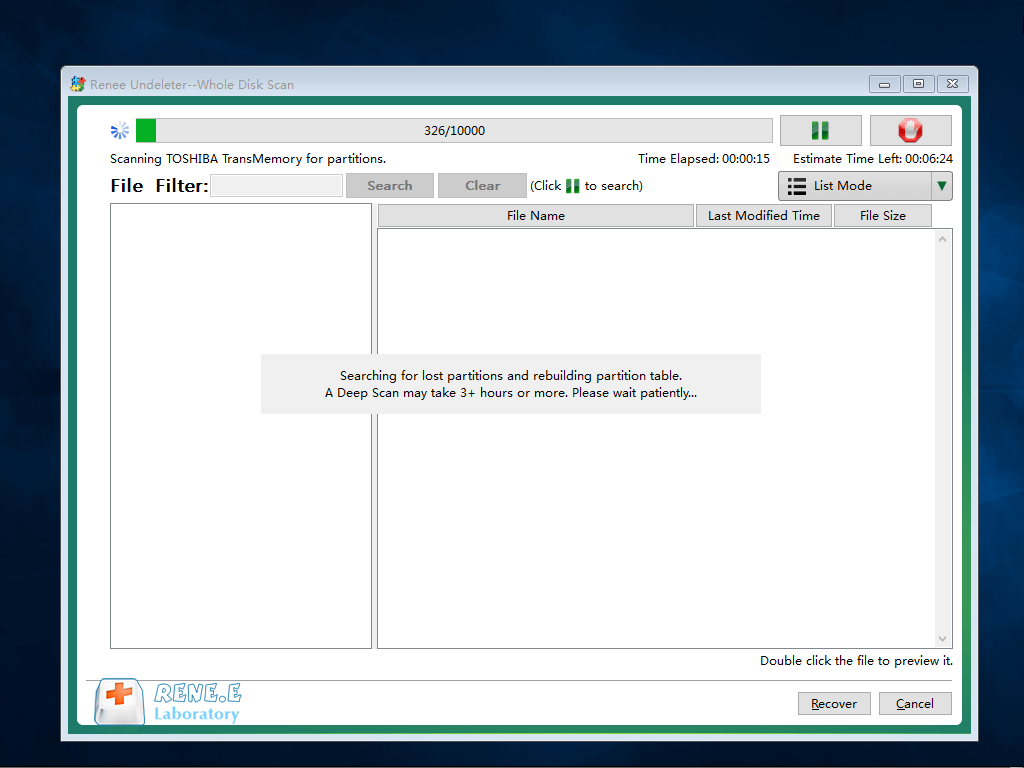
Step 5: Select (Whole Disk Scan) to scan the target hard disk.
scan the whole partition with renee passnow recovery function to reinstall windows 7
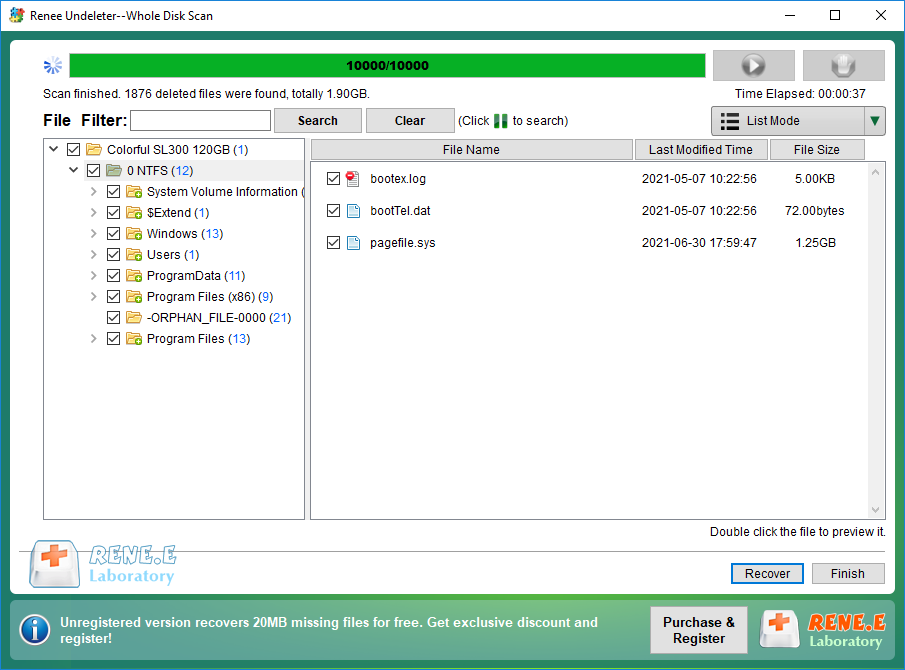
Step 6: After the scan, select the file to recover, click Recover, save the file to an external disk, eject the USB stick, and repair the computer.
recovering from disk in undeleter disk scan
If the above method is too difficult, you can also remove the hard drive from the malfunctioning laptop, use a hard disk enclosure to connect it to a functioning computer, and then proceed with data recovery.

2. Use Renee Undeleter to restore data in the hard disk

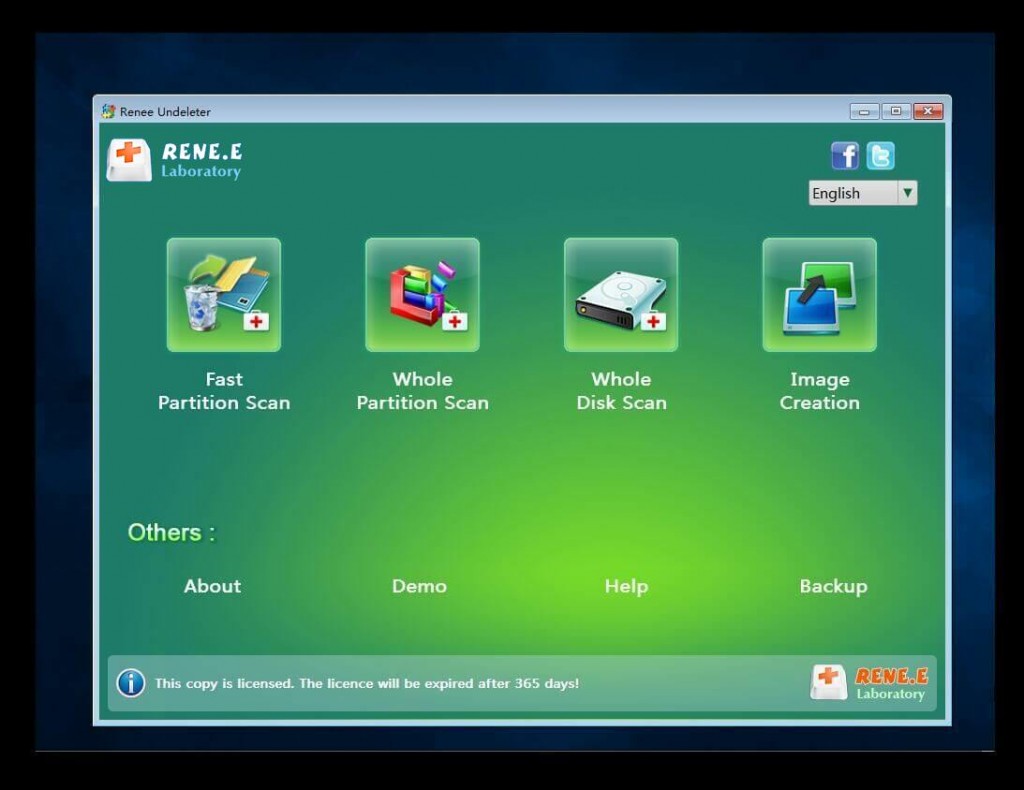
Renee Undeleter is a specialized software for restoring various data files. Whether you’ve accidentally deleted important files, emptied the recycle bin, or formatted a disk/storage, this tool can retrieve lost data. It includes four functional modules: Fast Partition Scan, Whole Partition Scan, Whole Disk Scan, and Image Creation, offering comprehensive solutions for all potential data loss issues.
Hot Topic - ADsRenee Undeleter – Simple & Powerful Software for Data Recovery

Easy to use Recover data by 3 steps;

Multiple scan modes Fast partition scan, whole partition scan and whole disk scan;

Supported file types Image, video, audio, text, email and so on;

Image creation Create a partition image to read and back up data;

Supported devices SD card, SDHC, SDXC, USB flash drive, hard disk and computer.

Easy to use Recover data by 3 steps;

Multiple scan modes Fast partition/whole partition/whole disk scan;

Supported devices SD card/USB/hard disk.

Free TrialFree TrialFree Trial 800 people have downloaded!
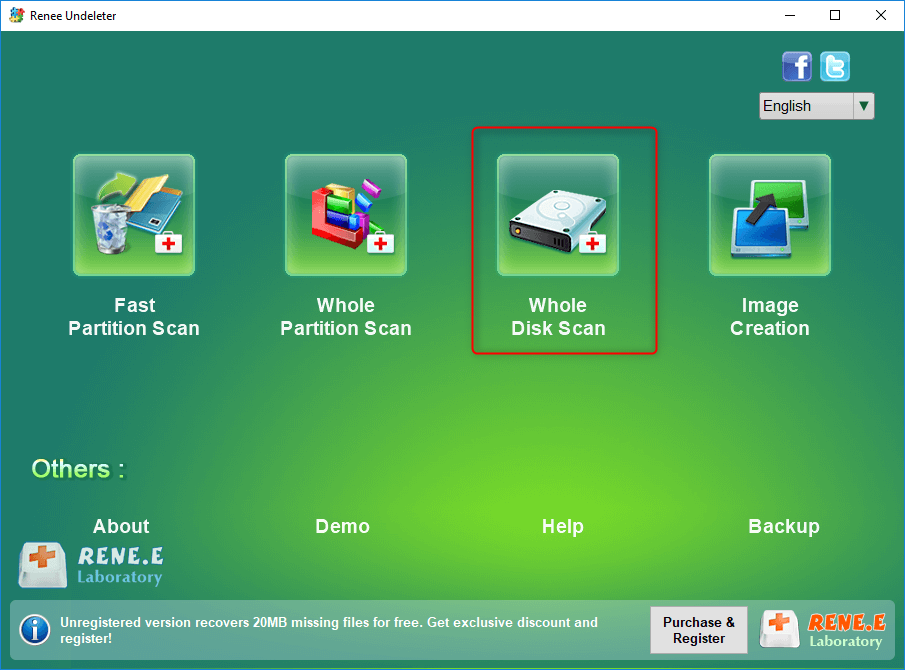
Step 1: Connect the hard disk to a bootable computer via a hard disk box, download and install Renee Undeleter, run it, and select the “Whole DIsk Scan” option.
Note: Do not install on the disk that needs to restore data, so as not to cause data overwriting.
select whole disk scan in renee undeleter
Data Recovery Function:

  • Fast Partition Scan – Quickly retrieve files lost due to accidental deletion or emptying the recycle bin.
  • Whole Partition Scan – Recover files from inaccessible or formatted partitions.
  • Whole Disk Scan – Analyze partition information and fully scan the entire disk.
  • Image Creation – Create an image of a partition to back up its current state.
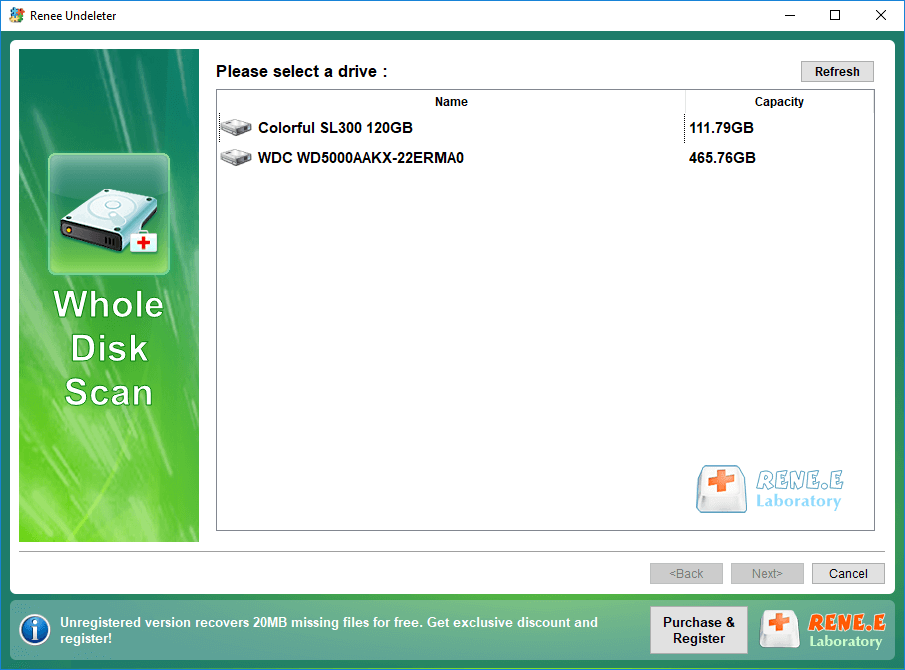
Step 2: Select the hard disk and click (Next).
select a disk to recover in renee undeleter
Step 3: The software will analyze the hard disk. A prompt window to “select the partition you want to scan” may appear. Select the desired partition; otherwise, it will scan all partitions, which will take longer. After scanning, preview the files in the right preview window, select the files to restore, and click the Recover button in the lower right corner.
select taget files to recover with renee undeleter
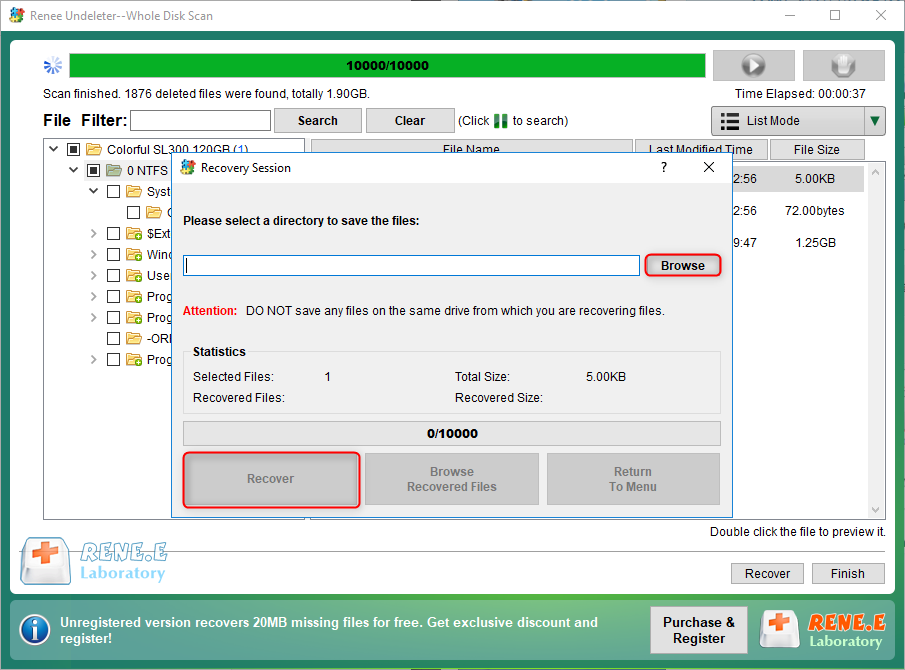
Step 4: Select the target folder, click Browse to choose another disk for saving the recovered files, then click Recover to start the file recovery. Wait patiently.
recover files from whole disk scan with renee undeleter

II. How to avoid data loss in the hard disk?

Use data recovery software as an emergency measure for lost data. If the data is severely damaged, recovery may not be successful. To avoid data loss, follow these suggestions for daily notebook use.

1. Regularly back up hard disk data

Backing up data is essential to prevent hard drive data loss. Since data on the hard disk can be lost unexpectedly, regularly back up important data from the notebook hard disk to external disks. For specific steps, please check file backup.

2. Use antivirus software to prevent virus infection

If the laptop is infected with a virus, files may be at risk of loss and damage. Using antivirus software is crucial to prevent data loss on the hard disk. Ensure you update your antivirus software regularly for optimal effectiveness.

3. Put the notebook in a dry and dust-free environment

The hard disk is the most fragile part of a computer. Dust or moisture can cause it to fail. It’s best to keep your notebook in a dry, dust-free place, whether in use or not.