

Beginner’s Guide to Samsung Disk Cloner: Start Cloning Today

Summary
Discover how to clone your drives effortlessly using Samsung Disk Cloner tools like Samsung Data Migration and Samsung Magician. This beginner’s guide offers step-by-step instructions and best practices to ensure a successful disk cloning experience.
Table of contents
https://semiconductor.samsung.com/us/consumer-storage/support/tools/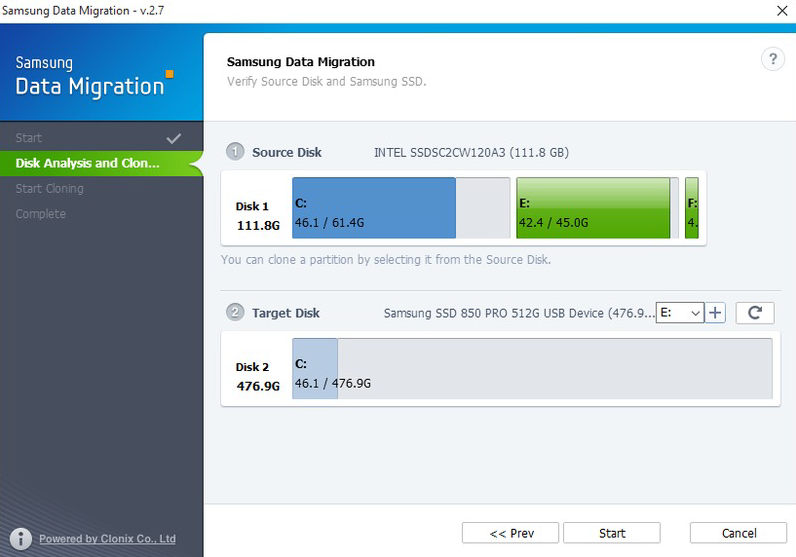


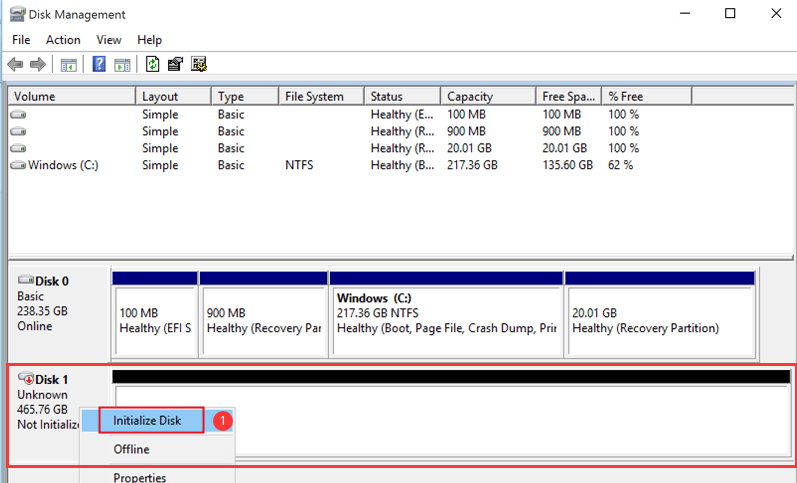
diskmgmt.msc
Begin by downloading the Renee Becca software from its official website. Follow the on-screen instructions to complete the installation process. Once installed, launch the application.

Automatic 4K alignment Improves SSD performance during system migration.
Support GPT and MBR Automatically adapt to the suitable partition format.
Support NTFS and FAT32 Redeploy various files in different file systems.
Back up quickly Back up files at up to 3,000MB/min.
Overall backup schedule Support system redeployment/system backup/partition backup/disk backup/disk clone.
Automatic 4K alignment Improve SSD performance
Support GPT and MBR Intelligently adapt to a partition format
Support NTFS and FAT32 Redeploy files in different file systems
Free TrialFree TrialNow 2000 people have downloaded!Similar to Samsung Data Migration, ensure that both your source disk (the current disk with your data) and the target disk (the new Samsung SSD) are properly connected to your computer. Verify that the disks are recognized by the system.
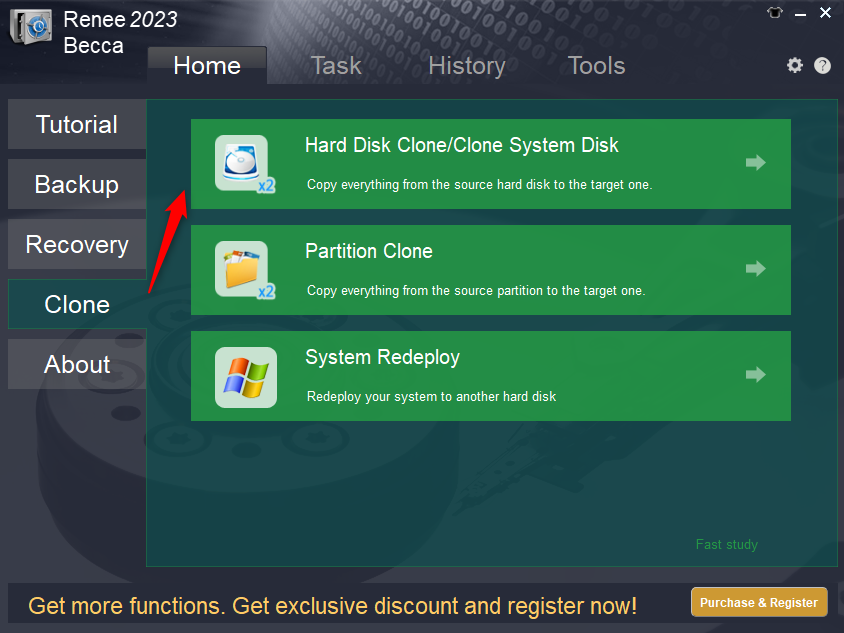
In the main interface, navigate to the “Clone” tab and select “Hard Disk Clone/Clone System Disk” from the options. This will initiate the cloning setup process.
You will be prompted to select the source disk and the target disk. Choose your current hard drive as the source disk and the new Samsung SSD as the target disk. Ensure both selections are correct before proceeding.
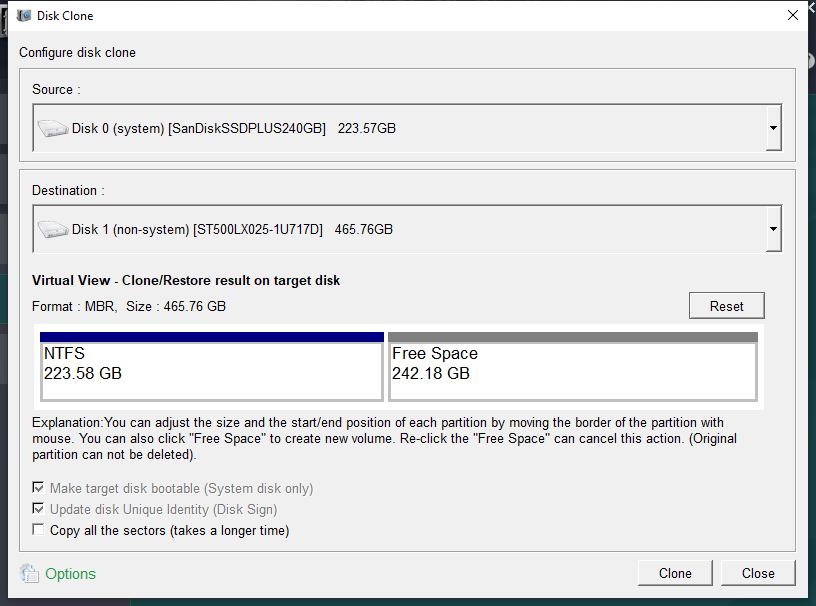
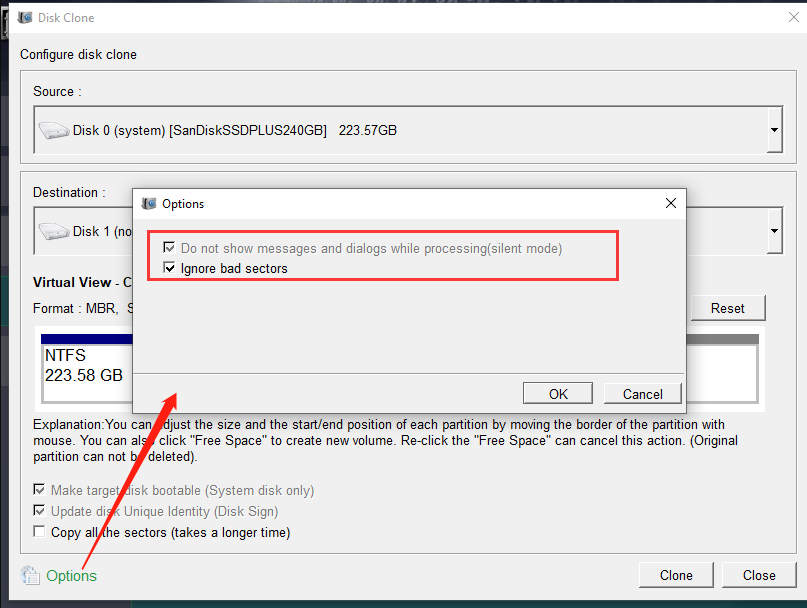
Renee Becca offers various options for the cloning process, such as sector-by-sector clone or resizing partitions. Configure these options according to your preferences. If unsure, you can proceed with the default settings.

Click on the “Start” button to begin the cloning process. A confirmation prompt will appear, indicating that all data on the target drive will be erased. Confirm to proceed with the cloning. The duration of the process will depend on the amount of data being transferred.
| Server Type | Enter boot menu method |
|---|---|
| DELL | Press the F12 key repeatedly before the Dell logo appears on the screen. |
| HP | Press the F9 key multiple times when the HP logo is displayed. |
| BIOS Name | Enter boot menu method |
|---|---|
| ASRock | DEL or F2 |
| ASUS | DEL or F2 for PCs, DEL or F2 for Motherboards |
| Acer | DEL or F2 |
| Dell | F12 or F2 |
| ECS | DEL |
| Gigabyte / Aorus | DEL or F2 |
| Lenovo (Consumer Laptops) | F2 or Fn + F2 |
| Lenovo (Desktops) | F1 |
| Lenovo (ThinkPads) | Enter then F1 |
| MSI | DEL |
| Microsoft Surface Tablets | Press and hold Power and Volume Up buttons |
| Origin PC | F2 |
| Samsung | F2 |
| Toshiba | F2 |
| Zotac | DEL |
| HP | Esc, F9 for "Boot Menu", Esc, F10, Storage tab, Boot Order, Legacy Boot Sources |
| INTEL | F10 |
Relate Links :
The Ultimate Guide to Cloning Your OS to an SSD
25-09-2023
Ashley S. Miller : Learn how to clone your operating system to an SSD in Windows, Mac, and Linux systems with our...
- Overview of Samsung Disk Cloning Tools
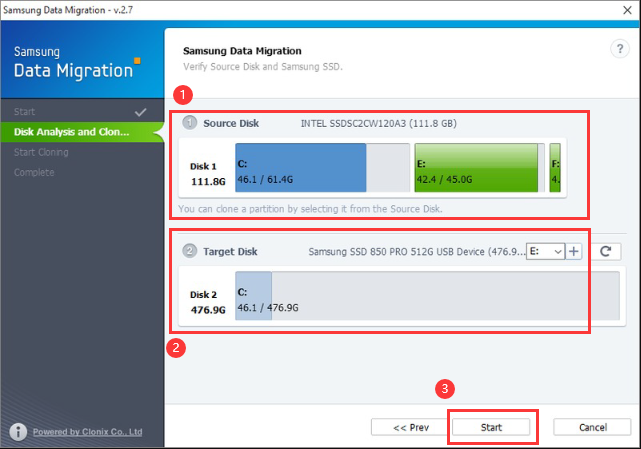
- Samsung Data Migration
- Samsung Magician
- Ensure Computer Meets Specifications and Prepare Disk
- Method 1: Using Samsung Data Migration to Clone Your Samsung Disk
- Method 2: Alternative Methods for Cloning with Renee Becca
- Configure computer to boot from new ssd
- Conclusion

