author avatar
    Technology Manager of Test Dept.
 

Summary
Enable sketchup autosave location to safeguard against power failures and learn efficient data recovery techniques for inadvertently deleted files.


sketchup autosave location

I. About Sketchup software

1. What is Sketchup software?

SketchUp, also known as “SketchUp Master” or “Design Master“, is a versatile 3D modeling software tailored for professionals in architecture, urban planning, production, and game development. Its intuitive push-pull technique streamlines the design process, allowing for quick creation, visualization, and modification of 3D concepts. The software stands out for its ease of making design changes throughout the project lifecycle, enabling designers to address issues based on design objectives. SketchUp is not only user-friendly but also boasts robust capabilities, including the ability to generate hand-drawn-style renderings, making it a favored tool among designers for both ideation and presentation.

2. How to view and modify the position and time interval of automatic saving of Sketchup software?

It is not difficult to view and modify the location and time interval of Sketchup’s automatic saving, you just need to follow the steps below to find it quickly.
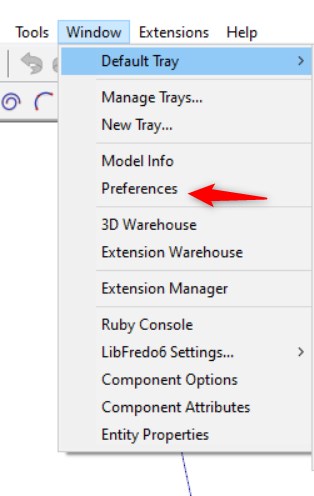
Step 1: Run the Sketchup software, and then find the (Window)-(Preferences) option in the menu bar above the main page of the software in turn.
Sketchup
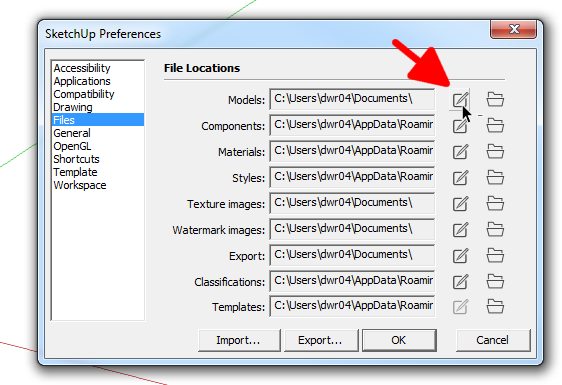
Step 2: Next, find (Files) in the Sketchup system preferences window, you can find the path where the corresponding file is saved on the right, and click the corresponding save path to modify it.
Sketchup
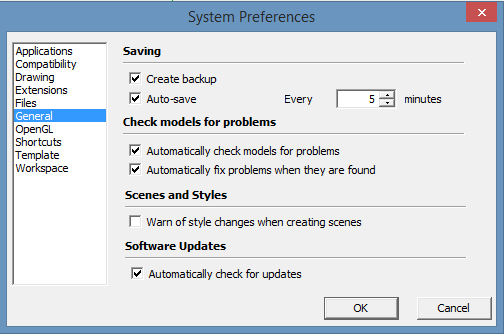
Step 3: Switch the function bar to the General option on the left. In the “Saving” column on the right, select the Create backup and Auto-save options. Set the time interval for Automatic Save on the right. Click the OK button to finalize your settings.
Sketchup
The following content provides a guide on how to locate and adjust Sketchup’s autosave settings. In the unfortunate event of losing a file without having a backup, retrieval is possible using Renee Undeleter, which is a user-friendly and efficient data recovery tool designed to tackle accidental data loss. Further details are provided below.

II. Recover accidentally lost/deleted files with the help of Renee Undeleter

1. What is Renee Undeleter?

Renee Undeleter is a versatile data recovery software designed to recover a variety of data files. Whether you’ve accidentally deleted files, cleared the recycle bin, or formatted a disk/storage device, Renee Undeleter can help you retrieve your lost data. It features four key modules: Fast Partition Scan, Whole Partition Scan, Whole Disk Scan, and Image Creation, providing a comprehensive solution to diverse data loss scenarios encountered during system use.
Hot Topic - ADsRenee Undeleter – Simple & Powerful Software for Data Recovery

Easy to use Recover data by 3 steps;

Multiple scan modes Fast partition scan, whole partition scan and whole disk scan;

Supported file types Image, video, audio, text, email and so on;

Image creation Create a partition image to read and back up data;

Supported devices SD card, SDHC, SDXC, USB flash drive, hard disk and computer.

Easy to use Recover data by 3 steps;

Multiple scan modes Fast partition/whole partition/whole disk scan;

Supported devices SD card/USB/hard disk.

Free TrialFree TrialFree Trial 800 people have downloaded!
2. How to recover accidentally lost/deleted files with the help of Renee Undeleter?

Restoring data with Renee Undeleter is very simple, the specific steps are as follows:
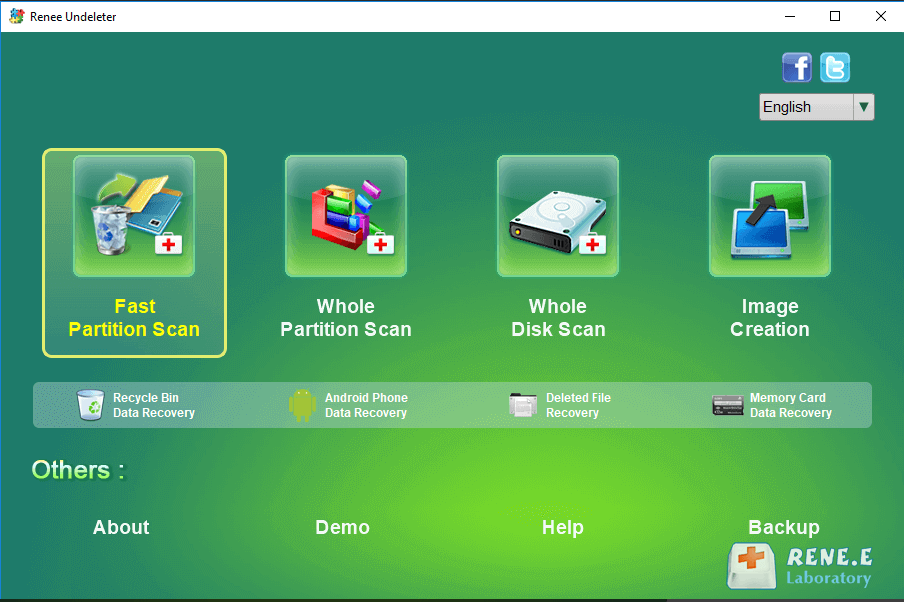
Step 1: Download, install and run Renee Undeleter, select the (Fast Partition Scan) option in the main interface.
Note: Do not install on the disk that needs to restore data, so as not to cause data overwriting. If (file recovery) does not find the file you need, you can also try (format recovery) and (partition recovery) functions.
data recovery in renee undeleter
Data recovery function:

  • Fast Partition Scan – Quickly retrieve files lost due to accidental deletion or emptying the recycle bin.
  • Whole Partition Scan – Quickly recover files lost due to inaccessible or formatted partitions.
  • Whole Disk Scan – Analyze and get partition information and perform a full scan of the entire partition.
  • Image Creation – You can create a mirror image for a partition to back up the current partition state.
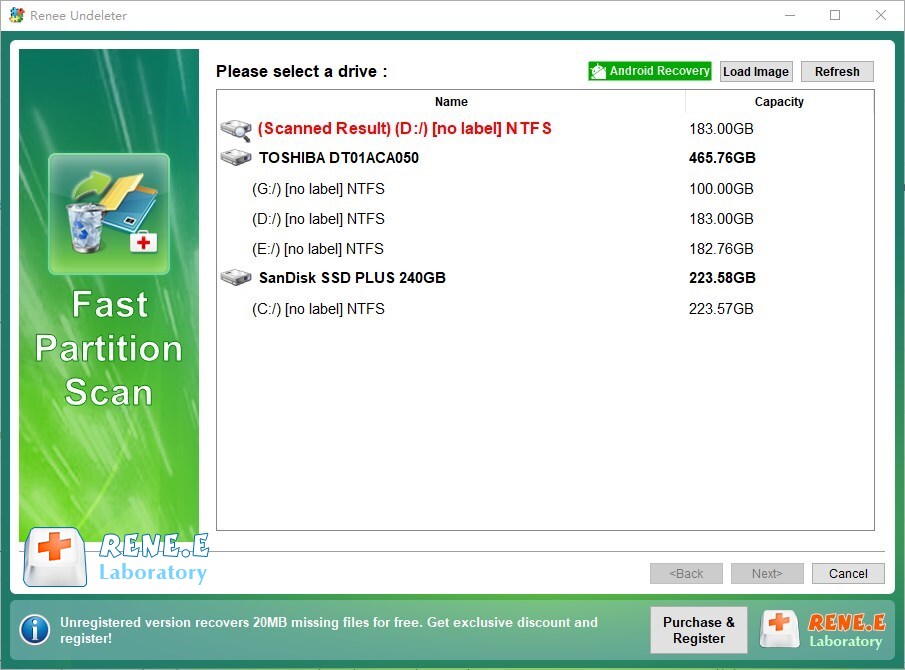
Step 2: Next select the partition to scan, which is where the accidentally lost/deleted files were originally saved. Then click (Next).
scan disk with Renee Undeleter
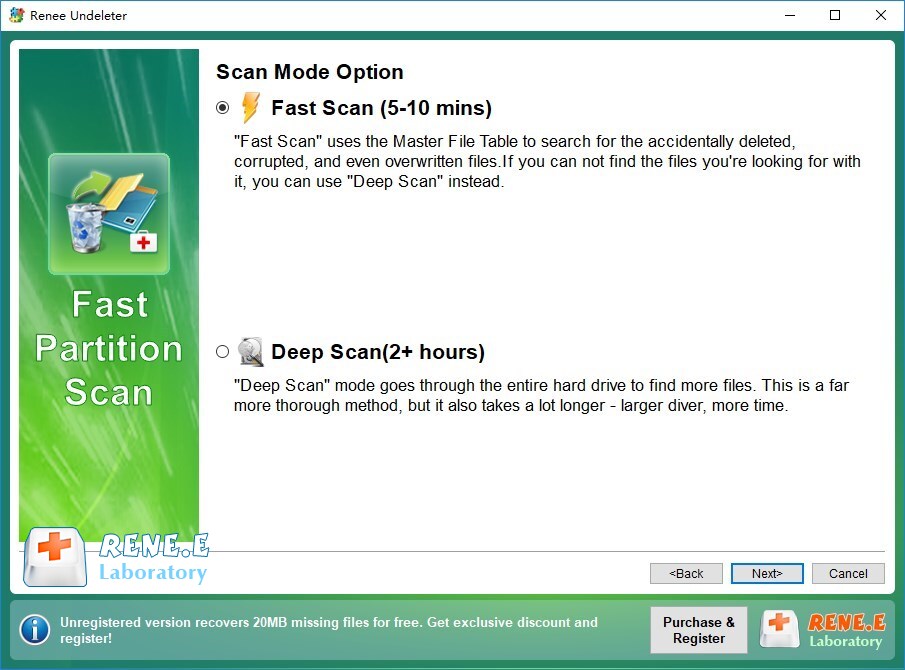
Step 3: Select Fast Scan and press Next to initiate the scan. Be aware that the Fast Partition Scan – Fast Scan only examines the first 30GB of free space on the selected disk. Should the file remain undetected, opt for the Fast Partition Scan – Deep Scan to conduct an extensive search, albeit with an increased duration.
fast scan lost data
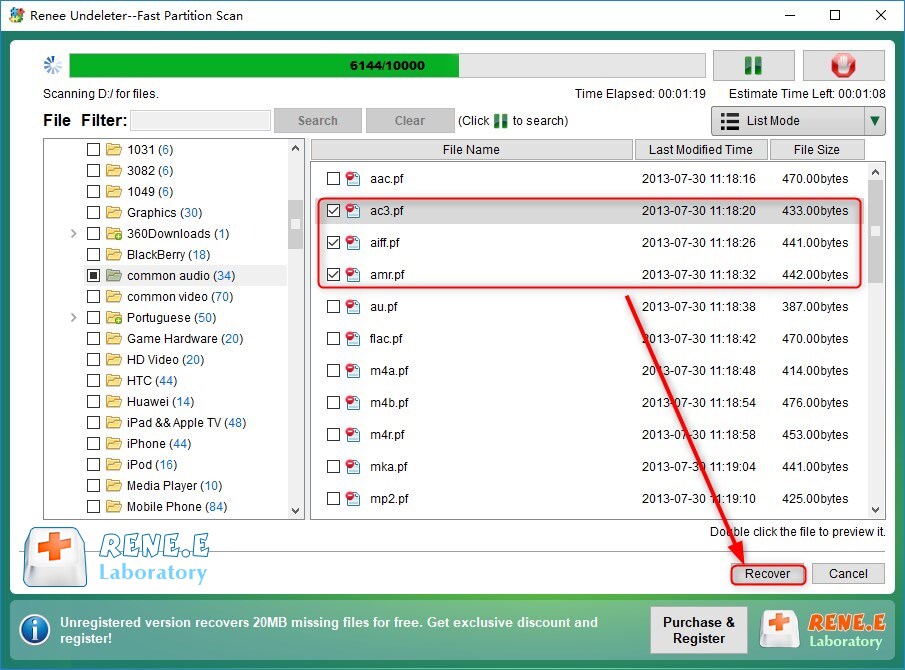
Step 4: After scanning, you can enter the extension of the file you want to recover in (File Filter) to search, then check the file you want to recover, and click the (Recover) button to save the file to another disk.
recover files with Renee Undeleter