author avatar
    Senior Product Manager
 

Summary
Resolve the stop code system_thread_exception_not_handled (bcmwl63a.sys) on Windows system with this article's conventional repair methods. Besides, you can transfer the important files before the reparation.
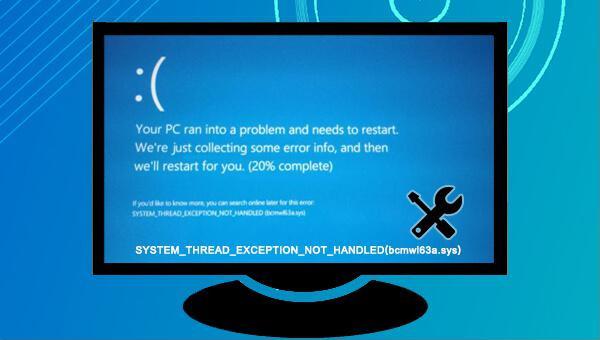


stop code system thread exception not handled

I. Why is there a blue screen error of system_thread_exception_not_handled (bcmwl63a.sys)?

Upon starting your computer, if an incompatible driver or a driver failure occurs, it can hinder Windows from booting correctly, resulting in a blue screen error “system_thread_exception_not_handled (bcmwl63a.sys)”. This issue may also stem from hardware memory or system file malfunctions.
Realizing that the error originates from the identified factors aids in its effective resolution. To safeguard against data loss, ensure you back up your data using reliable software like Renee PassNow before troubleshooting. Now, let’s move forward with the appropriate remedy.

II. When a blue screen error occurs in the system, use Renee PassNow for data backup

1. What is Renee PassNow?

Renee PassNow is a versatile system rescue software for Windows users. It enables you to reset Windows account passwordscreate new administrator accountsrecover data from disks/memory cards, and transfer files. Furthermore, it can securely erase or scan disk files. Additionally, it provides solutions for troubleshooting Windows system issues, such as MBR boot record repairsDBR error parameters0xc00000estartup failures, and blue/black screen errors. Compatible with Windows 10/8.1/8/7/XP/Vista, it satisfies a wide range of system rescue needs.
Hot Topic - ADsRenee PassNow – 3 Steps to transfer data from the crashed system

Easy to use 3 steps to transfer the files.

Transfer the files Transfer the important files of the computer without system.

Preview the files Preview the files while transferring the data.

Multifuctional Data recovery, Windows password reset, bootable problem recovery can be run without system.

Highly compatible Windows 10/8.1/8/7/XP/Vista. Also supports UEFI boot mode.

Easy to use 3 steps to transfer the files.

Transfer the files Transfer the important files of the computer without system.

Preview the files Preview the files while transferring the data.

Free TrialFree TrialNow 2000 people have downloaded!
2. How to use Renee PassNow for data backup?

If your computer fails to boot into Windows, create a bootable disk using Renee PassNow. Boot the computer from this disk and utilize the software’s features to transfer or restore data. Follow these steps:
Step 1: Install Renee PassNow on a functioning computer and insert a USB drive. Launch the application and select “Create a Live USB” under “Step 1: Select the creation method”. Make sure to back up any important USB drive data beforehand, as this process will erase all existing data.
Step 2: Select (x64) or (x86) according to your system architecture, and then press the (Download Now) button to initiate the ISO file download. Upon completion, hit the (Create USB) button. After the creation process is finished, click the (Eject USB) button to safely remove the USB drive.
use renee passnow to create usb to reset passnword
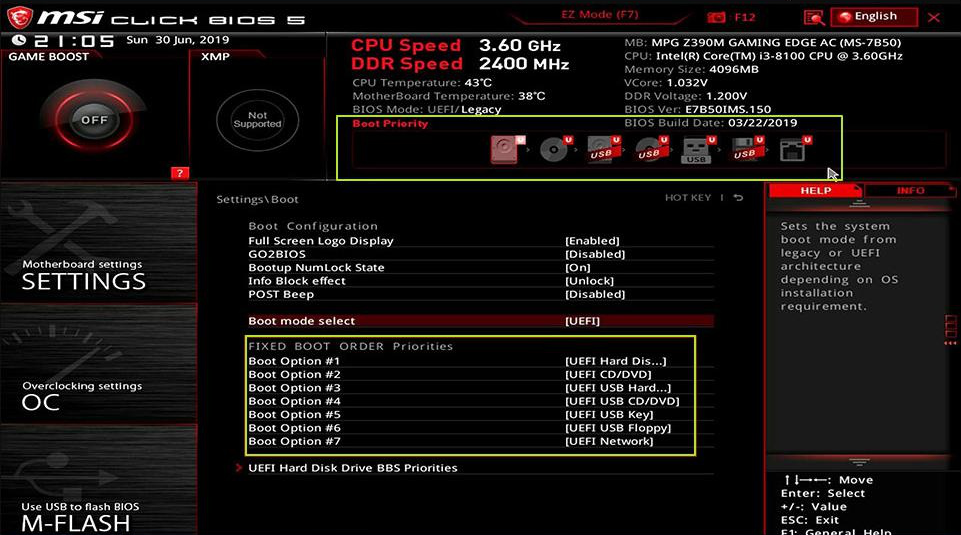
Step 3: Insert the bootable device into the target computer, power it on, and promptly press the BIOS access key shown on screen (note that this may only appear for 1-2 seconds). In the BIOS settings, navigate to Boot Priority and set the USB drive as the primary boot device. Save the changes and reboot the computer.
select boot order
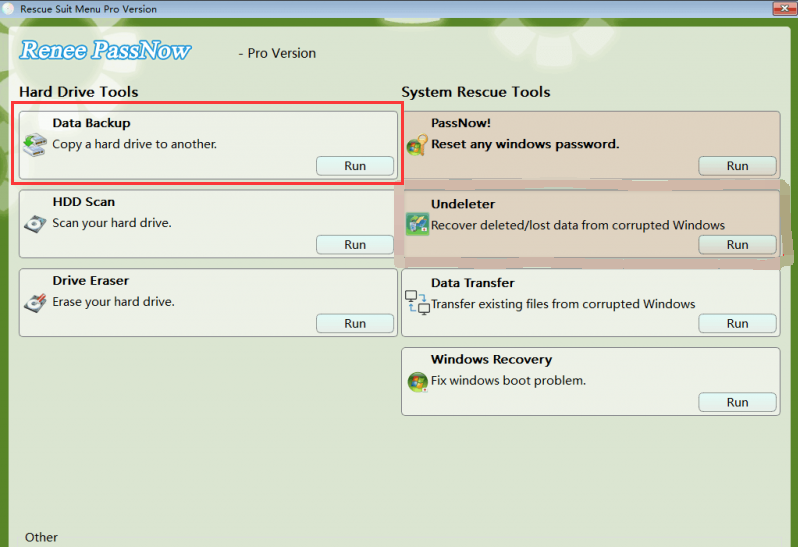
Step 4: Boot the computer from the startup USB drive and access Renee PassNow. Choose the ‘Data Backup’ feature from the menu. This clones the entire hard drive to another drive, which must have a larger capacity to accommodate the backup.
passnow data backup
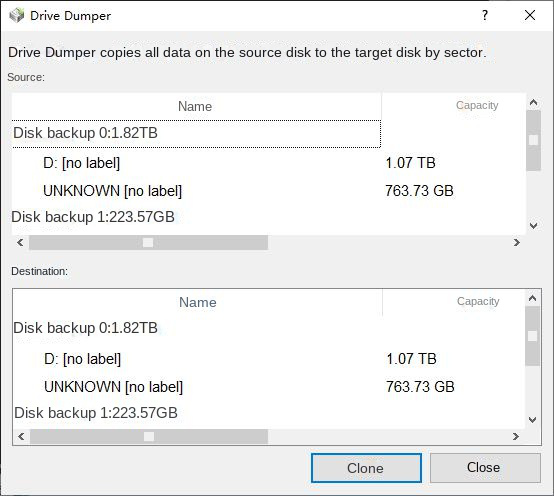
Step 5: Select the hard disk from the source list for backup. Then choose the target hard disk in the destination list, click clone, and wait for the cloning process to complete successfully backing up your computer’s hard disk files.
Select the hard disk that needs to back up and save data
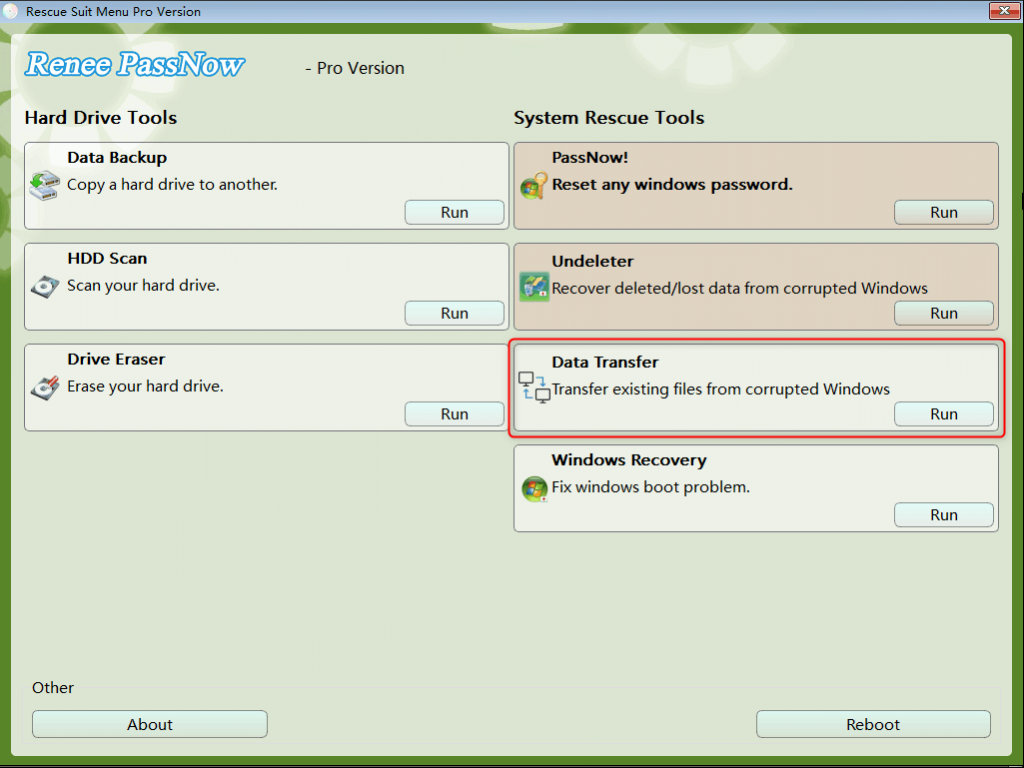
Step 6: For transferring selected crucial data from the hard disk, opt for Data Transfer.
data transfer function in Renee Passnow
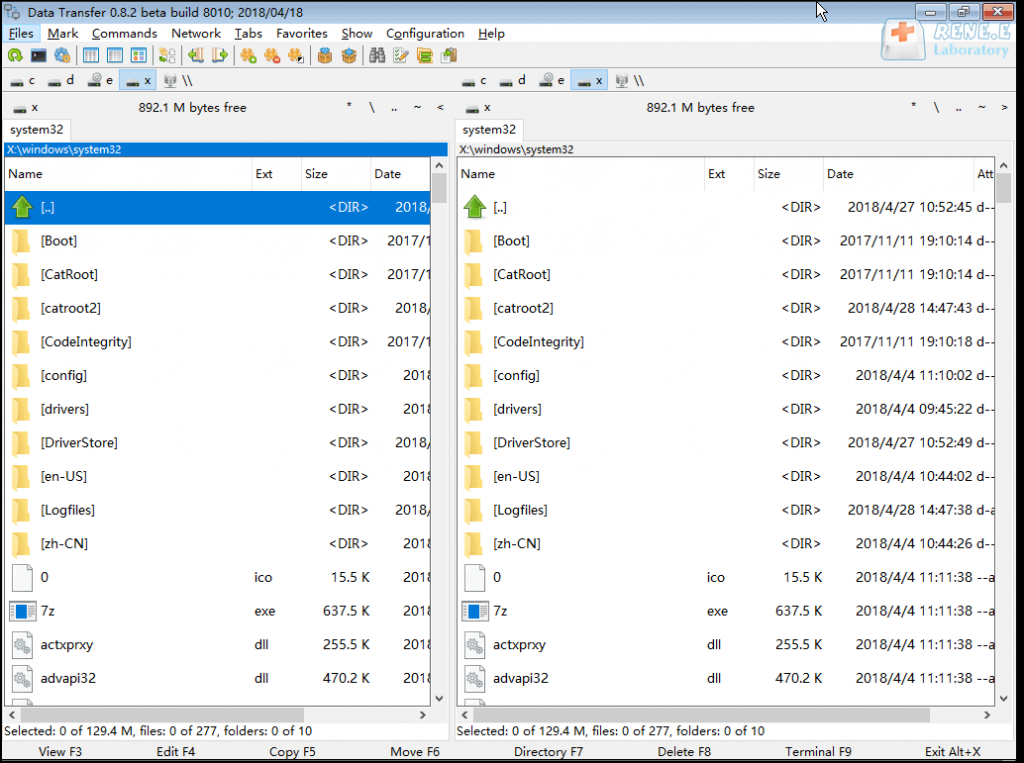
Step 7: Click on the desired disk drive letter (C/D/E/F, etc.) to locate files for transfer, ideally to an external disk for safety. To move data from the C drive to the G drive, select the C drive on the upper left, the G drive on the upper right, choose your files, and then hit the middle Copy function button. This will transfer your disk data seamlessly. To delete a file, select it and press the middle Delete button; remember, deletions are irreversible, so proceed with caution.
data transfer in Renee Passnow
TipsIf you encounter missing files after performing a backup or transferring data, utilize the “Undeleter” feature located on the main interface to begin the data recovery process.
After the important files are backed up, you can try the following solutions.

III. How to solve the system_thread_exception_not_handled (bcmwl63a.sys) blue screen error?

1. Enter safe mode

Windows Safe Mode is a diagnostic startup mode that launches Windows with only essential files and drivers. It facilitates troubleshooting and repair of system errors. To enter Safe Mode, follow these steps:
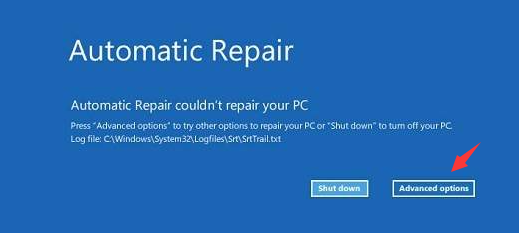
Step 1: Begin the computer’s startup process. Immediately after the Windows logo appears, quickly press the power button to interrupt the boot sequence. Perform this action three times. On your fourth attempt, allow the computer to boot fully. When you see the “Automatic Repair” screen, select (Advanced options) to enter the Windows recovery environment.
automatic Repair
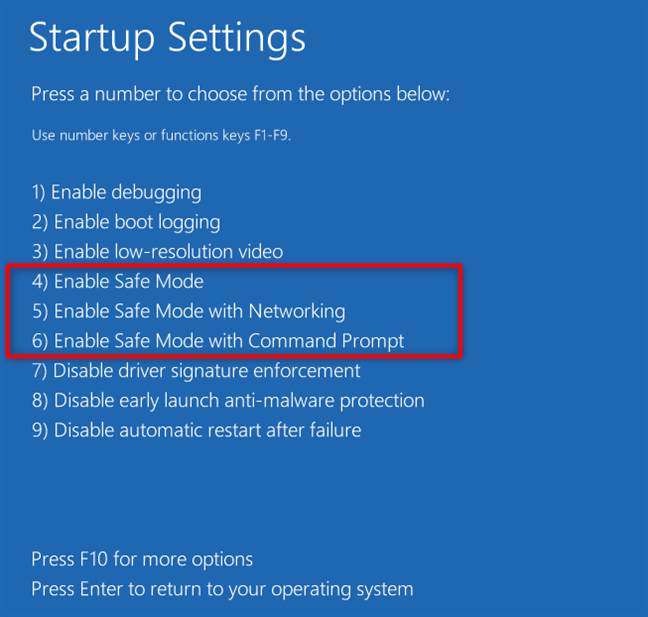
Step 2: In the Windows recovery environment, navigate to Troubleshoot > Advanced Options > Startup Settings > Restart. Upon reboot, press 5 or F5 to boot into Safe Mode with Networking.
startup settings windows 10 safe mode
After enabling safe mode, you can proceed to the following repair operations.

2. Check for driver updates

To resolve the “system_thread_exception_not_handled (bcmwl63a.sys)”  error, first verify the driver’s status. Outdated drivers often cause this issue. Ensure you have the latest version installed. Follow these detailed steps:
Step 1: Simultaneously press Windows+R, type devmgmt.msc in the Run window, and hit Enter to open Device Manager.
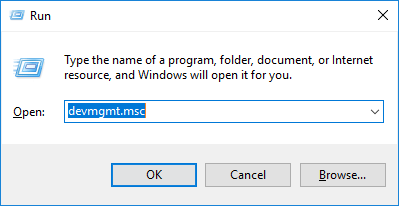
open device manager
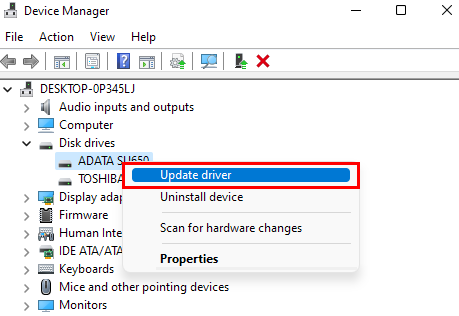
Step 2: In the Device Manager, identify the device marked with a yellow exclamation mark. Right-click on it and select Update Driver > Search automatically for updated driver software. After the driver update, restart your PC to verify if the problem has been resolved.
update driver disk

3. Roll back the driver

If you’ve encountered the “system_thread_exception_not_handled (bcmwl63a.sys)”  error after a recent driver update, reverting to the previous driver version may resolve the issue. Follow these steps to roll back the driver:
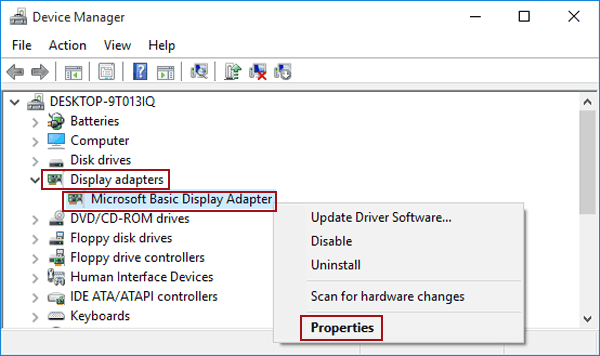
Step 1: Right-click the Start menu, select Device Manager, and double-click on the device that requires the driver update.
display adapter properties windows 10
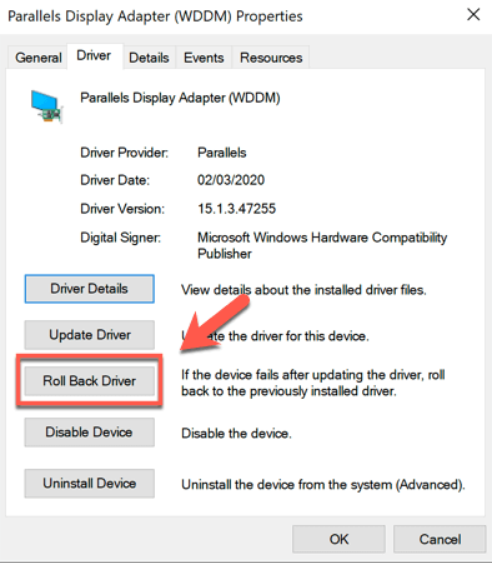
Step 2: Navigate to the Driver tab, click Roll Back Driver, and follow the on-screen instructions. After completion, reboot your computer to verify if the blue screen issue has been resolved.
display adapter properties roll back driver

4. Check hardware memory

If you encounter the “system_thread_exception_not_handled (bcmwl63a.sys)”  error, it may indicate a memory issue on your computer. Memory problems can lead to data loss or system malfunctions. To address this, utilize the Windows Memory Diagnostic tool by following these steps:
Step 1: Simultaneously press Windows+R, type mdsched.exe in the run window to launch the Windows Memory Diagnostic Tool.
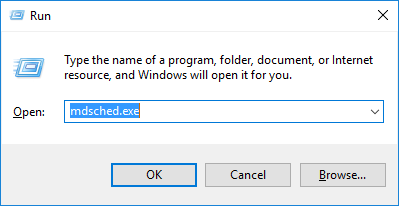
mdshed
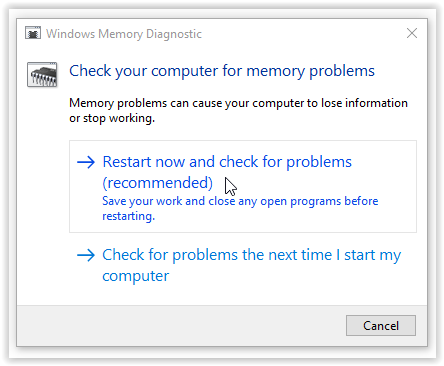
Step 2: Select the “Restart now and check for problems (recommended)” option located in the Windows Memory Diagnostic tool. Permit the diagnostic process to complete, and then restart your computer to assess whether the blue screen issue has been resolved.
check for the memory

5. Use the SFC command to check and repair damaged system files

To scan and repair protected system files, follow these steps:
Step 1: In the lower left search box, type cmd, right-click on Command Prompt, and choose “Run as administrator” to open it.
run as administrator
Step 2: Open the command prompt and type SFC /scannow, then press Enter. The System File Checker will scan and repair corrupted system files. Once complete, reboot your computer to check if the issue has been resolved.
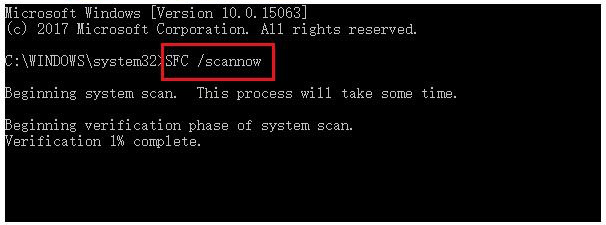
Enter the SFC command