author avatar
    Senior Product Manager
 

Summary
Learn how to fix the "The drive where Windows is installed is locked" error and recover your important data from your computer's hard disk.


the drive where windows is installed is locked

I. What are the reasons for the error The drive where Windows is installed is locked ?

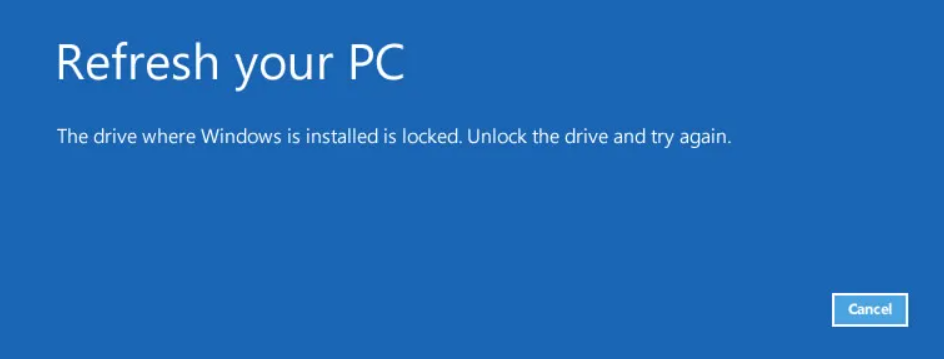
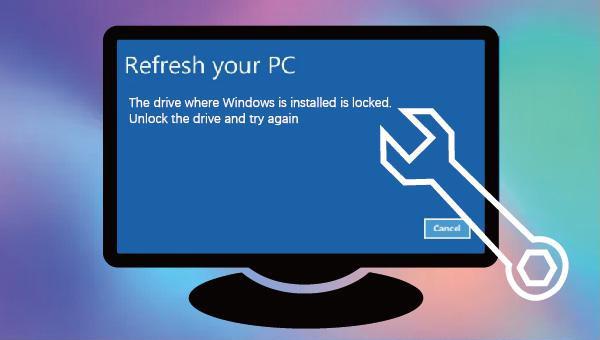
The system presents an error message stating, “The drive where Windows is installed is locked. Unlock the drive and try again.” This issue can be categorized into the following reasons:
The drive where Windows is installed is locked

Reason 1: Bitlocker boot agent is disabled

The primary reason for this problem is the utilization of Windows Bitlocker encryption. Bitlocker is a comprehensive encryption tool that safeguards user data, but it necessitates the installation of the Bitlocker boot agent. When starting up, the Bitlocker boot agent can unlock Windows drives before the operating system loads, whether it be Windows 7, 8, or 10. This error message may manifest if the Bitlocker boot agent is deactivated, or if there is a third-party bootloader or malware disrupting the boot process.

Cause 2: The TPM has been cleared or reset

BiBitLocker has the option to utilize the hardware encryption chip that is commonly found in modern PCs and laptops. This chip, known as TPM (Trusted Platform Module), is responsible for managing the encryption keys used for data protection. However, if the user manually clears the TPM in the BIOS or performs a firmware upgrade during the system’s upgrade process, it can result in the keys stored in the TPM being erased and causing the system to fail to boot.

Reason 3: The BCD file is corrupted

BCD (Boot Configuration Data) files that contain Windows system boot configuration parameters are a very important part of the boot process. If this file is corrupted, the boot process will stop and the titled failure message will appear.
In reality, regardless of the cause of the failure prompt mentioned above, the crucial step when unable to access the computer is to transfer the data stored on the device. The following will outline the process of transferring data in the event of system failure, without having to enter the Windows operating system.

II. How to use Renee Passnow to transfer data?

1. What is Renee Passnow?

Renee PassNow is a professional system rescue software, it can help Windows users Clear Windows account password, create a new administrator account; restore disk/memory card data, restore data after hard disk formatting; transfer disk files; erase or scan disk files, etc. In addition, this software also supports repairing Windows system problems, such as: repairing MBR boot records, DBR error parameters, 0xc00000e, Windows system startup failure, and some problems that cause black screen or blue screen, etc. As a system rescue tool with various functions, it is perfectly compatible with multiple systems including Windows 10/8.1/8/7/XP/Vista, and can meet the system rescue needs of different users.
Hot Topic - ADsRenee PassNow – 3 Steps to transfer data from the crashed system

Easy to use 3 steps to transfer the files.

Transfer the files Transfer the important files of the computer without system.

Preview the files Preview the files while transferring the data.

Multifuctional Data recovery, Windows password reset, bootable problem recovery can be run without system.

Highly compatible Windows 10/8.1/8/7/XP/Vista. Also supports UEFI boot mode.

Easy to use 3 steps to transfer the files.

Transfer the files Transfer the important files of the computer without system.

Preview the files Preview the files while transferring the data.

Free TrialFree TrialNow 2000 people have downloaded!

2. How to transfer data using Renee Passnow

Transferring data files with Renee Passnow is incredibly easy, even for those who may not be as familiar with computers. In just a matter of minutes, you can learn how to navigate the process with ease. Let’s explore the steps in detail together.
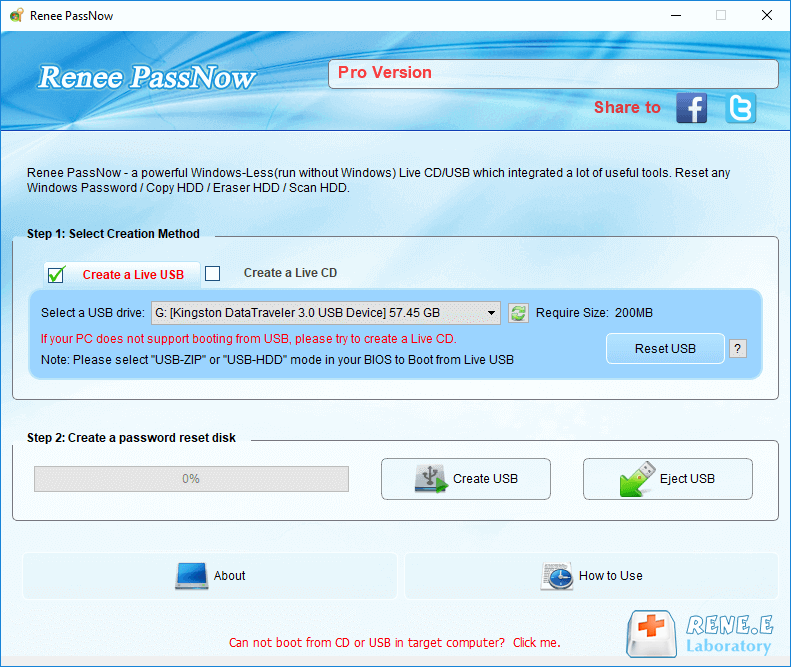
Step 1: Download and install Renee PassNow on another computer that can log in and run normally, then connect the USB disk to the PC.

Please select the (Create a Live USB) option under “Step 1: Select creation method” in the main interface.

Note: Before performing this operation, please make sure that the important files in the USB disk have been saved in other locations because the operation will delete all the data in the USB disk.

create a boot media with renee passnow
Step 2: Next, select (x64) or (x86) according to the system type, click the (Download Now) button to download the ISO file, and click the (Create USB) button. After the file is downloaded, click the (Eject USB) button.
use renee passnow to create usb to reset passnword
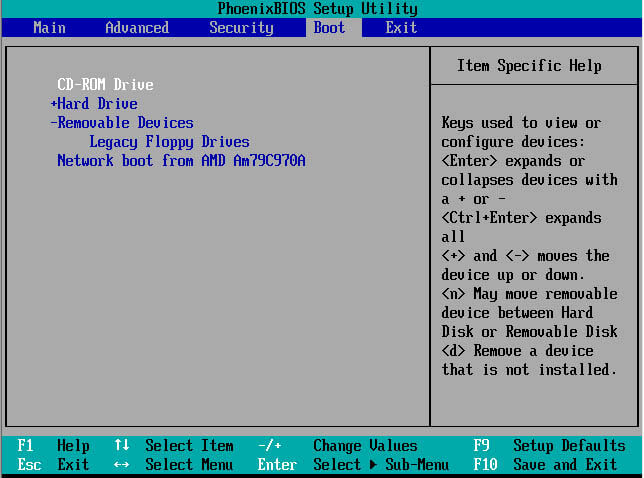
Step 3: Connect the boot media to the computer, turn on the computer, and then press the shortcut key to enter the BIOS. In the BIOS (Boot) interface, set the USB device or CD-ROM drive as the preferred boot item, then save and exit. Please refer to How to enter BIOS and modify the boot sequence.
Note: If you create a rescue USB disk, select (Removable Devices) as the first boot item, and if you create a rescue CD, select (CD-ROM Drive) as the first boot item.
change boot order in BIOS menu
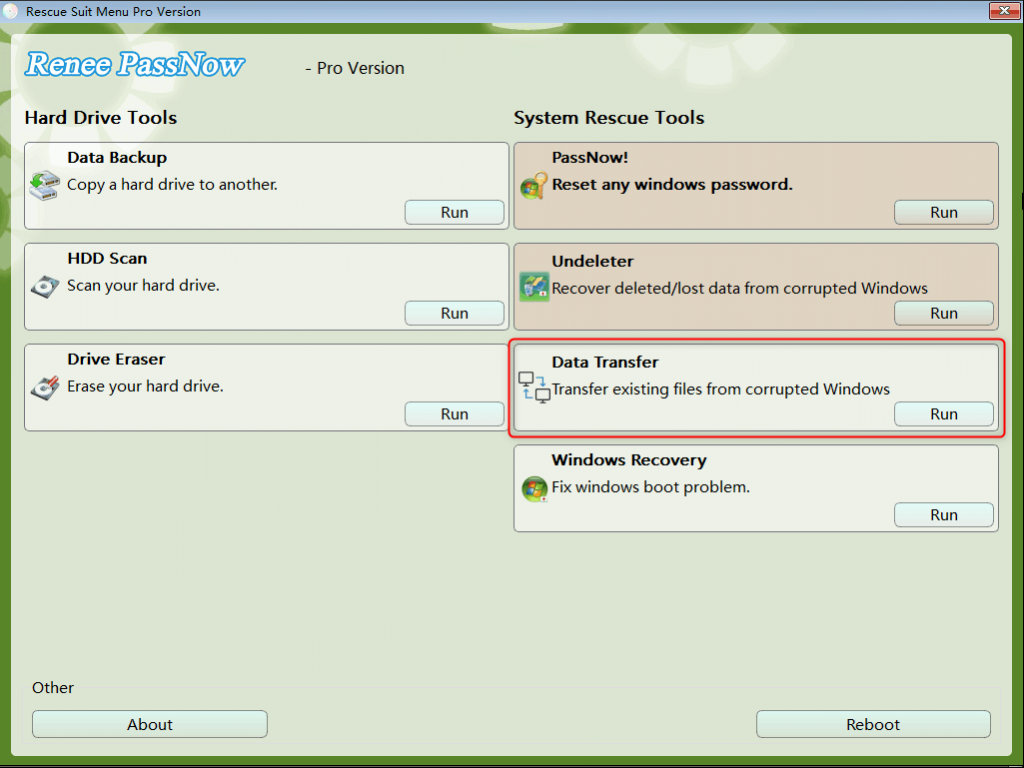
Step 4: Wait for a while, after Renee Passnow is loaded, select the (Data Transfer) option.
data transfer function in Renee Passnow
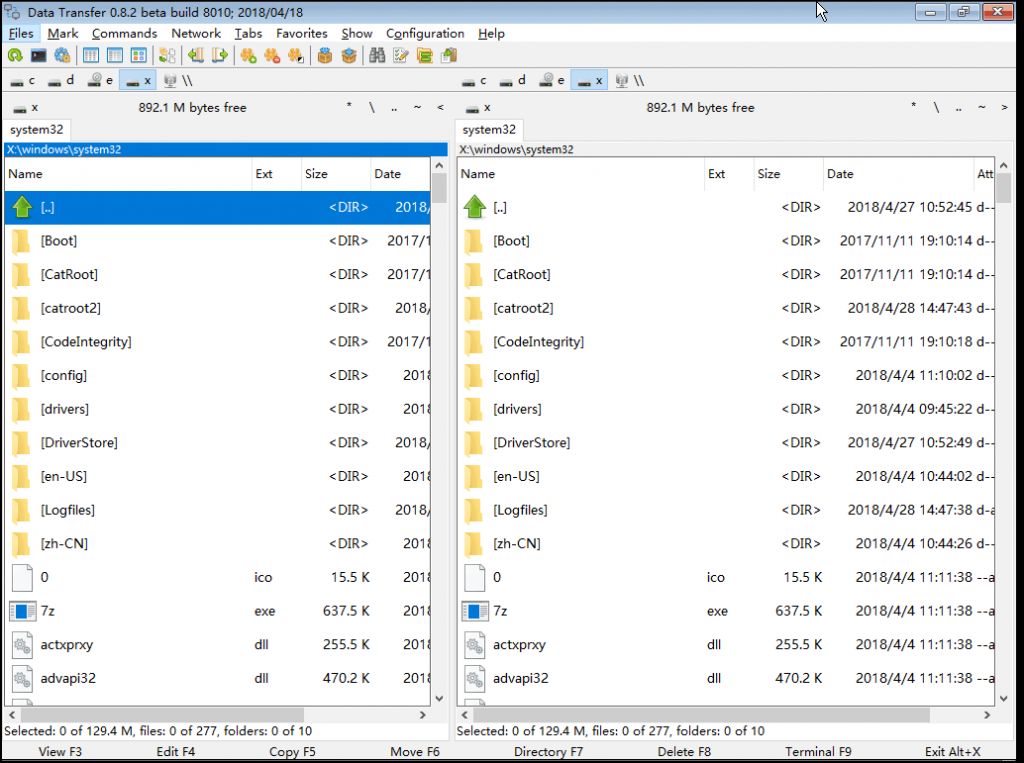
Step 5: In the pop-up interface, select the original hard disk and the target hard disk respectively. Directly drag and drop the files to the target hard disk so you can quickly transfer the data.
run data transfer function in renee passnow

III. How to fix the error message The drive where Windows is installed is locked ?

1. Fix errors with the help of SFC commands

SFC command is a Command Prompt command that can be used to verify and replace important Windows system files. Many troubleshooting procedures can also be performed using SFC commands.
You can also view more sfc command introductions.
Specific steps are as follows:
Step 1: Firstly, download the Windows 10 Media Creation Tool from Microsoft’s official website, and create the Windows installation media (USB flash drive or DVD). Download address: https://www.microsoft.com/zh-cn/software-download/windows10. Click here and view how to create a Windows installation media.
Step 2: After the Windows installation medium is created, set the Windows installation medium (USB or DVD) as the first boot item in the computer BIOS settings.

Please refer to How to enter BIOS and modify the boot sequence. Next, use the Windows 10 installation media to boot the computer, and click (Next) on the interface to select the Windows installation language, time, and keyboard.
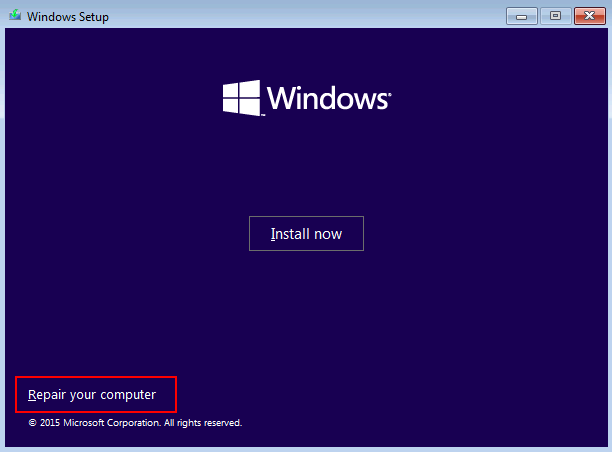
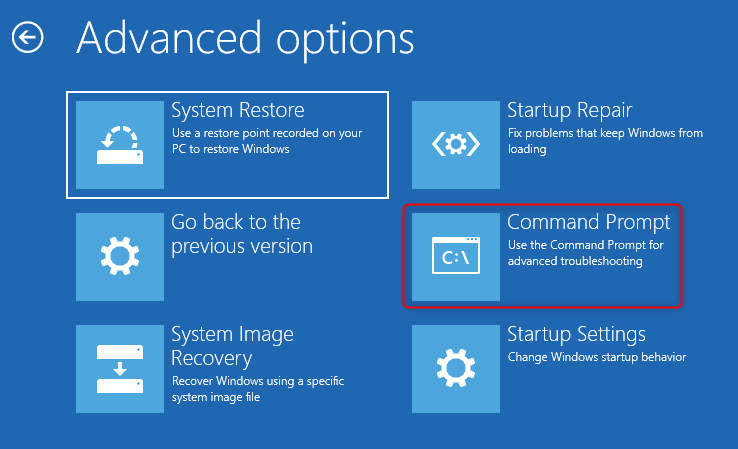
Step 3: Click the (Repair your computer) option in the lower left corner, then navigate to (Troubleshoot) > (Advanced Options) > (Command Prompt).
Repair your computer
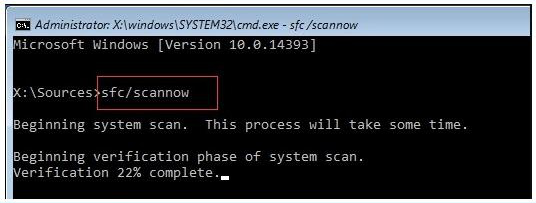
Step 4: Next, in the command prompt, type the command (sfc /scannow) and press the (Enter) key.
type recovery command

2. Repair with the help of the bootrec command

If the above methods cannot fix the error “The drive where Windows is installed is locked”, you can also use the bootrec command to fix it. The specific steps are as follows:
Step 1: Click the (Cancel) button on the “The drive where Windows is installed is locked” error interface. After that, find and click on the (Troubleshoot) option, next select (Advanced Options) > (Command Prompt).
command prompt
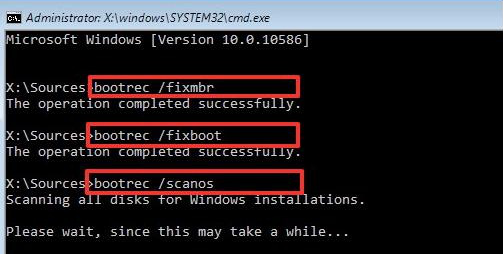
Step 2: After that, enter the following commands sequentially in the Command Prompt:
Input bootrec /FixMbr, and then press Enter.
Input bootrec /fixboot , and then press Enter.
Input bootrec /ScanOs , and then press Enter.
bootrec command
retype ( bootrec /RebuildBcd) , and then press Enter. The following prompts may appear afterwards:
Total identified Windows installations: 1

[1] D:\Windows

Add installation to boot list? Yes<Y>/No<N>/All<A>
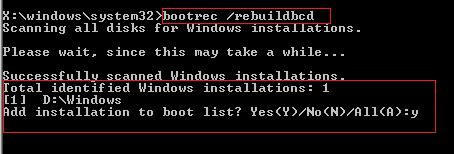
Please type (Y) and press (Enter) to continue the repair process. After repairing, type (Exit) and press (Enter) to exit. Finally, restart the computer to see if the problem is resolved.
Add installation to boot list prompt