author avatar
    Senior Product Manager
 

Summary
Uncover the reasons for the request failed due to a fatal device hardware error on hard disks and explore reliable solutions in our comprehensive guide.


the request failed due to a fatal device hardware error

I. What are the reasons for the error A fatal error occurred in the device hardware, which caused the request to fail ?

When the error shown in the title occurs when you are using a hard disk device, it is usually caused by the following reasons:
● The USB connection is loose or the line is faulty
● Too many bad sectors on the hard disk
● System or hardware failure
● The hard disk is severely damaged
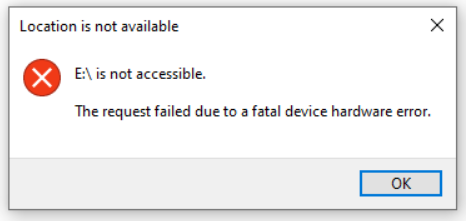
the request failed due to a fatal device hardware error
When the error message “The request failed due to a fatal device hardware” error message appears, it means that you have been unable to access the data in it normally. Repair failed hard drives.

II. Use Renee Undeleter to recover files from failed hard drives

To retrieve crucial data from your hard disk, we suggest utilizing Renee Undeleter, a professional data recovery tool.

1. What is Renee Undeleter?

Renee Undeleter is a comprehensive data recovery software designed to retrieve various data files lost due to accidental deletion, recycle bin clearance, or disk formatting. It features four key modules: Fast Partition Scan, Whole Partition Scan, Whole Disk Scan, and Image Creation, offering a versatile solution to a wide range of data loss scenarios.
Hot Topic - ADsRenee Undeleter – Simple & Powerful Software for Data Recovery

Easy to use Recover data by 3 steps;

Multiple scan modes Fast partition scan, whole partition scan and whole disk scan;

Supported file types Image, video, audio, text, email and so on;

Image creation Create a partition image to read and back up data;

Supported devices SD card, SDHC, SDXC, USB flash drive, hard disk and computer.

Easy to use Recover data by 3 steps;

Multiple scan modes Fast partition/whole partition/whole disk scan;

Supported devices SD card/USB/hard disk.

Free TrialFree TrialFree Trial 800 people have downloaded!

2. How to recover hard disk data with Renee Undeleter?

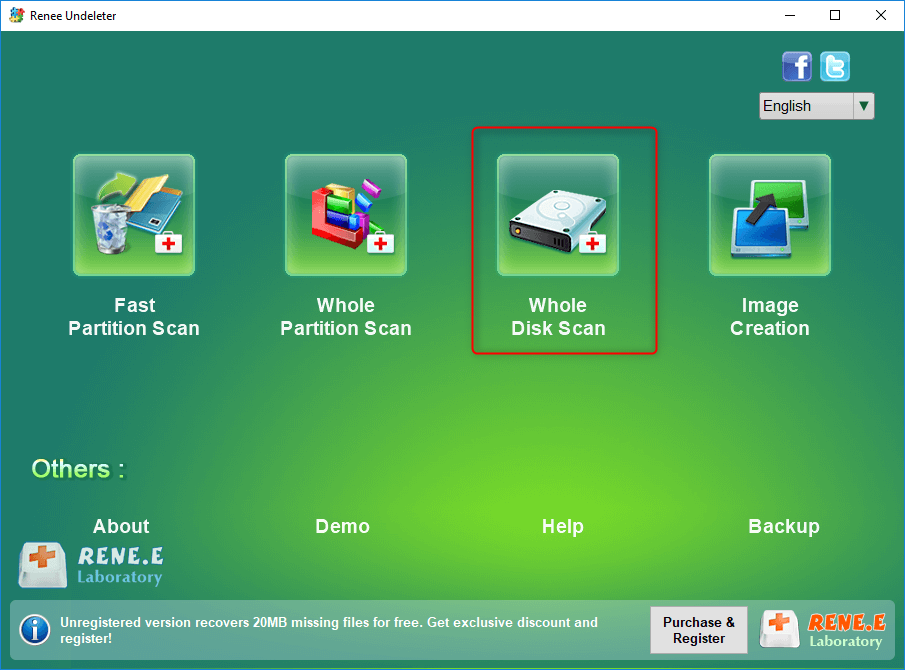
Step 1: Download and install Renee Undeleter. Launch the program and select “Whole Disk Scan” from the main menu.
Note: Do not install on the disk that needs to restore data, so as not to cause data overwriting.
elect whole disk scan in renee undeleter
Data recovery function:

  • Fast Partition Scan – Quickly retrieve files lost due to accidental deletion or emptying the recycle bin.
  • Whole Partition Scan – Quickly recover files lost due to inaccessible or formatted partitions.
  • Whole Disk Scan – Analyze and get partition information and perform a full scan of the entire partition.
  • Image Creation – You can create a mirror image for a partition to back up the current partition state.
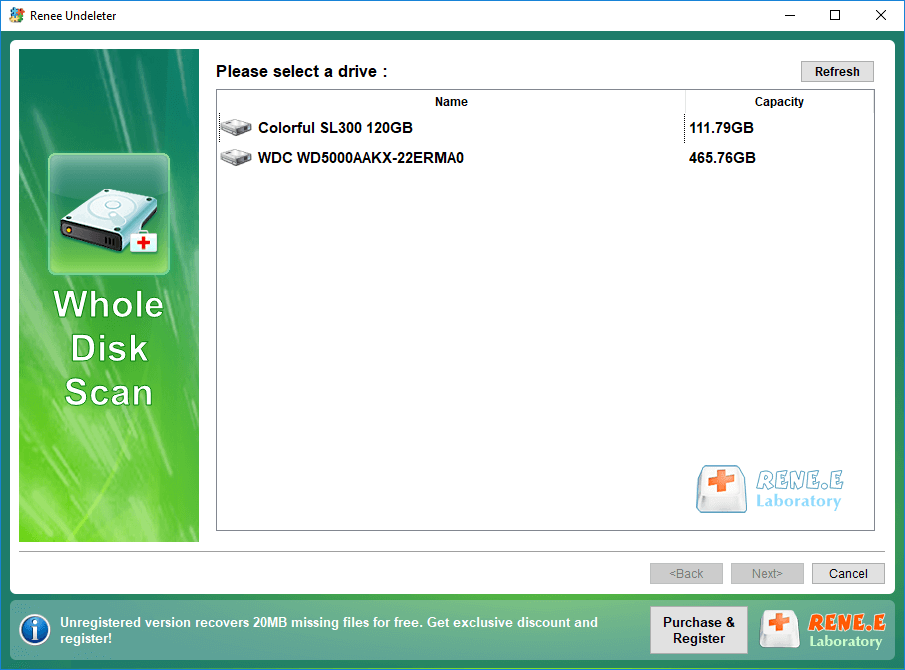
Step 2: Select the hard disk for scanning and click Next. Choose Default Setting in the advanced settings interface.
select a disk to recover in renee undeleter
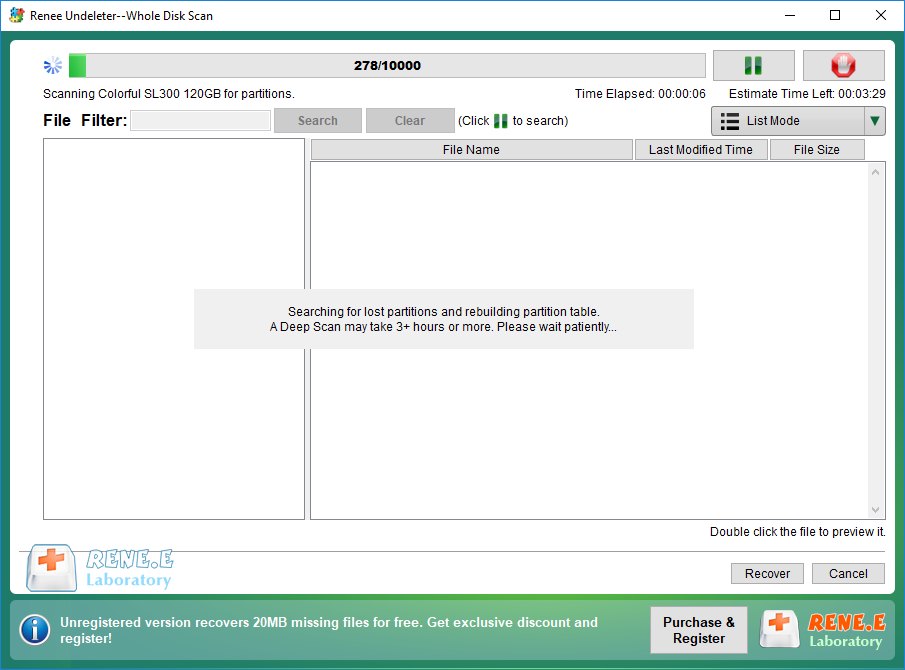
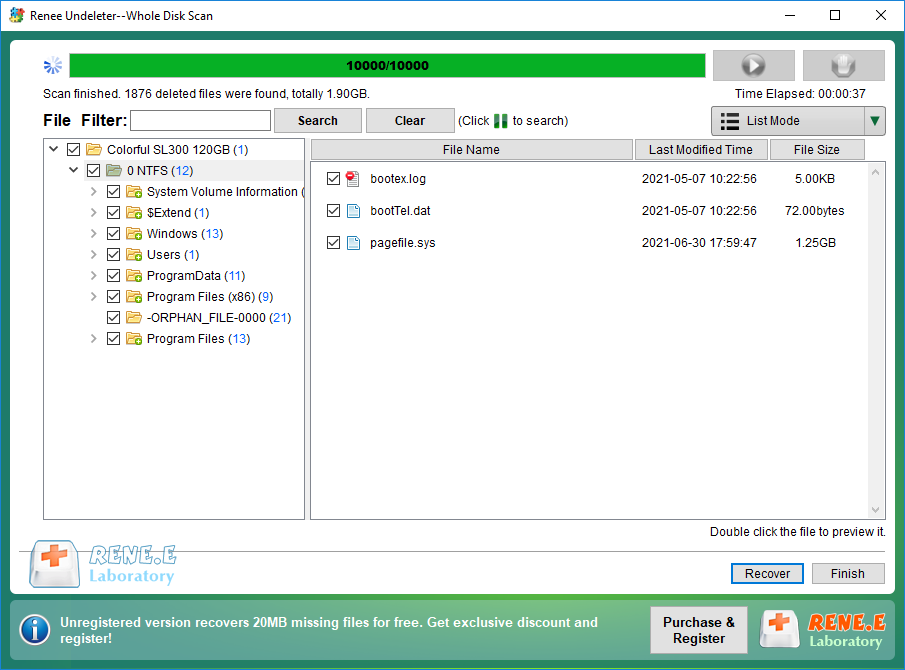
Step 3: The software will commence analysis of the hard disk. Should a prompt titled Select the partition you need to scan emerge, select the necessary partition. In the absence of a specific selection, the software will perform a comprehensive scan of all partitions, which will prolong the scan time.
scanning the whole disk in renee undeleter
After completing the scan, preview the files in the right-hand window, select the desired files for recovery, and click on the ‘Recover’ button located in the lower right to begin the restoration process.
select taget files to recover with renee undeleter
Step 4: Select the target folder and click Browse to choose the storage path for the file. Click Recover to initiate the file recovery process. Please wait patiently.

Notice: Avoid saving the recovered files to the original disk to prevent data overwriting. Instead, save them to a different disk.
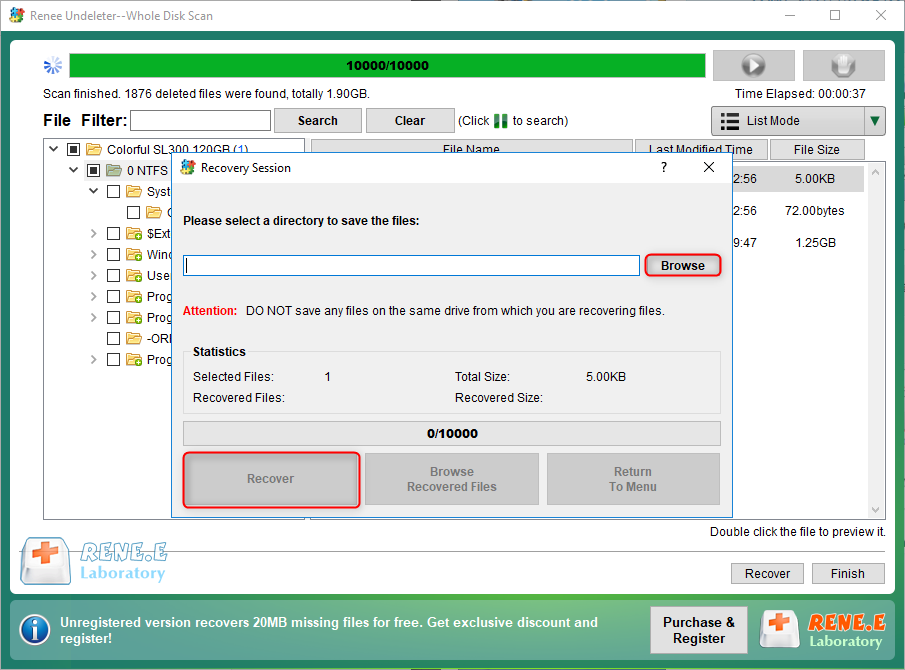
recover files from whole disk scan with renee undeleter

III. How to fix the failure of The device hardware has a fatal error, which caused the request to fail ?

1. Verify hard drive using SMART attributes

Windows incorporates a built-in SMART analysis tool to evaluate the health of hard drives and SSDs by examining various device parameters. Should the analysis yield a status of “Bad,” “Warning,” or “Unknown,” this signals a potential risk of device failure. It is essential to promptly transfer your data or adhere to the instructions provided in the second part to backup your data to an alternative storage medium prior to contemplating the replacement of the device.
Specific steps are as follows:
Step 1: If you’re working with an external hard disk, ensure it’s connected to your computer. If the hard disk is internal, proceed to the next step. Press Windows key + S, type “cmd” into the search bar, then right-click on Command Prompt and select “Run as administrator” to open the utility.
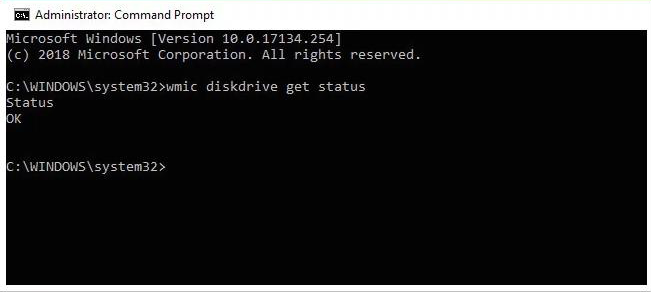
Step 2: In the opened command prompt window, type wmic diskdrive get status and press Enter.
Step 3: After running the command, you will receive one of four possible statuses: (OK), (Bad), (Unknown), or (Caution). Should you encounter any of the latter three statuses, follow the recommended procedures to resolve hard disk issues.
Execute the fault detection command

2. Check and repair bad sectors

To ensure the integrity and reliability of your data, it’s crucial to check and repair file systems and hard disk bad sectors. Assuming that the hard disk is still functional and not completely overrun by bad sectors, adhere to the following procedures:
Step 1: If the hard disk is external, connect it to the computer using the appropriate interface cable. For an internal hard disk, no additional connection is required.
Step 2: In the lower left corner, type cmd into the search box and select Run as administrator to open the Command Prompt.
run as administrator
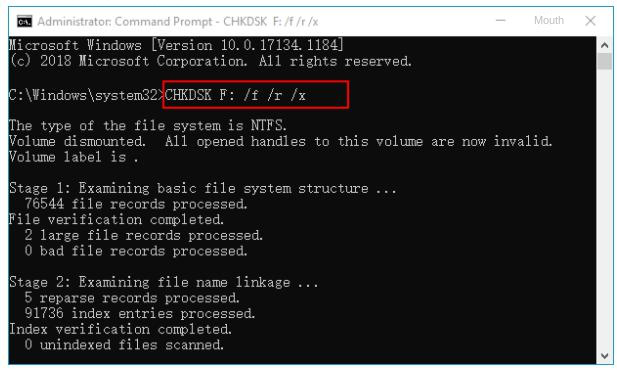
Step 3: Open the command prompt and type chkdsk F: /f /r /x, replacing “F” with your actual disk number. This command attempts to fix errors (/f), force unmount the drive (/x), and locate and recover bad sectors (/r). Press Enter to start the repair process. Once complete, verify if the device functions properly.
Enter the disk repair command