author avatar
    Technology Manager of Test Dept.
 

Summary
Learn how to recover the file on USB drive unallocated and make it useable again with our helpful solutions. Don't lose important files and follow our guide.


How to recover data on USB drive unallocated

I. What is the reason why the USB disk shows unallocated?

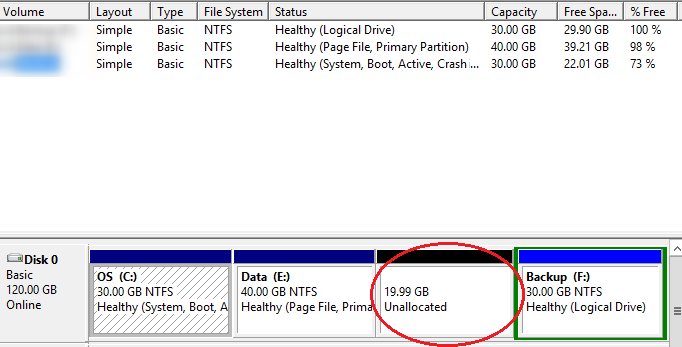
The status of the USB disk, including file system, capacity, and other information, can be easily viewed in disk management. If the USB disk appears as “unallocated” in Windows disk management, possible reasons include:
● Accidentally delete the partition of the USB flash drive while cleaning up a specific partition.
● Virus attack.
● File system error or device failure.
unallocated disk space

II. How to recover data from unallocated USB disk?

When the USB disk shows unallocated in Windows File Explorer, it is recommended to use professional data recovery software like Renee Undeleter to scan and restore the data.

1. What is Renee Undeleter?

Renee Undeleter is a software designed to restore data files that have been accidentally deleted, lost due to emptying the recycle bin, formatting disk/memory card/USB disk, or deleting disk partitions. It offers four functional modules for file recovery, formatting recovery, partition recovery, and image creation to help solve various data loss issues.
Renee Undeleter - User friendly & Helpful Formatted Data Recovery Software

Easy to use 3 steps to recover formatted data back.

Multi Recovery Modes File recovery, Whole partition recovery and Whole disk recover are available.

Support Different File Types Photos, videos, audios, files, emails, etc.

Image Creation Creat image for disk or parititon.

Compatible with Different Devices SD card, SDHC, SDXC, USB disk, computer, etc.

Easy to go 3 steps for whole recovery.

Multi Recovery Modes Files/partition/disk recovery modes.

Support Different Devices SD card/USB disk/hard disk, etc.
Free TrialFree TrialFree Trial 800 users have downloaded and found data back!

2. How to use Renee Undeleter to restore unallocated USB disk data?

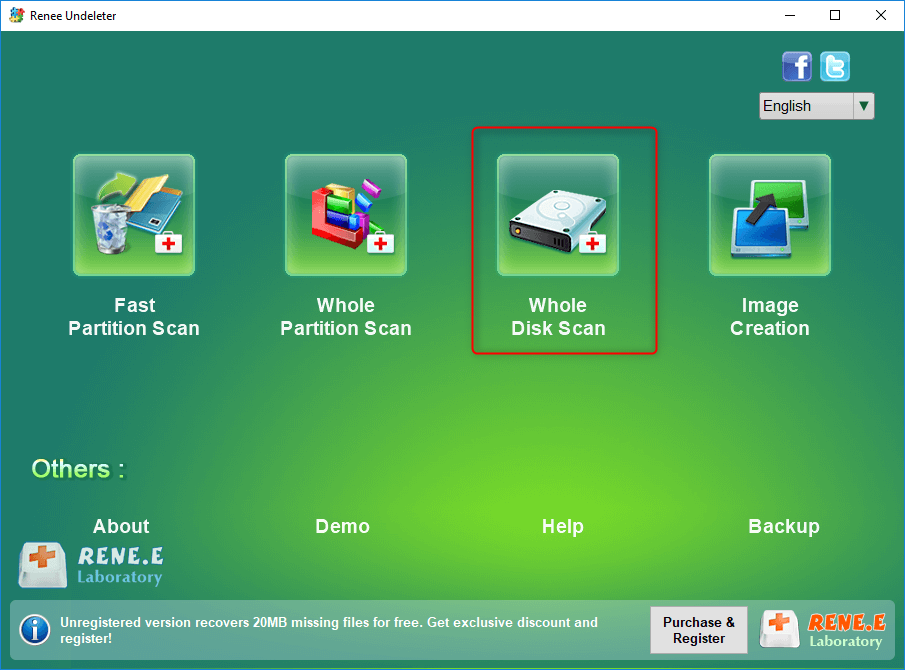
Step 1: Connect the USB disk to the computer, download and install Renee Undeleter, run the program, and select the Whole Disk Scan option to scan for all partition data, including “unallocated” space.
Note: Do not install Renee Undeleter in the disk where data is lost to avoid data overwriting.
elect whole disk scan in renee undeleter
Data recovery function:
Fast Partition Scan – Quickly retrieve files lost due to accidental deletion or emptying the recycle bin.
Whole Partition Scan – Quickly recover files lost due to inaccessible or formatted partitions.
Whole Disk Scan – Analyze and get partition information and perform a full scan of the entire partition.
Image Creation – You can create a mirror image for a partition to back up the current partition state.
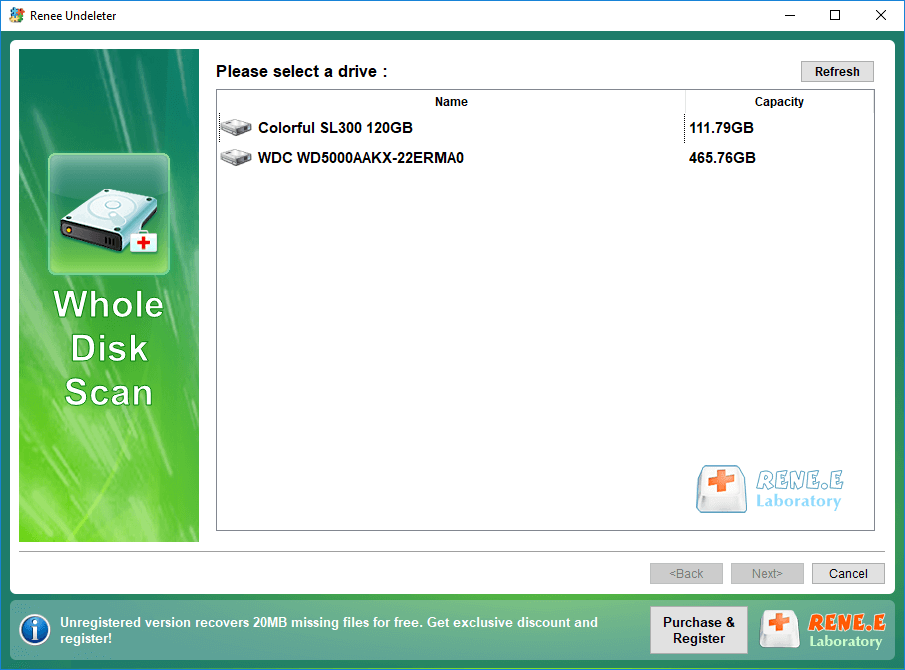
Step 2: Select the device that needs to recover data and click (Next).
select a disk to recover in renee undeleter
Step 3: Please wait patiently for the scan to find all partitions on the USB disk. A window will pop up allowing you to select a specific partition to scan. If not selected, all partitions will be scanned automatically, resulting in a longer process but more files can be found.
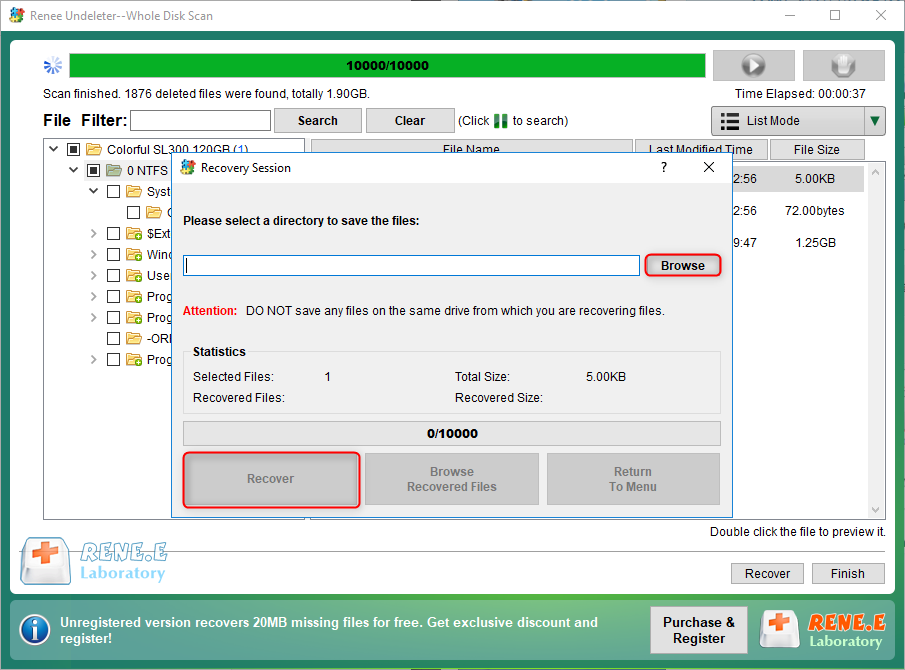
Step 4: Double-click to preview files during scanning. Check required files, then click (Recover) to restore to other disks.
recover files from whole disk scan with renee undeleter

III. How to repair the unallocated USB disk so that it can be used normally?

1. Create a new simple volume in Disk Management

Creating a simple volume is equivalent to rebuilding a partition, allowing the USB disk to work normally for storing and accessing files.
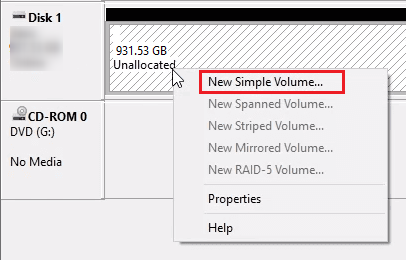
Step 1: Right-click the (Start) menu, select (Disk Management), find the USB disk, right-click the unallocated space, and select (New Simple Volume).
create simple volume for SD card
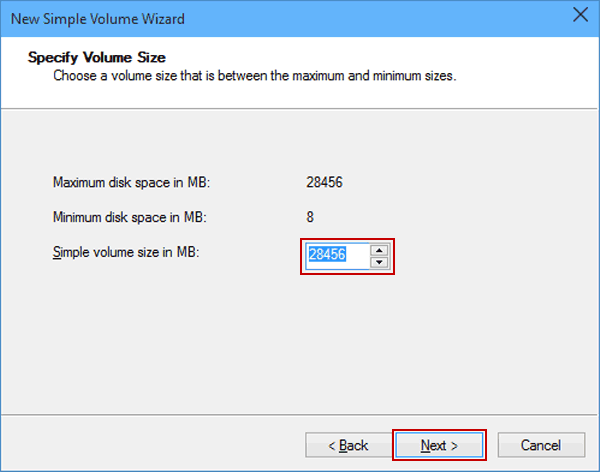
Step 2: In the new simple volume wizard, set the simple volume size (that is, the partition size), and then click (Next).
set the volume size in new simple volume wizard
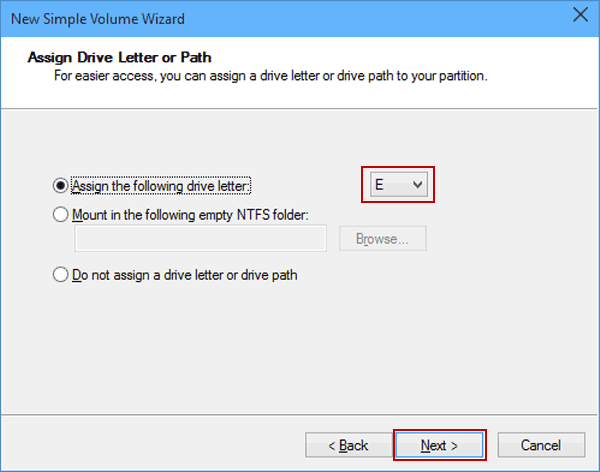
Step 3: Next, select the drive letter for the USB disk, and click (Next).
assign a drive letter for the new volume
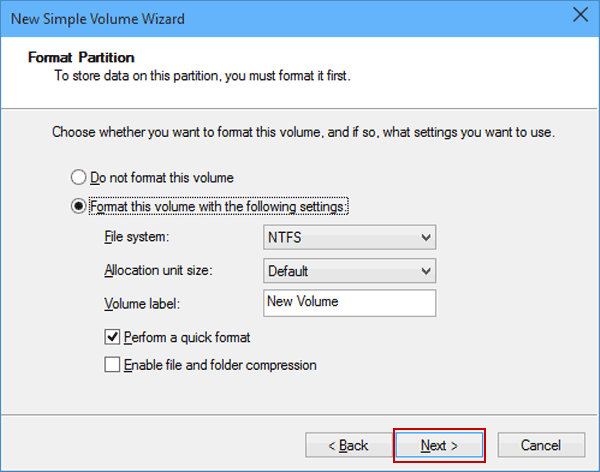
Step 4: Select the file system. For USB flash drives, FAT32 and exFAT file systems are more suitable. If you don’t know which file system to choose, you can check: Features and differences of FAT32, exFAT and NTFS file systems. Select the default value in “Allocation Unit Size“, and set the partition name in “Volume Label“. Then select the (Perform a quick format) option and click (Next). Finally, just click (Finish).
format the volume with the settings

2. Use the Windows system disk error checking function

If a USB disk suddenly becomes unallocated, it may be due to a faulty or damaged disk. You can check and repair it by rebuilding the partition using the disk error checking function in Windows.
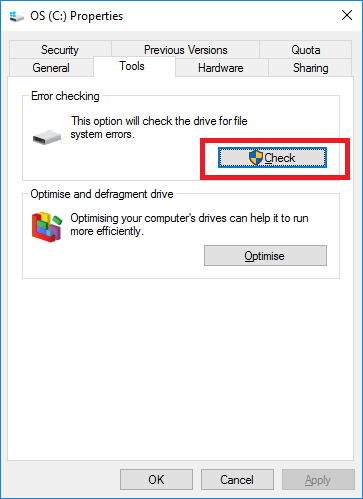
Step 1: Connect the USB flash drive to the computer, open “My Computer/This PC”, right-click the USB flash drive, and select (Properties). Switch to the (Tools) option in the Properties window and click the (Check) button.
check disk
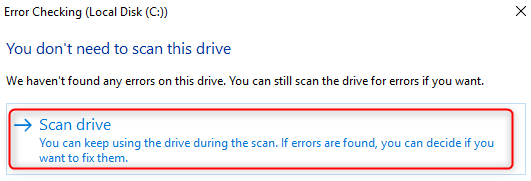
Step 2: Next, select the (Scan drive) option in the Error Checking interface.
scan drive on Windows 8/10

3. Use the chkdsk command to repair the USB disk

In addition to disk error checking, the chkdsk command can repair USB disk failures. Chkdsk stands for Microsoft Check Disk and is used to scan file system integrity and repair errors, as well as scan and repair bad sectors on the disk.
Step 1: Search (cmd) in the search box in the lower left corner, and select (Run as administrator) to open the command prompt.
run as administrator
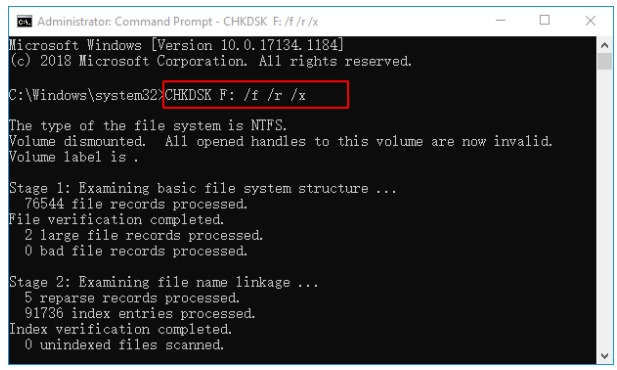
Step 2: Enter the (chkdsk F: /f /r /x) command in the command prompt and press the (Enter) key to check and fix USB disk errors.
Chkdsk checks a volume’s file system and metadata for errors on the F: drive letter. /f will fix errors, /r will find bad sectors and restore readable info, and /x will forcefully dismount the volume if needed.
chkdsk F: /f /r /x