author avatar
    Senior Product Manager
 

Summary
Learn how to solve the issue wd external hard drive not recognized by your computer. This article provides possible causes and solutions.
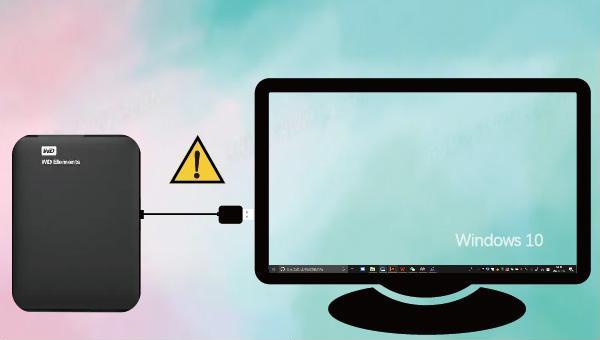

wd external hard drive not recognized

I. What is a WD external hard disk, and what are the reasons why the hard disk cannot be recognized?

Western Digital Hard Drive (WD) is produced by Western Digital Corporation, a renowned American hard disk manufacturer founded in 1970. The company started designing and producing hard disks in 1988 and is headquartered in Lake Forest, California. As one of the oldest hard disk manufacturers and a founder of the IDE interface, WD is known for its high-performance, low-power consumption external hard disks, making them popular among users.
When using the WD external hard disk, why can’t it be recognized and the indicator light is flashing? Let’s explore the possible reasons for this issue.
Malware or programs in the system can cause the WD external hard disk to fail. Use anti-virus software to scan and remove threats, then use the system’s disk inspection tool to detect and repair.
● The USB port or cable is damaged. It is recommended to replace the USB port or data cable and try again.
● WD external hard disk does not have a drive letter.
● Hard disk partition problems, such as hard disk partitions suddenly disappear and become unallocated space.
Regardless of why the WD external hard disk isn’t working, try these methods to resolve the issue.

II. How to solve the problem that the WD external hard drive cannot be recognized and the indicator light flashes?

1. Create a new partition for the WD external hard disk

When the WD external hard disk partition disappears and becomes unallocated space, it cannot be found in the file explorer. To resolve this, create a new partition for the unallocated space in disk management as follows:
Step 1: Press the (Windows+X) keys on the keyboard at the same time. Then in the pop-up list, select the (Disk Management) option.
open windows disk management
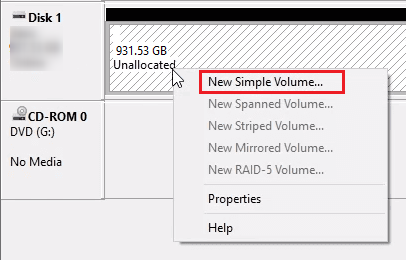
Step 2: Right-click on the unallocated space on the WD external hard drive and select the (New Simple Volume) option.
create simple volume for SD card
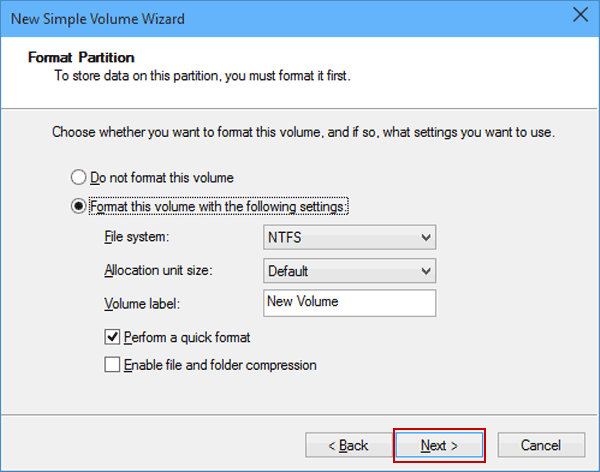
Step 3: Customize the partition size, drive letter, file system (NTFS, exFAT, FAT32), and other parameters. After setting, click Finish to complete the partition creation. To create multiple partitions, repeat the steps.
Tips: If the external hard disk is only used on Windows, you can choose the NTFS file system, while the Mac system can only read the files in the NTFS hard disk, but cannot write. You need to install third-party software. If you need to use it on both Windows and Mac systems, you can also choose the exFAT file system.
select file system
Experiencing sudden partition disappearance, which renders it unallocated, can lead to data loss. After creating a new partition, it is advisable to utilize professional data recovery software to reclaim the lost data. We recommend Renee Undeleter. Let’s delve into this software and explore its usage.
What is Renee Undeleter?
Renee Undeleter is software designed to restore various data files. Whether you accidentally delete important files, empty the Recycle Bin, or format the disk/storage, this tool can retrieve the lost data. It includes four functional modules: Fast Partition Scan, Whole Partition Scan, Whole Disk Scan, and Image Creation, addressing all potential data loss issues comprehensively and conveniently.
Hot Topic - ADsRenee Undeleter – Simple & Powerful Software for Data Recovery

Easy to use Recover data by 3 steps;

Multiple scan modes Fast partition scan, whole partition scan and whole disk scan;

Supported file types Image, video, audio, text, email and so on;

Image creation Create a partition image to read and back up data;

Supported devices SD card, SDHC, SDXC, USB flash drive, hard disk and computer.

Easy to use Recover data by 3 steps;

Multiple scan modes Fast partition/whole partition/whole disk scan;

Supported devices SD card/USB/hard disk.

Free TrialFree TrialFree Trial 800 people have downloaded!
How to use Renee Undeleter to recover hard disk data?
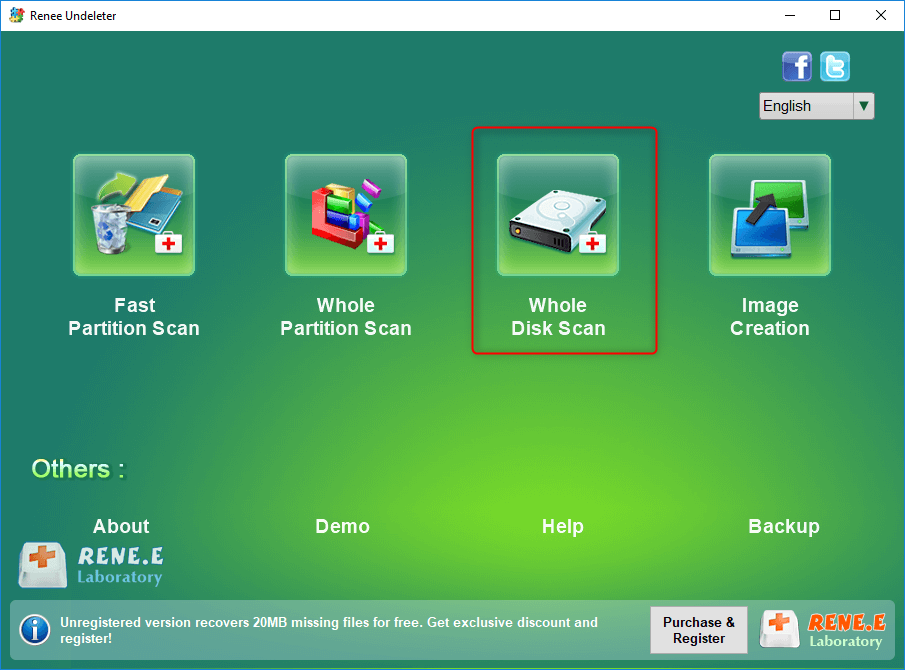
Step 1: Download, install, and run Renee Undeleter. Select the (Whole Disk Scan) option on the main interface.
Note: Do not install on the disk that needs to restore data, so as not to cause data overwriting.
select whole disk scan in renee undeleter
Data Recovery Function:

  • Fast Partition Scan – Quickly retrieve files lost due to accidental deletion or emptying the recycle bin.
  • Whole Partition Scan – Recover files from inaccessible or formatted partitions.
  • Whole Disk Scan – Analyze partition information and fully scan the entire disk.
  • Image Creation – Create an image of a partition to back up its current state.
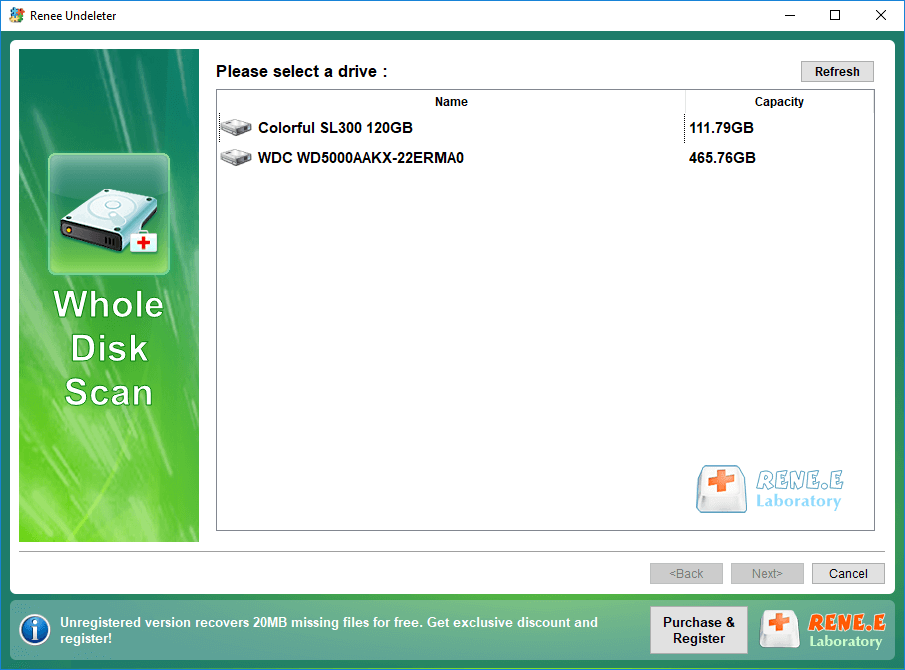
Step 2: Select the external hard disk and click (Next).
select a disk to recover in renee undeleter
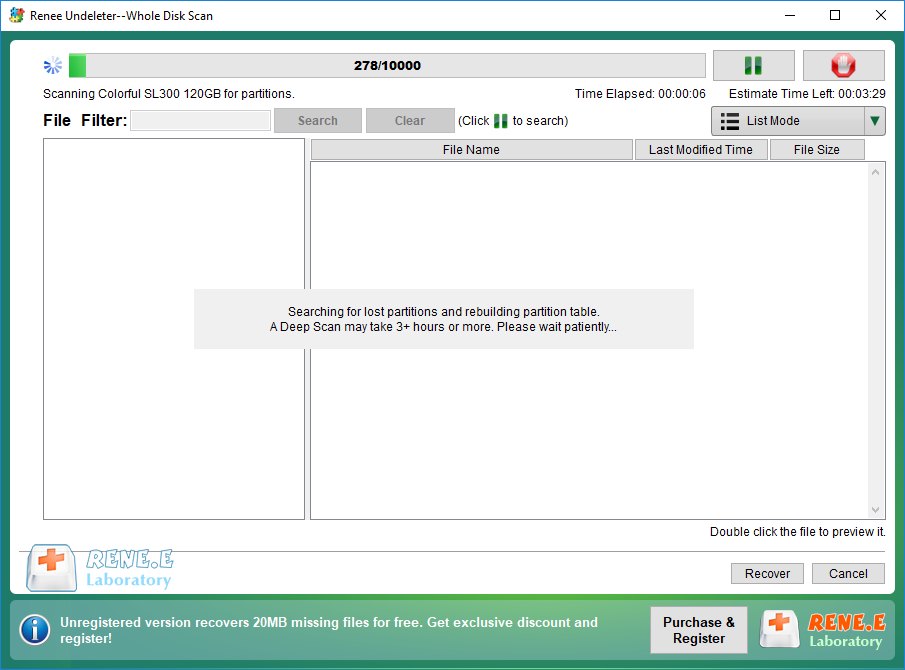
Step 3: The software will analyze the external hard disk. After the analysis, a “select the partition you want to scan” prompt may appear. You can select the desired partition or scan all partitions, which will take longer.
scanning the whole disk in renee undeleter
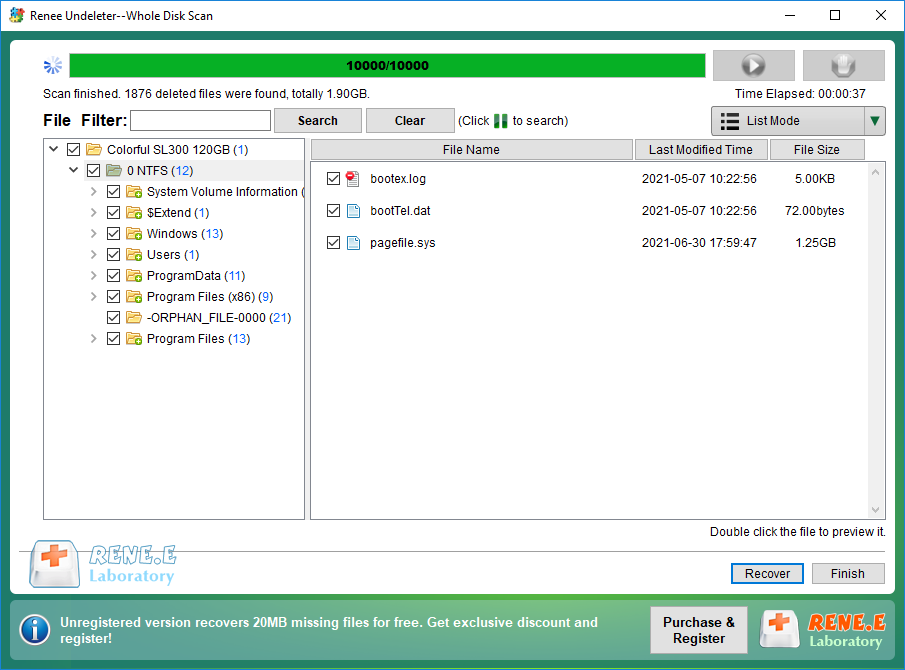
After scanning, preview the files in the right window, select the files to restore, and click the Recover button in the lower right corner.
select taget files to recover with renee undeleter
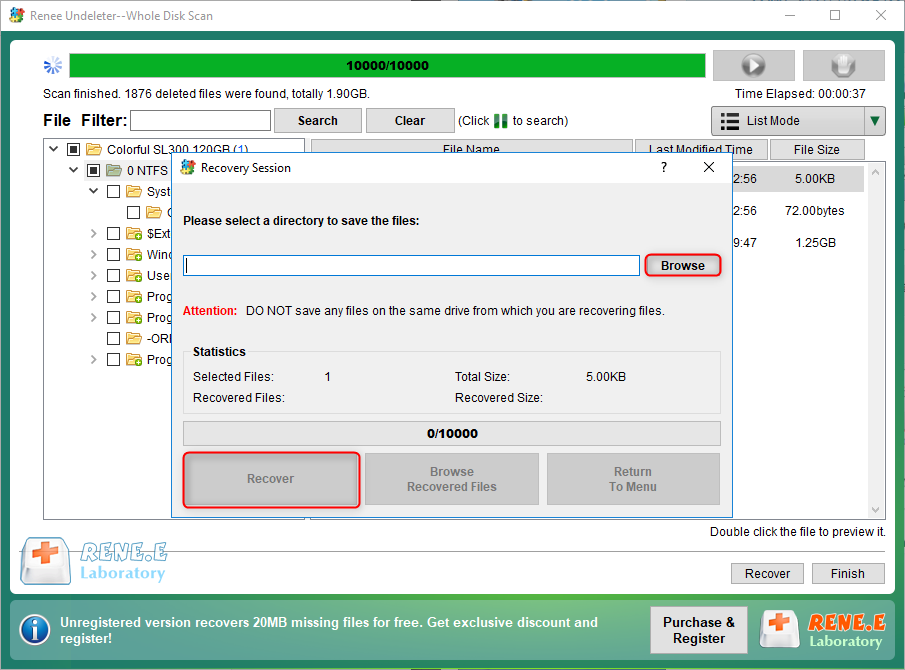
Step 4: Select the target folder, click Browse to choose the file storage path, then click Recover to start the file recovery. Wait patiently. Note: Avoid saving recovered files on the original disk to prevent data overwriting. It’s recommended to use a different disk.
recover files from whole disk scan with renee undeleter

2. Change the drive letter and path of the WD external hard disk

If your WD external hard disk isn’t recognized, it may lack a drive letter. To add one, follow these steps:
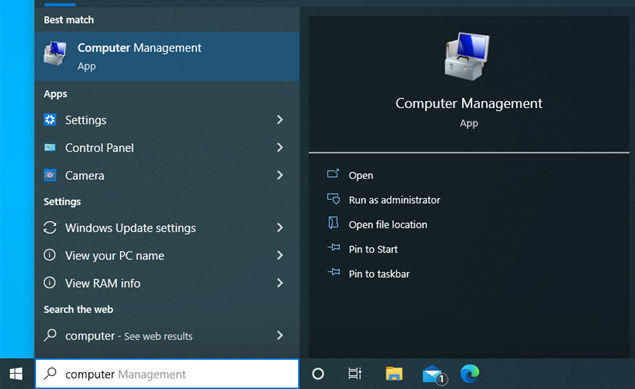
Step 1: Run the computer, enter “computer management” in the search box, and then click on it.
find computer management
Step 2: Click Disk Management on the left. If the disk has no drive letter (e.g., D: / E: / F:), check if it is a WD external hard disk.
disk management
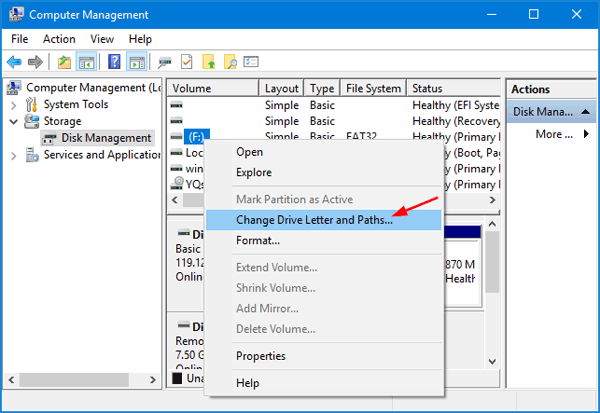
Step 3: Right-click on the disk without a drive letter and select the (Change Drive Letter and Paths) option.
change drive letter in disk management
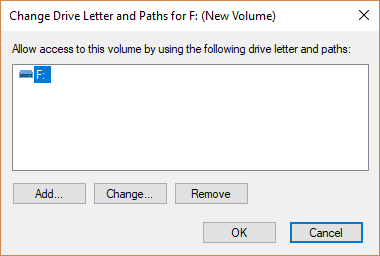
Step 4: Click the (Add) button.
add a drive letter
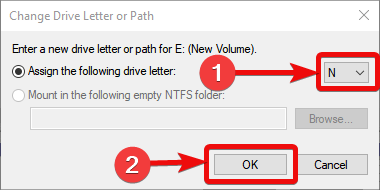
Step 5: Check “Assign the following drive letter,”, select a letter, then click OK to assign a drive letter to the WD external hard disk. You should now see the hard disk in the file explorer.
disk Management Change Driver Letter