

Fix the error that Windows resource protection could not perform the requested operation

Summary
If Windows resource protection could not perform the requested operation, how to fix the problem? You can repair Windows system files with the solutions presented in this article.


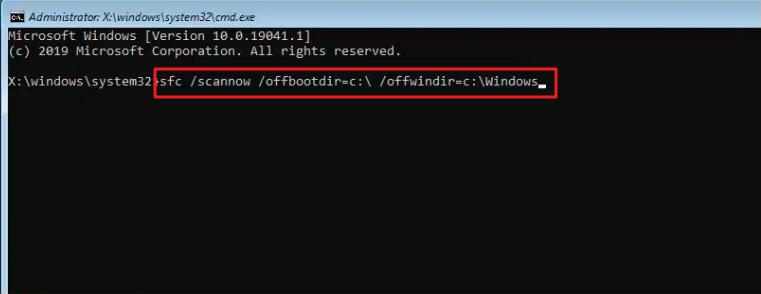
Note: c:\ and c:\windows can be modified according to the actual situation.
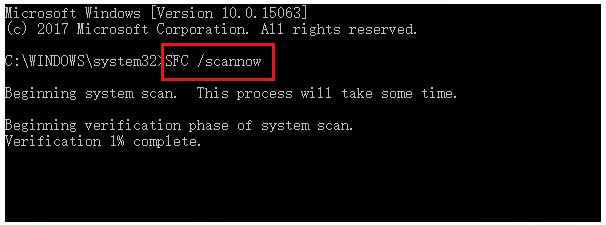
/scannow: scans the integrity of all protected system files and, if possible, repairs files containing problems;
/offbootdir: Specifies the location of the offline boot directory for offline repair;
/offwindir: Specifies the location of the offline Windows directory for offline repair.

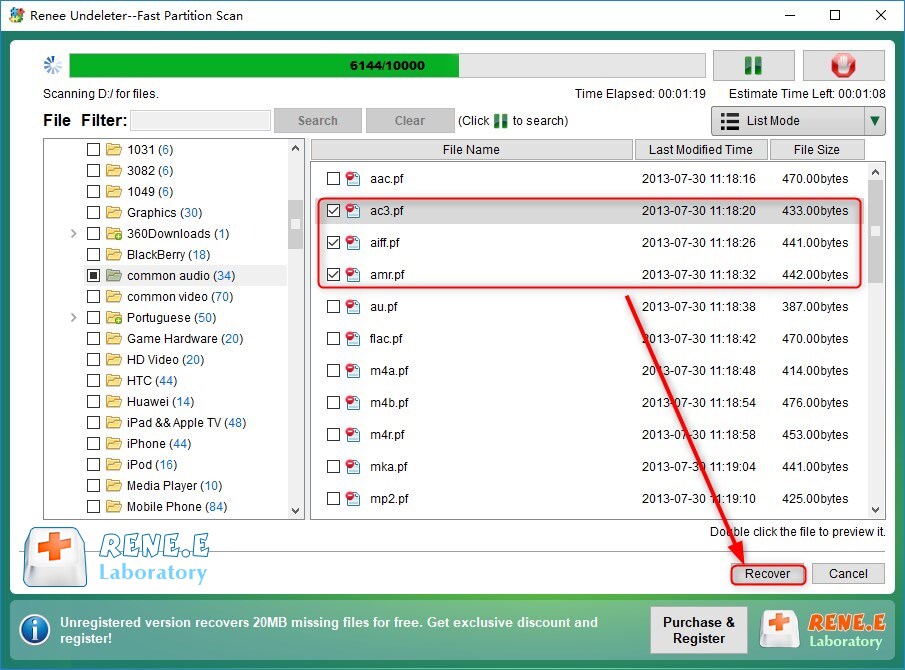
Easy to use Recover data by 3 steps;
Multiple scan modes Fast partition scan, whole partition scan and whole disk scan;
Supported file types Image, video, audio, text, email and so on;
Image creation Create a partition image to read and back up data;
Supported devices SD card, SDHC, SDXC, USB flash drive, hard disk and computer.
Easy to use Recover data by 3 steps;
Multiple scan modes Fast partition/whole partition/whole disk scan;
Supported devices SD card/USB/hard disk.
Free TrialFree TrialFree Trial 800 people have downloaded!
Fast Partition Scan – Quickly retrieve files lost due to accidental deletion or emptying the recycle bin.
Whole Partition Scan – Quickly recover files lost due to inaccessible or formatted partitions.
Whole Disk Scan – Analyze and get partition information and perform a full scan of the entire partition.
Image Creation – You can create a mirror image for a partition to back up the current partition state.

It should be noted that “Fast Scan” only scans the first 30GB of the remaining space of the selected disk. If the desired file is not found after scanning, you can use “Deep Scan” to try to scan the hard disk partition again, but it will take more time and more files can be scanned.

Relate Links :
How to fix when the PC stuck on preparing automatic repair?
01-08-2023
Jennifer Thatcher : Learn how to fix the problem that the computer stuck on preparing automatic repair. This article provides insight...
How to fix the error "Failed to enumerate objects in the container"?

26-01-2024
Ashley S. Miller : Learn how to solve the "Failed to enumerate objects in the container" error message in Windows. Before it,...
How to Reset BIOS and Unlock Your Device?

27-12-2023
John Weaver : Reset the BIOS to regain access or restore previous settings. Learn how to reset BIOS in this article....
Master Bootrec.exe Tool: Your Guide to Easy Windows Recovery

01-08-2023
Amanda J. Brook : Learn what Bootrec.exe tool is and how to use it to solve common computer problems like sector damage...
- I. Causes for the error: Windows resource protection could not perform the requested operation
- II. How to solve the SFC error: Windows resource protection could not perform the requested operation?
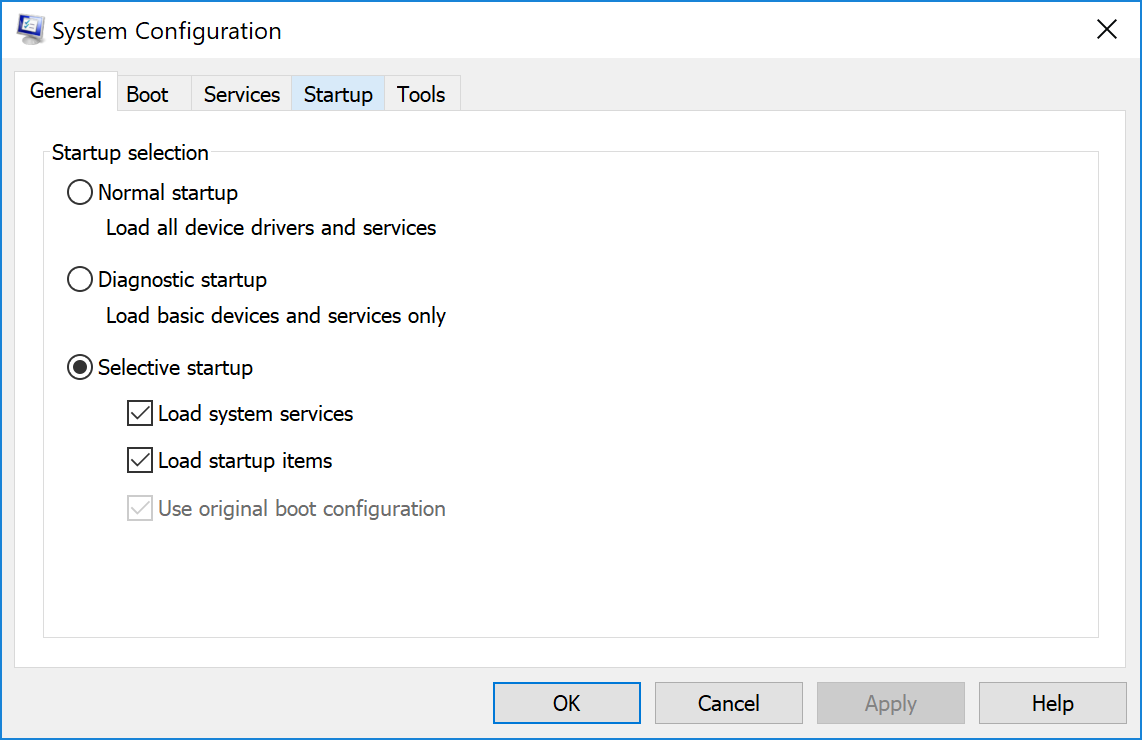
- 1. Run the SFC /scannow command in safe mode
- 2. Run the chkdsk disk check command
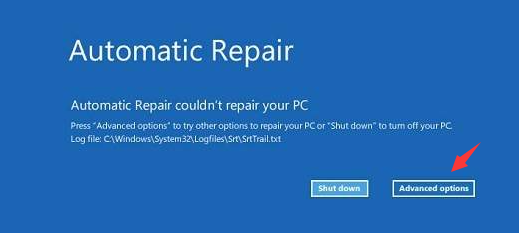
- 3. Enter the recovery environment and run the SFC command
- III. (Extended Information) Recover lost data with Renee Undeleter
- 1. What is Renee Undeleter?
- 2. How to recover lost data with Renee Undeleter?

