

Recovering CHKDSK Deleted Files on Windows 10/11

Summary
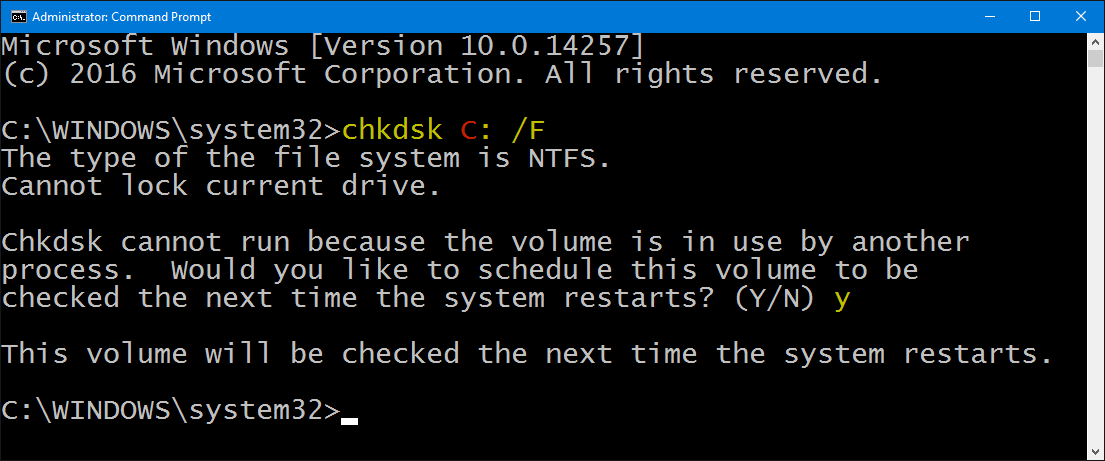
Running the CHKDSK command on Windows 10/11 can sometimes lead to data loss, especially if the drive is highly fragmented. This guide provides essential information on how to recover files deleted by CHKDSK. It explains that CHKDSK can delete files during its repair operations, particularly when it encounters bad sectors and fails to recover or remap the data. The guide emphasizes the importance of stopping the use of the affected drive immediately to increase the chances of successful data recovery.


Table of contents

Easy to use Only simple steps to recover data from storage devices.
Multiple scan modes Fast partition scan, whole partition scan and whole disk scan for different recovery needs.
File types Support to recover pictures, videos, audios, documents, mails, etc.
Supported storage devices Recover data from recycle bin, SD card, external disk, etc.
Supported systems Windows 10, 8.1, 8, 7, Vista, XP, 2000 and Mac OS X10.6, 10.7, 10.8.
Easy to use Only simple steps to recover data from storage devices.
Multiple scan modes - 3 scan modes for different recovery needs.
Supported storage devices Recover data from recycle bin, SD card, external disk, etc.
Easy to use Only simple steps to recover data from storage devices.
Multiple scan modes Fast partition scan, whole partition scan and whole disk scan for different recovery needs.
File types Support to recover pictures, videos, audios, documents, mails, etc.
Supported storage devices Recover data from recycle bin, SD card, external disk, etc.
Supported systems Windows 10, 8.1, 8, 7, Vista, XP, 2000 and Mac OS X10.6, 10.7, 10.8.
Easy to use Only simple steps to recover data from storage devices.
Multiple scan modes - 3 scan modes for different recovery needs.
Supported storage devices Recover data from recycle bin, SD card, external disk, etc.

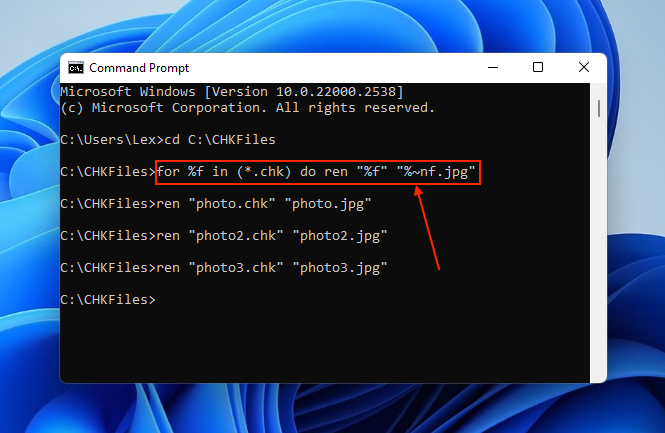
mkdir C:\CHKFiles
cd C:\CHKFiles
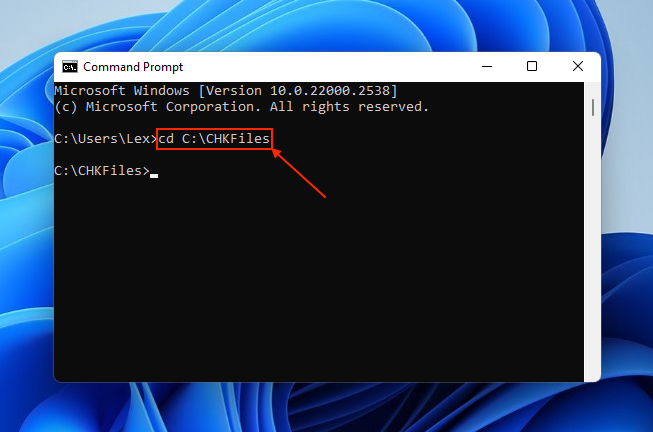
for %f in (*.chk) do ren "%f" "%~nf.jpg"
Easy to use Only simple steps to recover data from storage devices.
Multiple scan modes Fast partition scan, whole partition scan and whole disk scan for different recovery needs.
File types Support to recover pictures, videos, audios, documents, mails, etc.
Supported storage devices Recover data from recycle bin, SD card, external disk, etc.
Supported systems Windows 10, 8.1, 8, 7, Vista, XP, 2000 and Mac OS X10.6, 10.7, 10.8.
Easy to use Only simple steps to recover data from storage devices.
Multiple scan modes - 3 scan modes for different recovery needs.
Supported storage devices Recover data from recycle bin, SD card, external disk, etc.


Easy to use Only simple steps to recover data from storage devices.
Multiple scan modes Fast partition scan, whole partition scan and whole disk scan for different recovery needs.
File types Support to recover pictures, videos, audios, documents, mails, etc.
Supported storage devices Recover data from recycle bin, SD card, external disk, etc.
Supported systems Windows 10, 8.1, 8, 7, Vista, XP, 2000 and Mac OS X10.6, 10.7, 10.8.
Easy to use Only simple steps to recover data from storage devices.
Multiple scan modes - 3 scan modes for different recovery needs.
Supported storage devices Recover data from recycle bin, SD card, external disk, etc.
Relate Links :
SD Card Photos Disappeared? Learn Quick Recovery Tips Now!
12-07-2024
John Weaver : Lost photos from your SD card? Don't worry. This article will guide you on how to recover lost...
Lost Partition on External Hard Drive: How to Recover Your Precious Data

16-11-2023
Ashley S. Miller : Learn how to recover your lost partition on an external hard drive using various methods and software such...
Mastering Western Digital Hard Drive Recovery
15-11-2023
Ashley S. Miller : Learn how to master Western Digital hard drive recovery with a comprehensive guide, including tips and tricks for...
SD Card RESTORE DATA: Retrieve Deleted Files & Repair Corrupted SD Card
15-08-2024
Ashley S. Miller : Learn how to retrieve deleted files and repair damaged SD cards with our comprehensive guide on using SD...
- Does CHKDSK Delete Files?
- Where Does CHKDSK Put Recovered Files and What is Found.000?
- How to Recover CHKDSK Deleted Files: 5 Methods
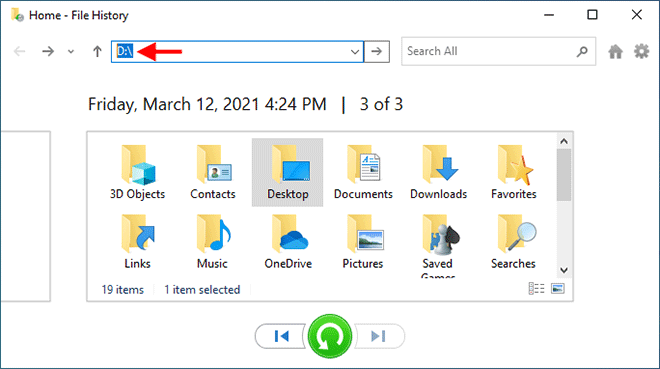
- Method 1: Restore a Local Backup
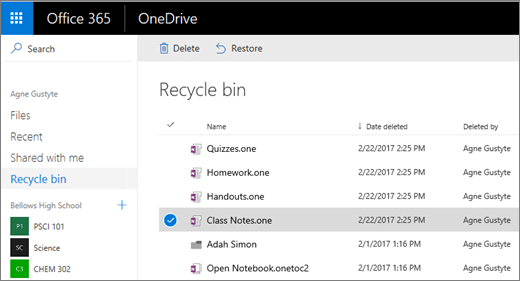
- Method 2: Restore Cloud Backups
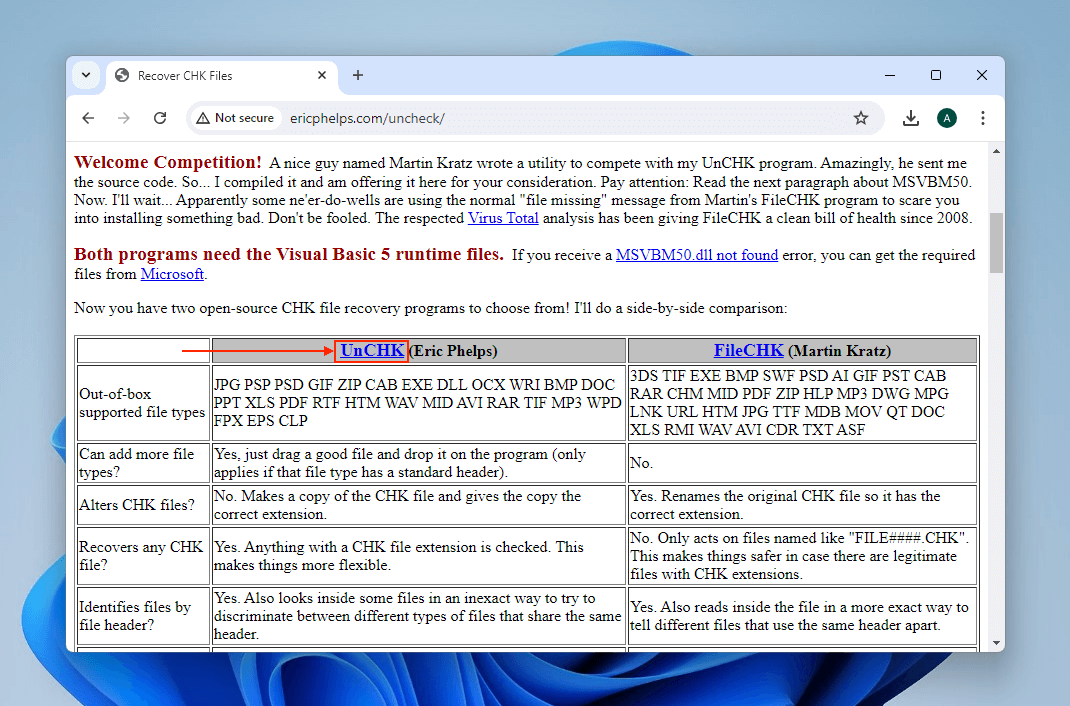
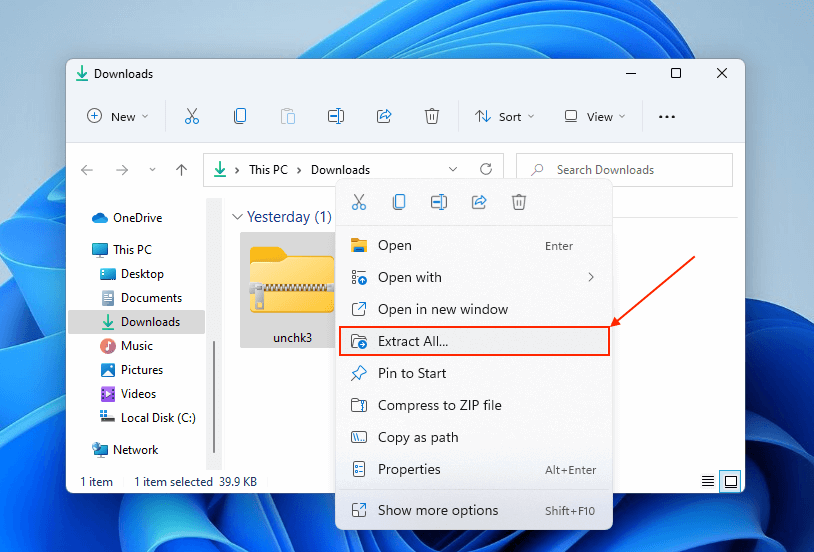
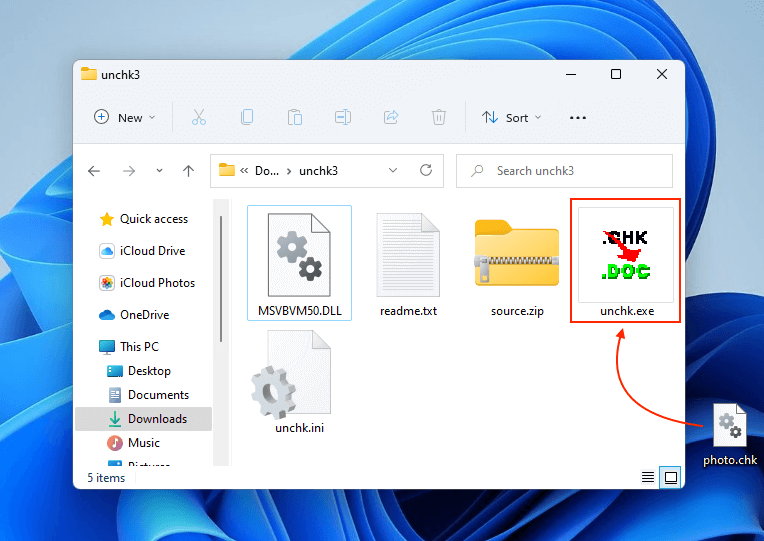
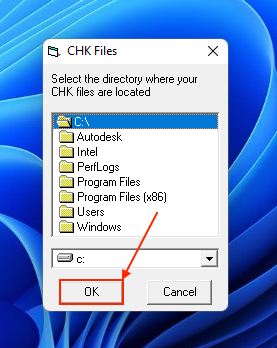
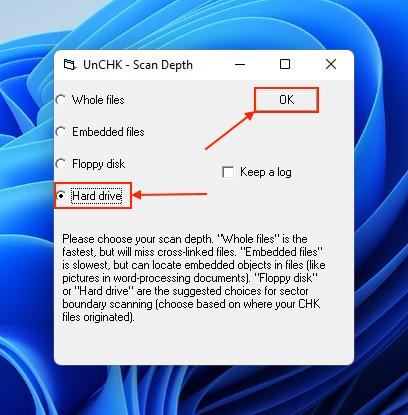
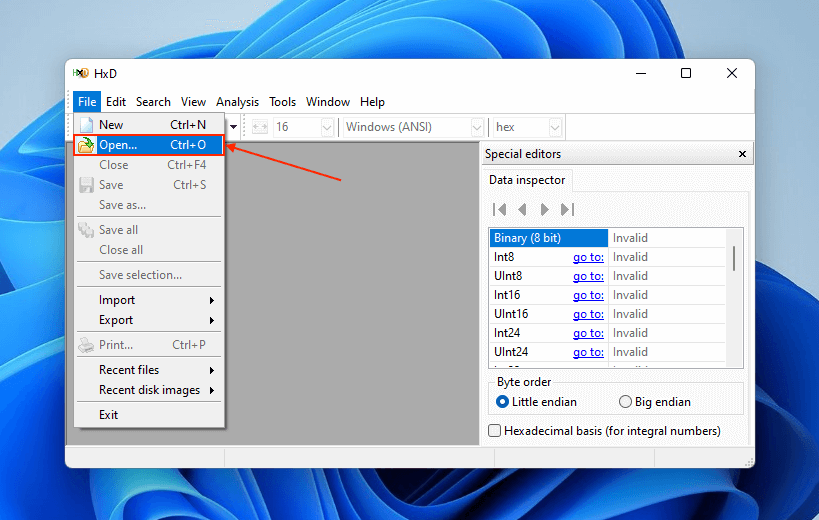
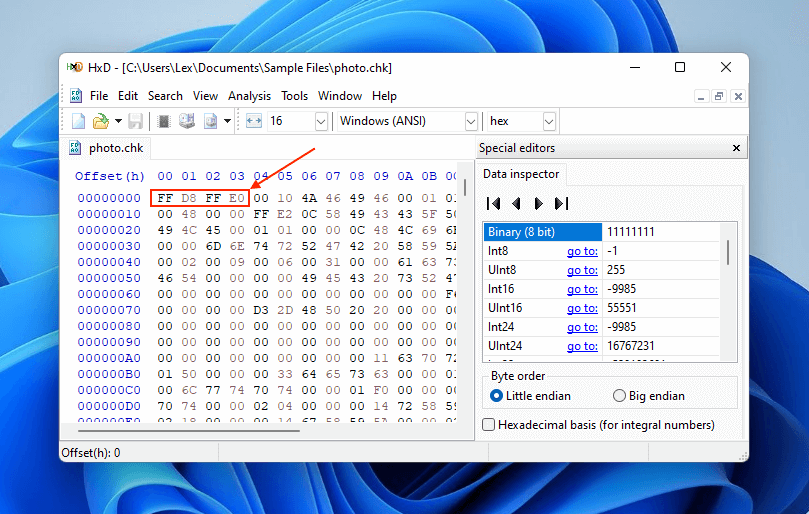
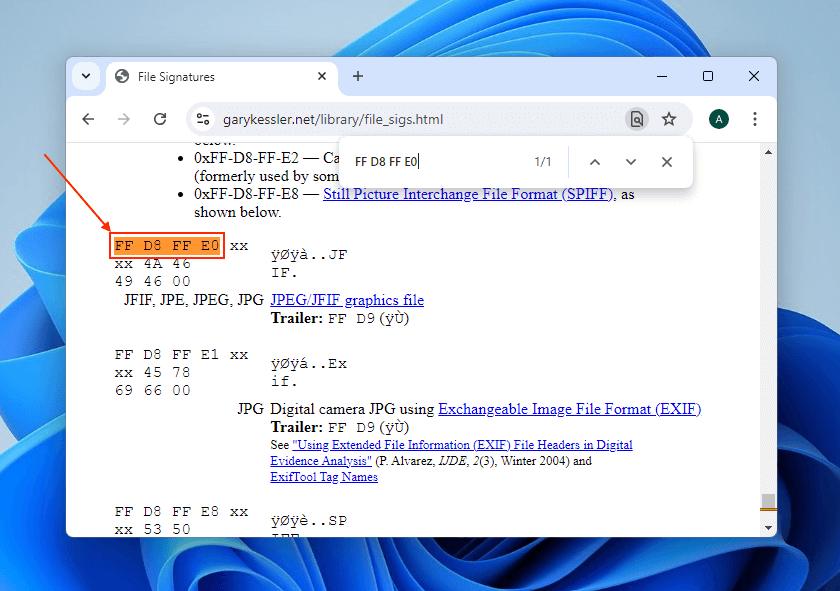
- Method 3: Use CHK Recovery Tools on Found.000
- Method 4: Rename the Found.000 Files Manually
- Method 5: Use Professional Data Recovery Software
- Conclusion

