author avatar
    Specialist of Customer Service Dept.
 

Summary
Learn how to quickly fix error code 0xc000007b when running games or applications with these common solutions. Say goodbye to the frustration!
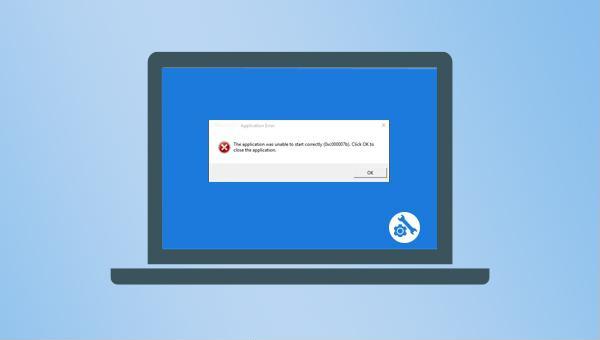
0xc000007b

I. What is 0xc000007b, and what is the reason for this problem?

0xc000007b is a relatively common type of error that usually occurs when you are using a 64-bit application on a 32-bit version of Windows; or when using a 32-bit application on a 64-bit version of Windows.
Unlike 64-bit systems, 32-bit systems cannot perform memory-intensive operations. The 32-bit system supports up to 4GB of memory, while the 64-bit system can support 4GB to 256GB of memory. This error code occurs when you force a 64-bit process to run on a 32-bit system. Additionally, hard disk failures or a disabled .NET framework can also cause this error.
After understanding the 0xc000007b error and its causes, let’s teach you several simple ways to solve this error.

II. How to solve the problem of error code 0xc000007b when the application cannot be started correctly?

1. Run the application in compatibility mode

Running your application in compatibility mode is an effective solution for many users. When you receive an error message of 0xc000007b, please follow the steps below to run your application in compatibility mode. The specific steps are as follows:
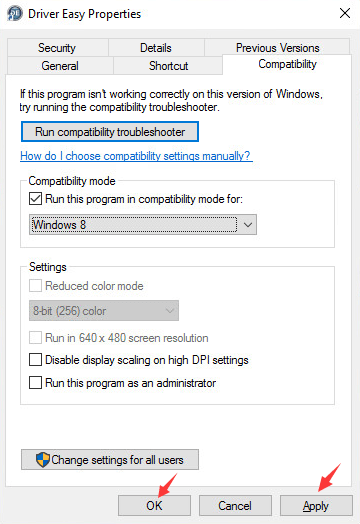
Step 1: Right-click the application program where the error message appears, select the (Properties) option, and open it.
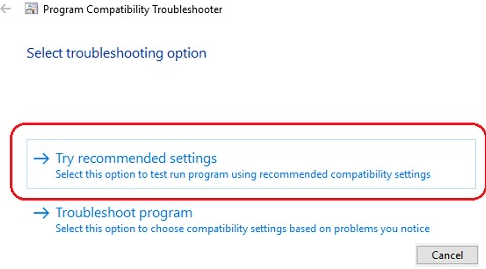
Step 2: Switch to the Compatibility option and click the Run Compatibility Troubleshooter button. Select the Try recommended settings option and wait patiently. After that, re-run the application to see if the problem is resolved.
run compatibility troubleshooter

2. Run the Chkdsk command to check hard disk errors

When an error occurs on the hard disk, the application program cannot be started normally, and an error code appears. You can try to use the Chkdsk command to check and repair the hard disk error. Follow these steps:
Step 1: Run the computer, search (cmd) directly in the search box, and select (run as administrator) to open the command prompt tool.
run as administrator
Step 2: In the command prompt, enter chkdsk C: /f /r (replace C: with your drive letter where the application is installed) and press Enter. After the hard disk error is fixed, check if the application starts normally.
Enter the disk repair command

3. Enable NET framework

NET Framework may also cause error code 0x000007b to appear. Let’s learn how to enable the NET framework. The specific steps are as follows:
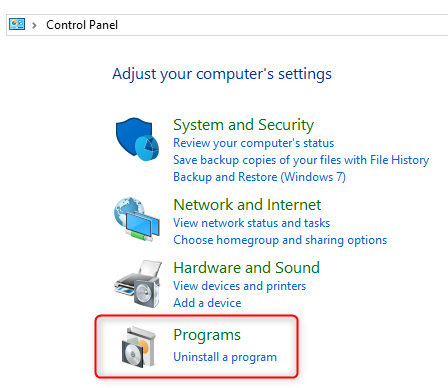
Step 1: Run the computer, enter (control panel) in the search box, and open it. Then click (Uninstall a program) under (Programs).
uninstall a program
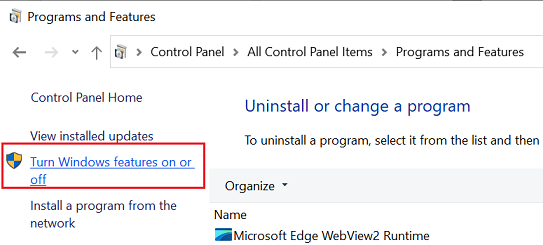
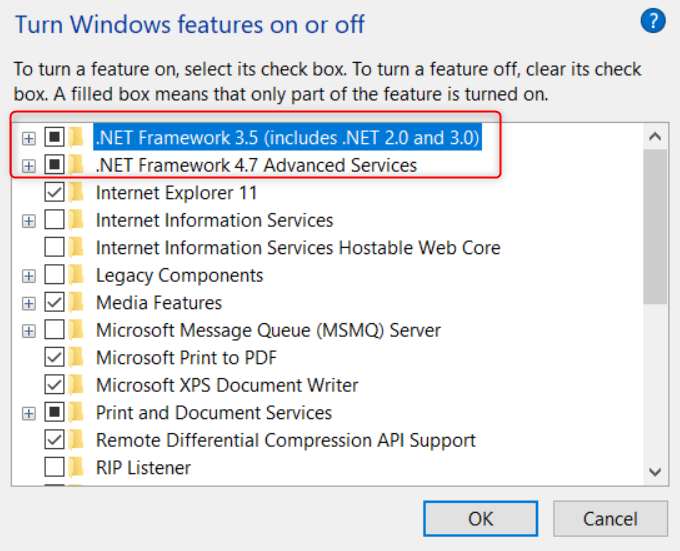
Step 2: Click Turn Windows Features on or off, check the options for .NET Framework 3.5 (including .NET 2.0 and 3.0) and .NET Framework 4.7 Advanced Services in the Windows Features window, then click OK. Restart the computer to see if the issue is resolved.
Enable NET framework
To safely repair the 0xc000007b issue and avoid data loss, I recommend using the professional backup and restore software Renee Becca. Below is a detailed function introduction and operation method.

III. Back up important files with Renee Becca

1. What is Renee Becca?

Renee Becca is a specialized tool for system and hard disk data backup and restoration. It helps back up and restore important data such as programs, system configurations, emails, photos, videos, documents, bookmarks, and more. Utilizing leading incremental/differential backup technology, it saves time and disk space. Besides system backup, it supports partition backup, hard disk backup, file backup, and disk cloning to meet various needs.
Renee Becca - Reliable Data Backup & Restore Software

Quick Backup files at up to 3,000MB/min.

Fullfill different backup needs Supports system backup, disk / partition backup, file backup and disk clone.

Intelligent Automatically analyze the differences between source and backup data.

Convenient Support VSS, allowing to freely view webpages when backing up system.

Highly compatible Supports various files and storage devices.

Quick Backup files at up to 3,000MB/min.

Fullfill different backup needs Backup for disk, partition and system. Save disk space by backing up incremental /differential data.

Highly compatible Supports various files and storage devices.
Free TrialFree Trial 2000 users have downloaded and enjoy Renee Becca!

2. How to backup data with Renee Becca?

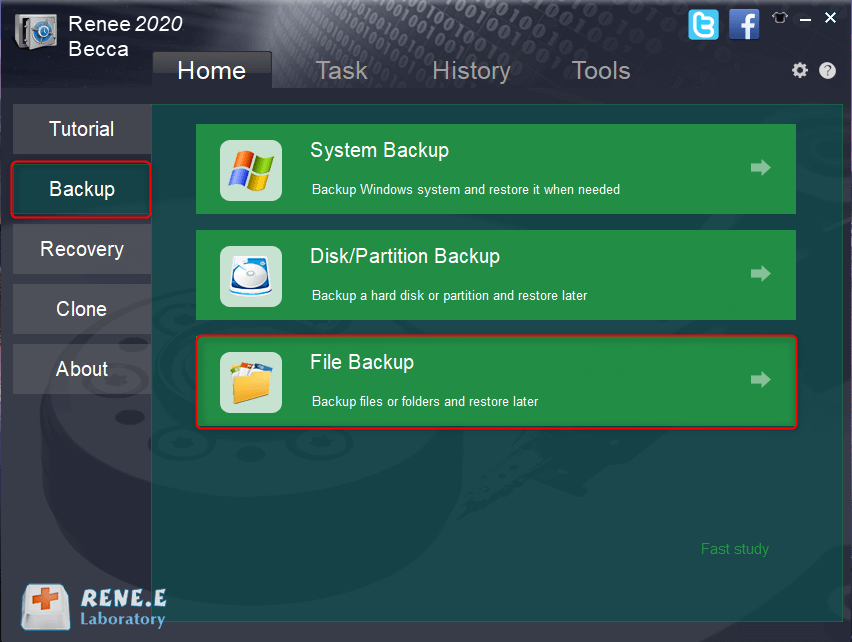
Step 1: Download, install, and run Renee Becca on your computer. In the main interface, select the File Backup option. To back up an entire hard disk or partition, choose the hard disk/partition backup function. Click here for detailed steps.
click to back up files in renee becca
Step 2: Select all the files that need to be backed up in (source), and select the hard disk partition to store the backup in (destination).
how to back up files in renee becca
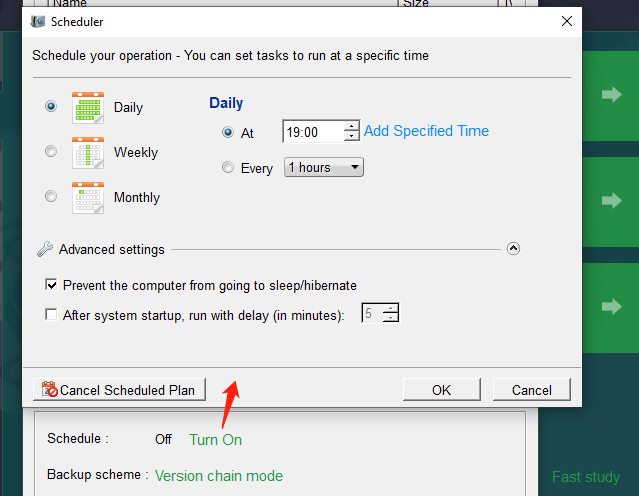
In addition, you can make a daily/weekly/monthly automatic backup plan and click (OK) to enable the automatic backup.
file backup schedule on Renee Becca
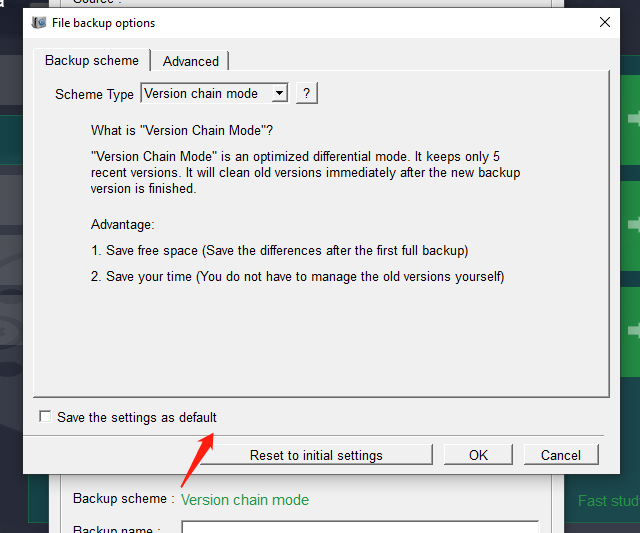
In Backup SchemeScheme Type, choose a backup scheme based on your needs. Renee Becca offers 5 options: version chain mode, single version mode, full mode, incremental mode, and differential mode.
backup mode of file backup on Renee Becca
Renee Becca offers 5 backup plans:

  • Version Chain Mode: Keeps the latest 5 versions, automatically deleting older ones after each backup.
  • Single Version Mode: Retains only the most recent version, deleting the previous one after each backup.
  • Full Mode: Creates a full backup.
  • Incremental Mode: After an initial full backup, only incremental backups are made.
  • Differential Mode: Only differential backups are made after an initial full backup.
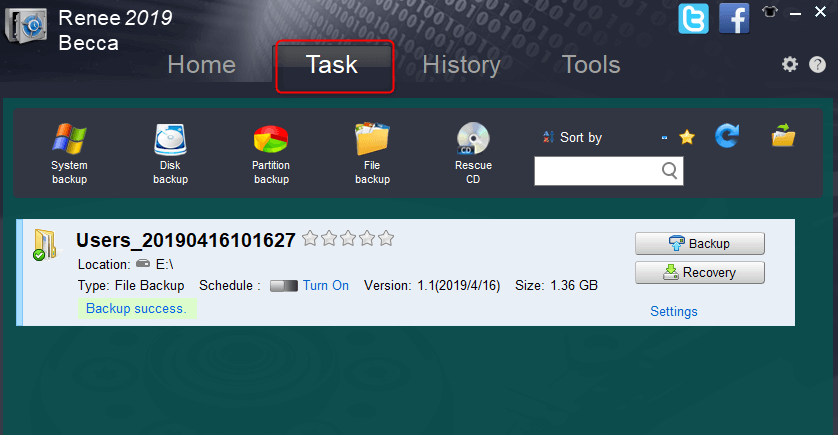
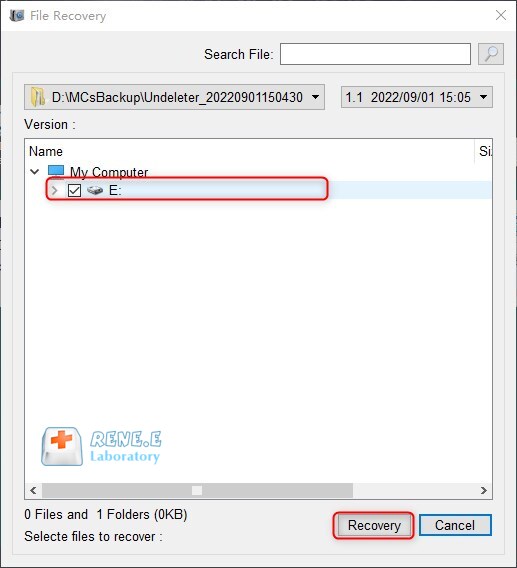
Step 3: Click the Backup button to start the backup according to your settings. You can monitor the backup progress on the taskbar. After completion, click the Recovery button to restore files to the specified hard disk.
restore the backup
Step 4: Select the location and click the (Recovery) button.
files recovery location