author avatar
    Specialist of Customer Service Dept.
 

Summary
Learn to extract individual files from system image when your system fails. Discover the solution in this guide.


extract individual files from system image

I. About system image backup

1. What is system image backup?

A system image is a copy of your system drive used to restore your computer if your hard drive or entire system fails. By default, it includes drive data, the Windows system, and necessary system settings, programs, and files. Restoring from a system image performs a complete restore, replacing all current programs, settings, and files with those in the system image. Users cannot select individual items to restore.

2. How to create a system image?

Step 1: Run the Windows computer, type (control panel) in the search box, click on it, and enter the application.
search windows Control Panel
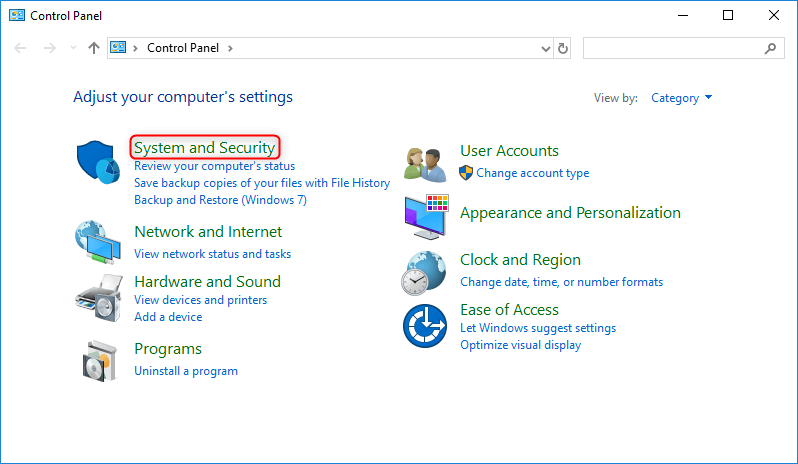
Step 2: Click on the (System and Security) option.
select system and security in windows control panel
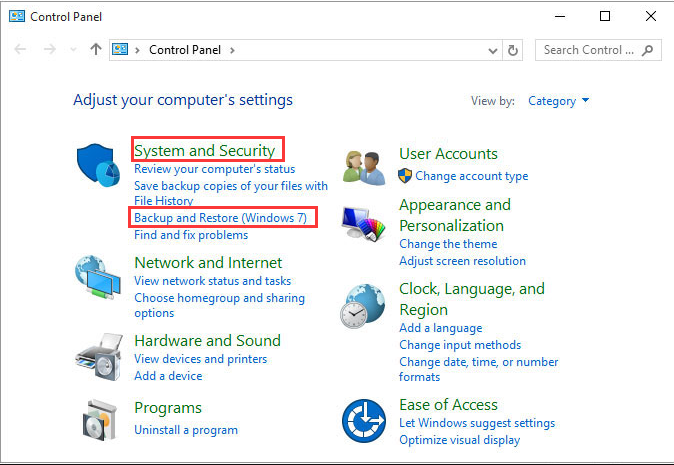
Step 3: Click the Backup and Restore (Windows 7) option.
windows 7 backup restore in control panel
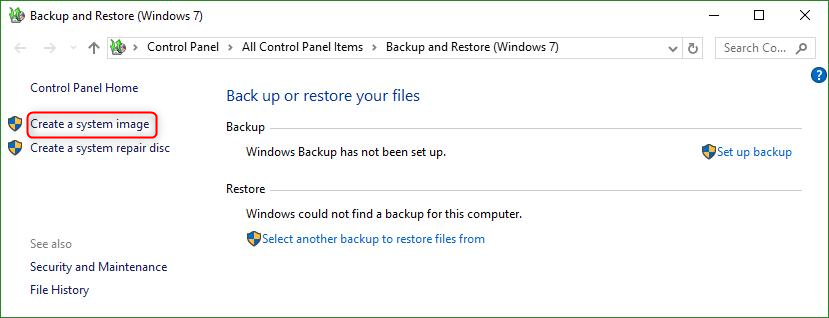
Step 4: Click the Create a system image button to back up the system data, then follow the on-screen instructions. For restoration steps, click here.
create a system image windows 10
The above steps outline how to create a system image. Although you cannot directly restore a single file from a Windows system image, there is a specific method to do so. Let’s learn together.

3. Extract a single file in the system image through the disk management tool

Before extracting a file using the Disk Management Tool, ensure the Windows System Image file is created, then proceed with the following steps.
Step 1: Start the computer, press Windows+X, and select Disk Management. Click Operation on the top function bar and select Attach VHD.
TipsVHD (Virtual Hard Disk) is a file format representing a virtual hard disk drive. Creating a system image generates a VHD file storing the hard disk’s contents. The “Attach VHD” function in Disk Management allows the OS to recognize the VHD, enabling file access through the file explorer. VHDX, the successor to VHD, differs in that VHD has a 2TB capacity limit, while VHDX supports up to 64TB, making it more suitable for modern disk images.
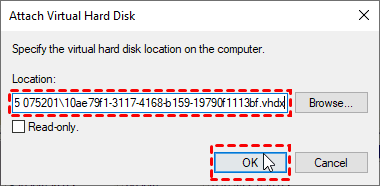
Step 2: Click Browse, select the previously created VHDX or VHD (system image file), and then click OK. Do not check read-only here, as this will prevent individual files from being restored.
Locate the Windows system image VHD
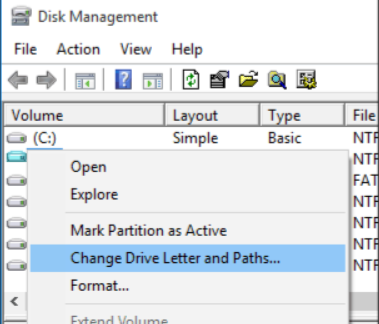
Step 3: Assign a drive letter to the virtual hard disk to access it. Right-click the virtual hard disk, select Change drive letter and path, and add the drive letter. Once done, access the file data through the file explorer and restore or extract individual files from the system image.
VHD file Change Drive Letter and Paths
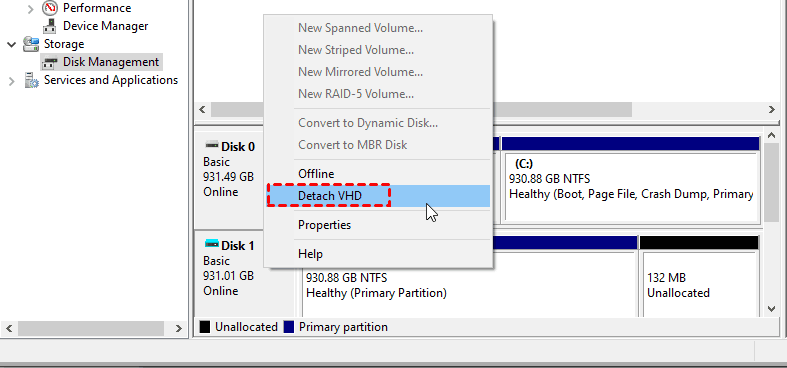
Step 4: The virtual hard disk will unmount upon restarting, or you can manually unmount it after accessing the files. Right-click the mounted virtual hard disk in Disk Management and select “Detach VHD.”
Detach VHD
Step 5: Click (OK) to unmount the virtual hard disk.
To maintain the integrity of the system image and avoid accidental modifications, consider using other file backup methods. For instance, the file backup function of Renee Becca supports automatic backups at regular intervals, providing a practical solution.

II. Easier file backup and restore software: Renee Becca

1. What is Renee Becca

Renee Becca is a tool for system/hard disk data backup and restoration. It helps back up and restore important data like programs, system configurations, emails, photos, videos, documents, bookmarks, etc. Using leading incremental/differential backup technology, it saves time and disk space. It supports system, partition, hard disk, file backup, and disk cloning to meet your needs.
Renee Becca - Reliable Data Backup & Restore Software

Quick Backup files at up to 3,000MB/min.

Fullfill different backup needs Supports system backup, disk / partition backup, file backup and disk clone.

Intelligent Automatically analyze the differences between source and backup data.

Convenient Support VSS, allowing to freely view webpages when backing up system.

Highly compatible Supports various files and storage devices.

Quick Backup files at up to 3,000MB/min.

Fullfill different backup needs Backup for disk, partition and system. Save disk space by backing up incremental /differential data.

Highly compatible Supports various files and storage devices.
Free TrialFree Trial 2000 users have downloaded and enjoy Renee Becca!

2. How to backup and restore files with the help of Renee Becca

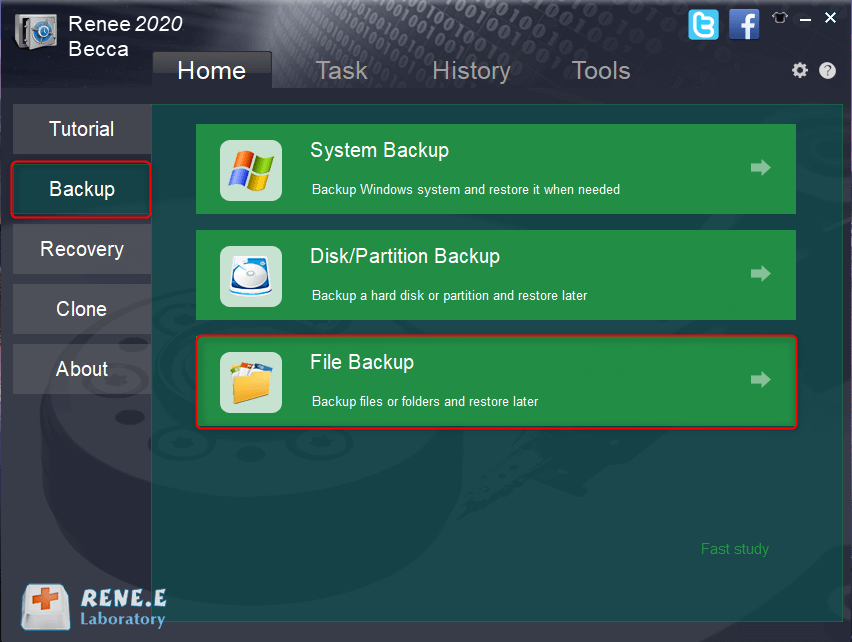
Step 1: Download, install, and run Renee Becca on the computer. Select the (File Backup) option in the main interface.
click to back up files in renee becca
Step 2: Select all files to be backed up from the source device and choose the hard disk partition for storing the backup.
how to back up files in renee becca
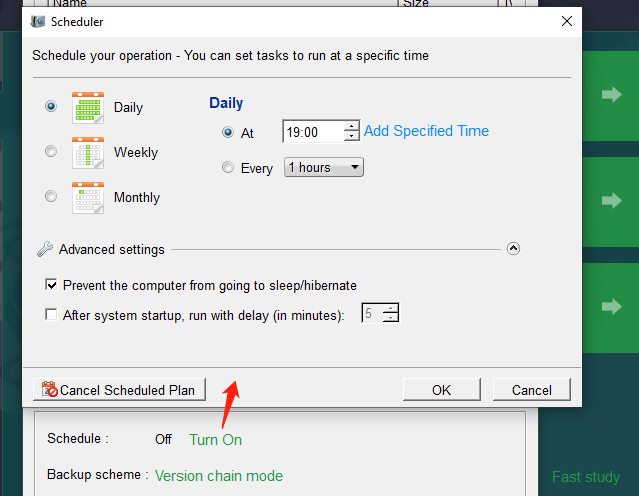
In addition, using the Scheduler, you can make a daily/weekly/monthly automatic backup plan and click (OK) to enable the automatic backup.
file backup schedule on Renee Becca
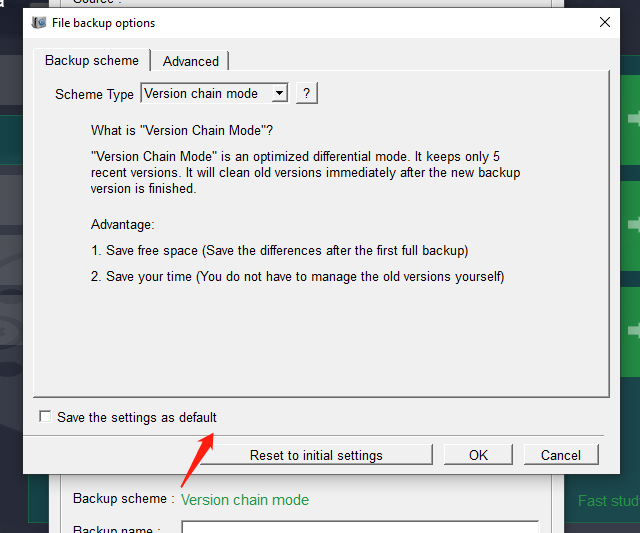
In Backup SchemeScheme Type, select a suitable backup mode based on your needs. Renee Becca offers five backup schemes: version chain mode, single version mode, full mode, incremental mode, and differential mode.
backup mode of file backup on Renee Becca
Renee Becca offers 5 backup plans:

  • Version Chain Mode: Keeps the latest 5 versions, automatically deleting older ones after each backup.
  • Single Version Mode: Retains only the most recent version, deleting the previous one after each backup.
  • Full Mode: Creates a full backup.
  • Incremental Mode: After an initial full backup, only incremental backups are made.
  • Differential Mode: Only differential backups are made after an initial full backup. You can compare incremental and differential backups.
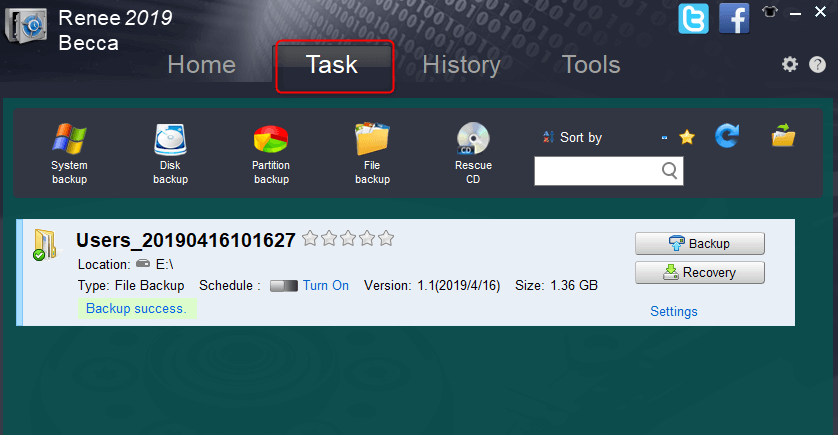
Step 3: Click the Backup button to start the backup according to your settings. You can monitor the progress on the taskbar. After completion, click the Recovery button to restore files to the specified hard disk as needed.
restore the backup
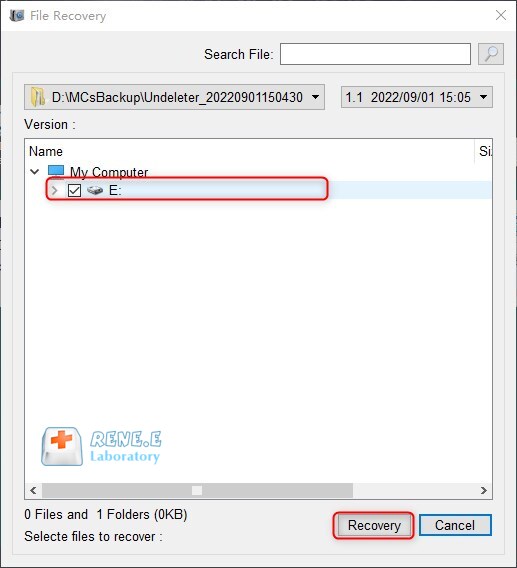
Step 4: Select the location to save the restored files and click the (Recovery) button.
files recovery location