author avatar
    Senior Program Developer
 

Summary
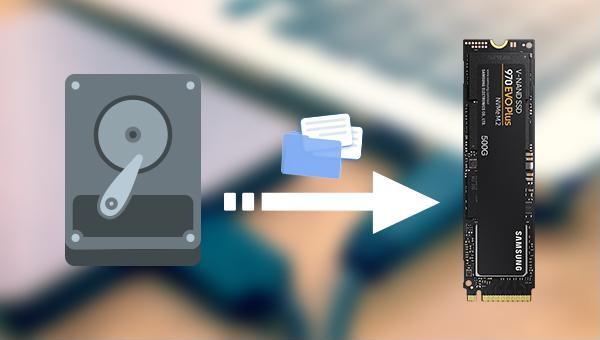
Learn how to transfer data from an ordinary hard drive to an NVMe M.2 solid-state drive for faster data processing speeds. We can use Renee Becca which is simple to clone a hard disk.


clone hdd or ssd to nvme m 2 ssd

I. About NVMe M.2 SSD

1. What is NVMe M.2 SSD?

The NVMe standard, the full name of Non-Volatile Memory Express (Non-Volatile Memory Standard), is an SSD specification that uses PCI-E channels. It was first proposed at the Intel Developer Forum in 2007.
M.2 SSD is a card-shaped hard disk, which is divided into three sizes according to its standard, namely: Type2280 (22cm wide, 80cm long), Type2260 and Type2242. As a new generation of SSD devices, NVMe M.2 SSD has much higher data processing capability than solid-state drives using SATA3.0 interface. The SSD data writing speed of the general SATA3.0 interface is 550MB/s, while the SSD data processing speed of NVMe M.2 can reach 3300-3500MB/s. So now NVMe M.2 SSD is becoming more and more popular, and its appearance greatly improves the read and write performance of solid state drives.
The speed of an M.2 solid-state drive depends on its matching protocol and channel. The following is a speed comparison of different types of solid-state drives for reference.
HDD typechannel/busupper layer protocoltransfer speed
SATA SSDSATAAHCI550MB/s
M.2 SSDSATAAHCI550MB/s
M.2 SSDPCI-eNVMe3300-3500MB/s
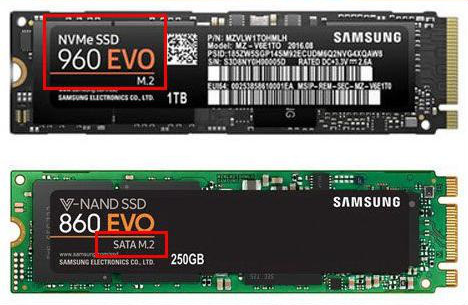
When purchasing an M.2 solid-state drive, you can know which protocol the solid-state drive runs through the product information. If the M.2 SSD runs the NVMe protocol, the product will be marked with NVMe. If other words are displayed, such as SATA M.2, the AHCI protocol is generally used. There is a large difference in transmission speed between the two, please confirm the information before purchasing.
Different Types of M.2 SSDs

2. What are the advantages and characteristics of NVMe M.2 SSD?

a. The performance is several times higher than that of traditional hard drives;
b. It can effectively reduce the operation delay;
c. The NVMe protocol can increase the maximum queue depth from 32 to 64000, and the IOPS capability of the SSD will also be greatly improved; (IOPS is the abbreviation of Input/Output Operations Per Second in English, which means the number of input/output operations per second. Higher, the faster the SSD read and write speed.)
d. Its automatic power consumption state switching and dynamic energy management functions can greatly reduce equipment power consumption;
e. The compatibility of the PCI-E channel is not as good as that of the SATA channel, but the SSD using the NVMe protocol and the PCI-E channel can be easily matched with different platforms and systems, and can work normally without the corresponding driver provided by the manufacturer. Currently Windows, Linux, Solaris, Unix, VMware, UEFI, etc. have all added support for NVMe M.2 SSD.
After understanding the relevant knowledge points about NVMe M.2 solid-state drives, next, let’s learn how to install NVMe M.2 solid-state drives and clone hard drives to NVMe M.2 solid-state drives. Let’s learn together.

II. How to clone a hard disk to an NVMe M.2 SSD?

If you want to replace the old hard drive with an NVMe M.2 SSD and perform hard drive cloning, you can follow the three steps below.

1. Step 1: Install NVMe M.2 SSD on the motherboard

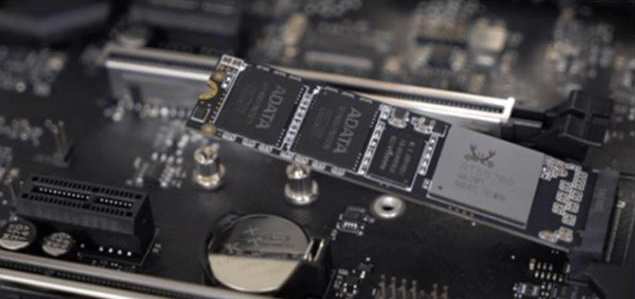
First, you need to install the NVMe M.2 SSD to your computer, that is, insert the NVMe M.2 SSD into the slot as shown in the figure. The M.2 slot is located slightly in the center of the memory slot. On the right side (the location varies depending on the type of motherboard), and then fix the base screw that comes with the motherboard under the semicircle at the end of the M.2 solid-state drive, and then fix the solid-state drive to the bottom with another small screw Do not directly use the base screws to fix the M.2 solid-state drive to the motherboard, as this will cause the solid-state drive to bend or even be damaged. NVMe M.2 solid-state drives are different from SSD slots using SATA channels. Please pay attention to distinguish them. In addition, NVMe M.2 SSDs and SATA SSDs can coexist in theory.
Schematic diagram of where the NVMe M.2 SSD is inserted into the card slot
If you want to clone the data of the old hard disk (such as the system disk) to the new solid-state hard disk, you can use the following data backup/cloning software to operate, but the cloning will erase the data of the target disk, if the new solid-state hard disk contains important data, please backup or transfer in advance.

2. Step 2: Use Renee Becca to clone the hard drive to NVMe M.2 SSD

Renee Becca is a tool specially used for system/hard disk data backup and restoration. It can help you back up and restore important data in your computer, such as programs, system configuration, emails, photos, videos, documents, bookmarks, etc. In addition, you can also use it to clone disk and system data. The software provides three cloning methods, including hard disk cloning/cloning system hard disk; partition cloning and system migration. You can choose the most suitable cloning method according to your different needs.
Renee Becca - Reliable Data Backup & Restore Software

Quick Backup files at up to 3,000MB/min.

Fullfill different backup needs Supports system backup, disk / partition backup, file backup and disk clone.

Intelligent Automatically analyze the differences between source and backup data.

Convenient Support VSS, allowing to freely view webpages when backing up system.

Highly compatible Supports various files and storage devices.

Quick Backup files at up to 3,000MB/min.

Fullfill different backup needs Backup for disk, partition and system. Save disk space by backing up incremental /differential data.

Highly compatible Supports various files and storage devices.

Free TrialFree Trial 2000 users have downloaded and enjoy Renee Becca!
How to clone a hard drive with Renee Becca?
It is very simple to clone a hard drive with the help of Renee Becca, the specific steps are as follows:
Step 1: Download, install and run Renee Becca, select the option (Hard Disk Clone/Clone System Disk) in the main interface (Clone) column.
Renee Becca clone function description:

Hard Disk Clone/Clone System Disk: Creates an exact copy of the selected disk. It supports moving the partition boundary with the mouse to adjust the partition size, and cloning the system disk so that the cloned hard disk can be started.

Partition clone: Creates an exact copy of the selected partition.

System Redeploy: Support to migrate the system to another hard disk.
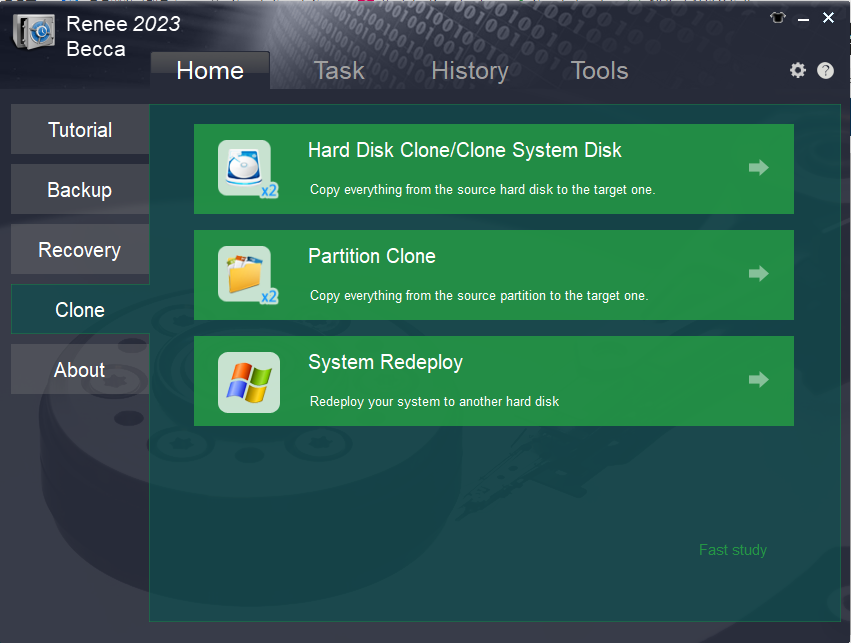
cloning functions of Renee Becca
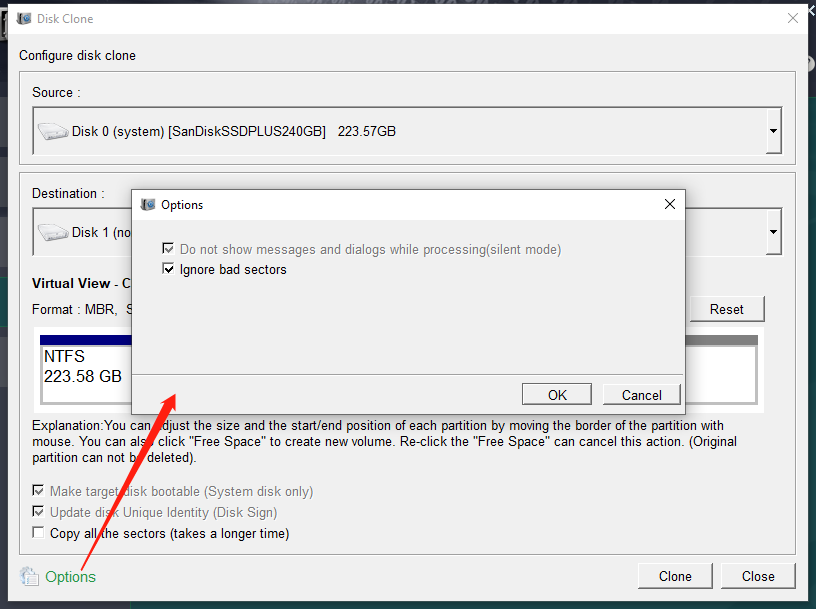
Step 2: Next, select the original disk to be cloned and the NVMe M.2 SSD in the (source) and (destination location) of the pop-up “Disk Clone” pop-up window. You can click the (Options) button in the lower left corner to confirm whether it is checked (Ignore bad sectors) (It is generally checked by default. After this option is checked, the software will use intelligent algorithms to read readable data in bad sectors as much as possible. When the data in bad sectors cannot be read, it will be ignored.).
Under the virtual view, you can view the space allocation of the cloned hard disk. Click (Available Space) to create a new partition, and you can also move the partition boundary with the mouse to adjust the partition size. If the clone is a system disk, you can also check (Make target disk bootable (System disk only)) option. Finally, click the (Clone) button to execute the command to clone the hard disk. Cloning the hard disk will overwrite the data on the target hard disk, please make a file backup in advance.
ignore bad sectors
If you are cloning a system disk and want the system to boot from the NVMe M.2 SSD, you need to enter BIOS or UEFI and set it as the first boot device. If you are not cloning a system disk, you can ignore the following steps.

3. Step 3: Change the boot disk to NVMe M.2 SSD

Finally, you need to change the boot disk to an NVMe M.2 SSD from which the data has been cloned. When you start your computer, it first loads the BIOS or UEFI on the motherboard (generally new motherboard models use UEFI boot mode more,click here for more information), where you can change the boot order of the system. To enter BIOS or UEFI, please press the F2, Del, Esc or F11 key when starting the computer, usually it will be displayed under the black screen that appears when you start the computer. (It should be noted that the shortcut keys vary by device model, click here to view a summary of shortcut keys for different brands of PCs or motherboards.)