III. Multiple ways to restore factory settings in Windows 10
There are several ways to restore Windows to factory settings. Here are six commonly used methods for you to choose from based on your situation.
1. Restore the computer to factory settings from the settings
Windows 10 offers a simple function to reinstall or reset the system without downloading an ISO image. This method applies to computers upgraded to Windows 10, using the “Reset” function to restore the factory state. The advantage is that it doesn’t require additional files or installation media. However, users have reported that it doesn’t fix some corruptions. If this method fails, you must use an alternative method.
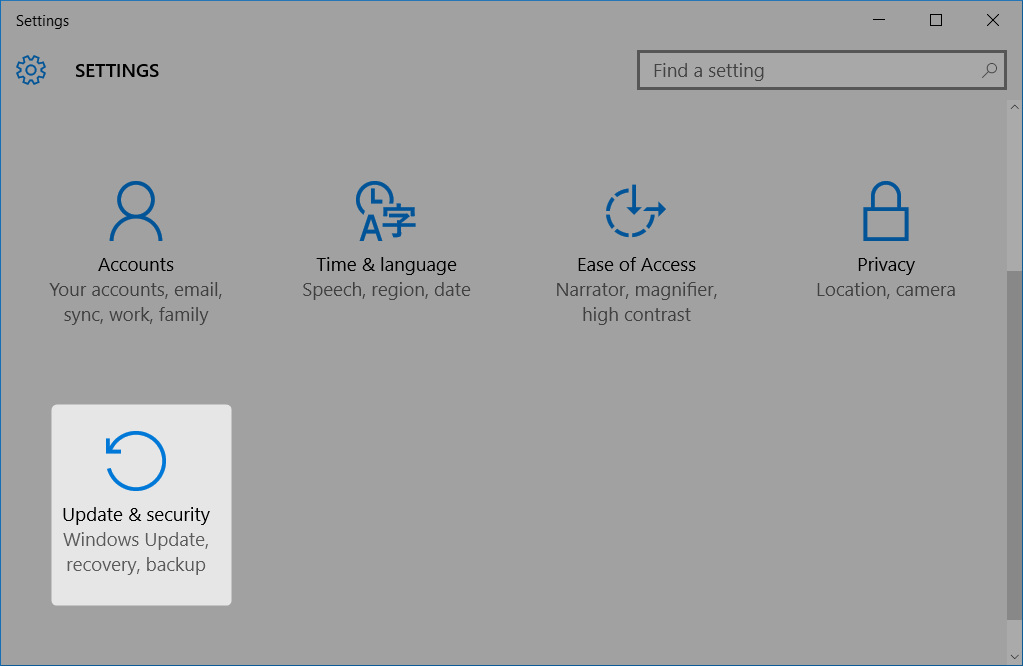
① Click the (Start) button, then click (Settings) > (Update and Security).
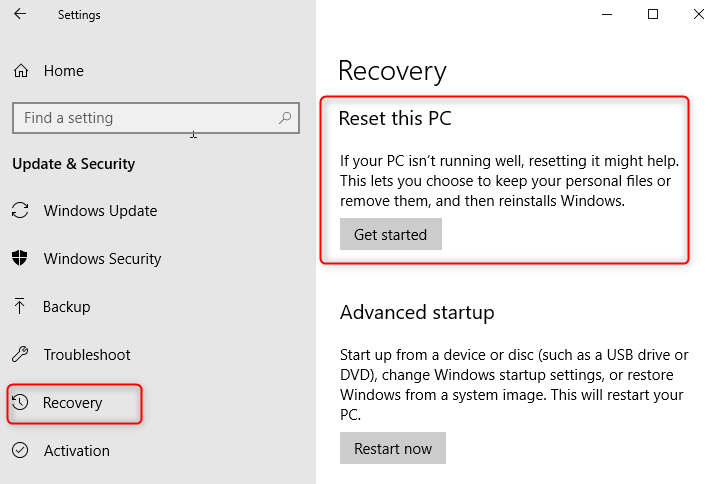
② Click (Recovery), under “Reset this PC”, and click (Get started).
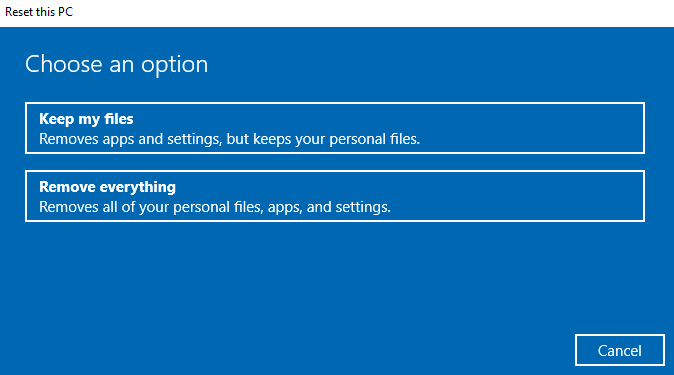
③ In the pop-up window, choose either “Keep my files” or “Remove everything” based on your needs.
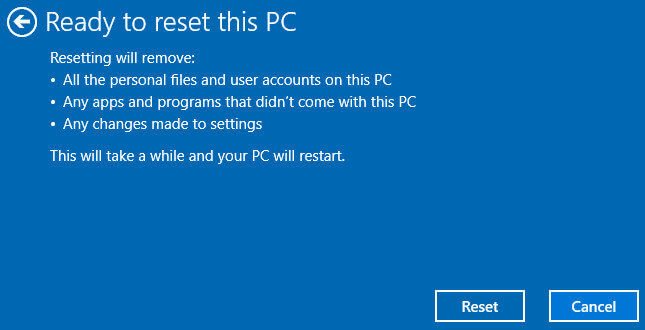
④ Please confirm that you understand the application and settings will be cleared after the reset, then click (Next).
⑤ Click the (Reset) button to reinstall Windows 10.
2. Restore the computer to factory settings from the Windows recovery environment
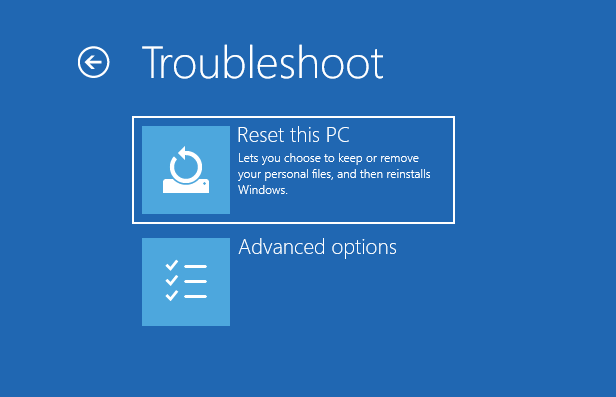
If you can’t access Windows, restore your computer to factory settings by booting into the Windows recovery environment. The “Reset this PC” option allows you to either completely wipe the hard drive or retain personal files. The steps are as follows:
① Press the power button to shut down the computer. When the Windows logo appears, press the power button immediately. Repeat this three times. After the third restart, the computer will automatically enter the Windows recovery environment.
② Please click (Troubleshoot) > (Reset this PC) in turn.
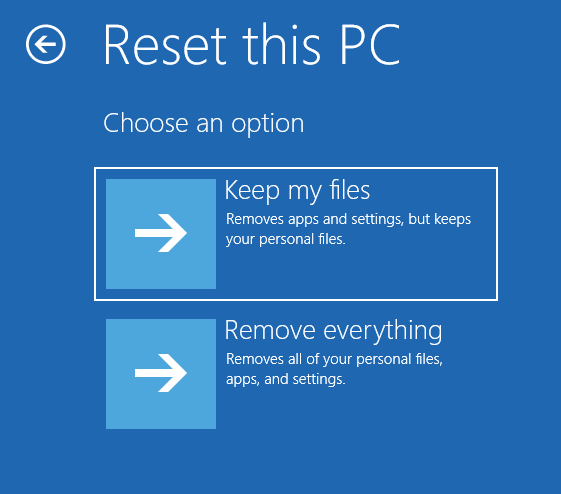
③ After clicking Reset this PC, choose either Keep my files or Remove everything based on your needs. Note that the Remove everything option will take a long time. Follow the instructions after making your selection.
TipsKeep my files: Removes third-party applications but retains personal files.
Remove everything: Delete all data on the drive and remove malware.
3. Reinstall Windows using the installation media
Reinstalling Windows can restore the computer to factory settings, deleting all data and settings. The steps are:
Step 1: Create Installation Media
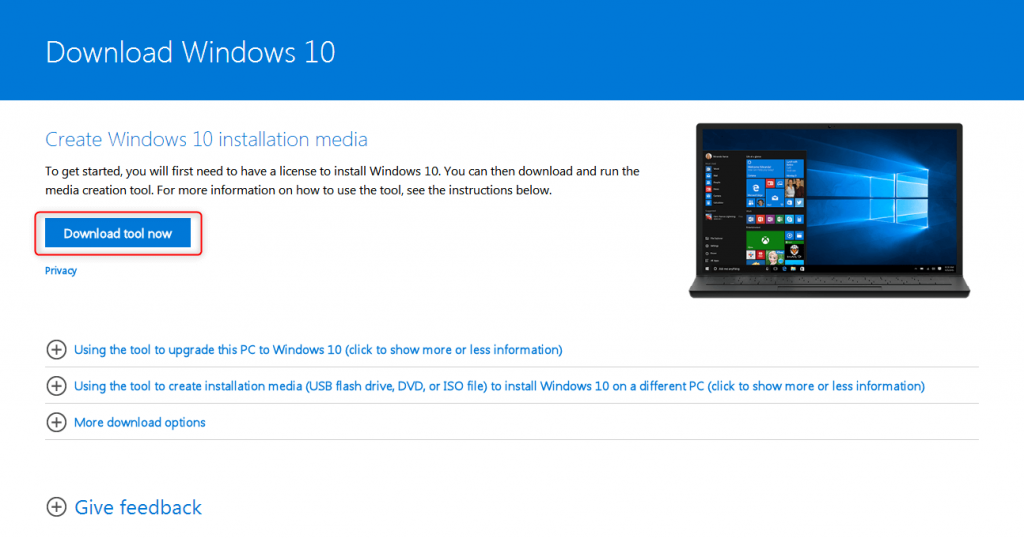
First, before reinstalling Windows 10, you need to create installation media. Before creating, you need to pay attention to the following two points:
Important data has been backed up to other storage devices (e.g., USB stick, SD card, mobile hard disk) or
OneDrive. Ensure the backup device is not the same one used for downloading the
Windows 10 installation media.
The storage device for the installation media should have at least 8GB of free space and be empty, as all content will be deleted during the process.
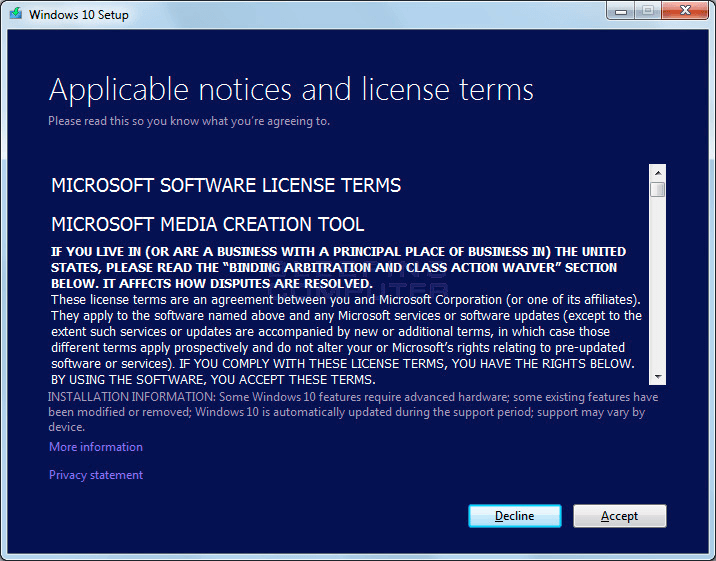
② After downloading, open the tool and select Yes to allow changes to your device. When the Windows 10 Installer Setup Guide appears, click Accept for the License Terms and Agreement.
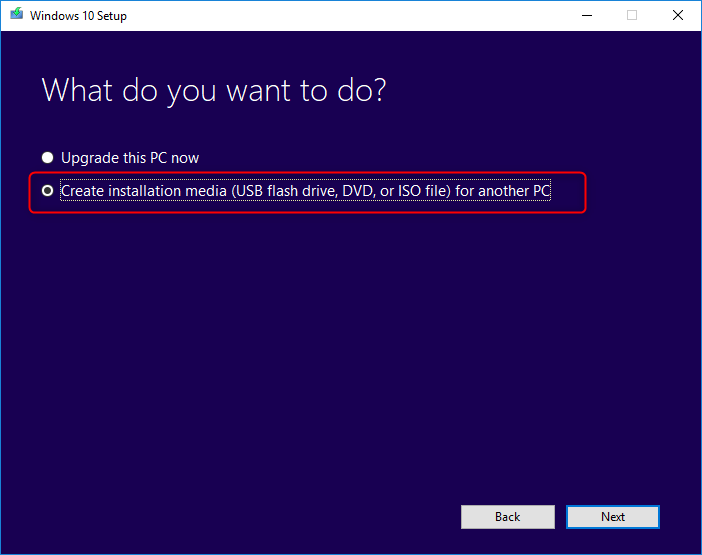
③ To create an installation disk, please select Create installation media (USB flash drive, DVD, or ISO) for another PC and click (Next).
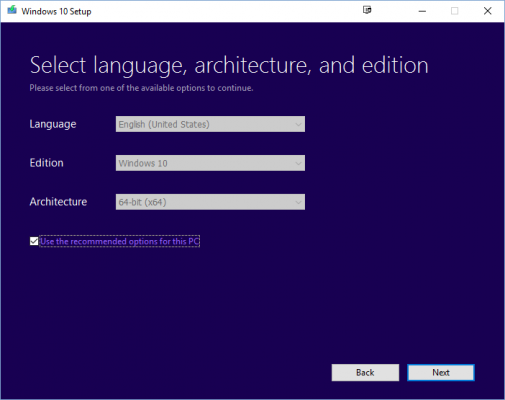
④ Set the language, version, and architecture (64-bit or 32-bit) of the Windows 10 system, then click Next. The Use the recommended options for this computer option is checked by default for automatic selection.
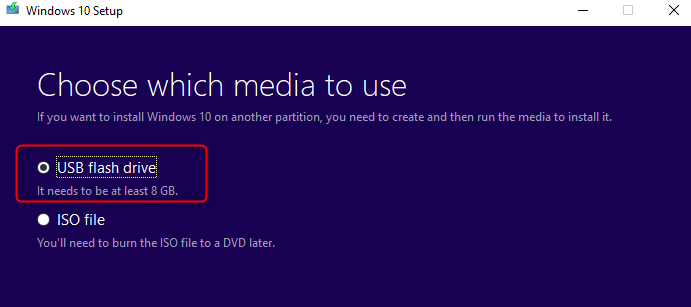
⑤ Select the target to install the system image, here to create a USB stick installation disk, please select (USB stick) and click (Next).
⑥ Select the pre-inserted USB flash drive and click (Next). Finally, wait for the installation media to be created and click (Finish).
Step Two: Reinstall Windows 10 Using Installation Media
① Insert the installation medium into the computer where the system will be reinstalled, preferably when the computer is shut down. Note: For desktops or all-in-one computers, use the rear USB port; for laptops, use the USB 2.0 port.
②
Restart the computer. If it doesn’t automatically boot from the USB installation medium, change the boot order in the BIOS or UEFI settings to prioritize the USB. To access the boot menu or change the boot order, press a key (e.g.,
F2,
F12,
Delete,
ESC) immediately after turning on the computer. For more details, see:
How to enter the BIOS and change the boot order.
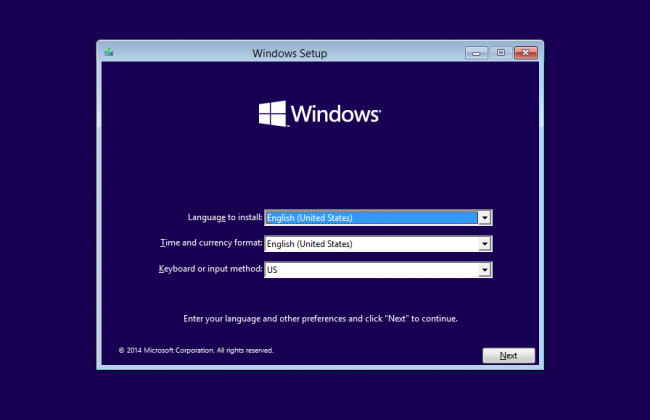
③ On the Install Windows page, select the language, time, and keyboard preference, then click Next > Install Now to start installing Windows 10. Wait for the installation to complete. Your computer will restart several times during the process.
4. Use a system restore point to factory reset Windows 10
If you created a system restore point when you first got your computer, you can perform a factory reset through it. Additionally, if something goes wrong after modifying system settings on Windows 10, you can undo the changes by restoring a system restore point. The steps are as follows:
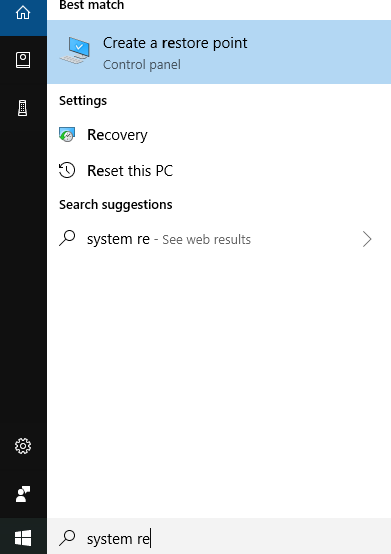
① Enter (system restore) in the search box on the taskbar, and select (create restore point) in the search results.
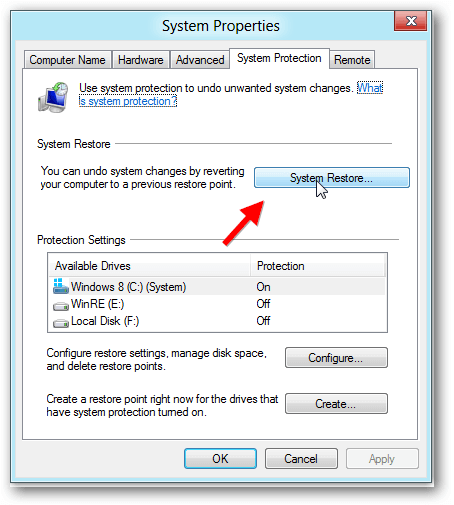
② In the System Properties window, click System Restore. In the new window, click Next. Note: If this option is grayed out, no restore points are available.
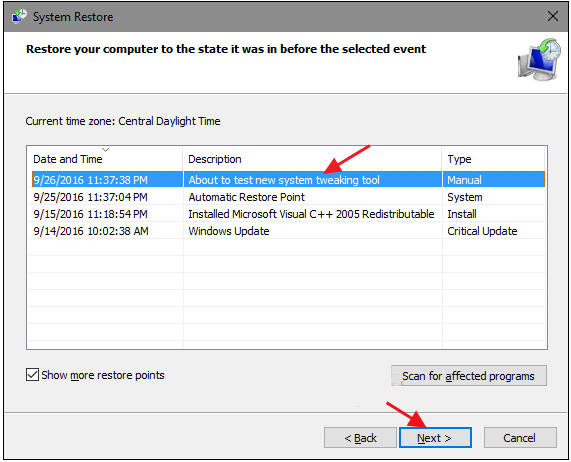
③ Select the restore point, click (Next), and follow the on-screen instructions to complete the process.
5. Reset Windows 10 with Fresh Boot
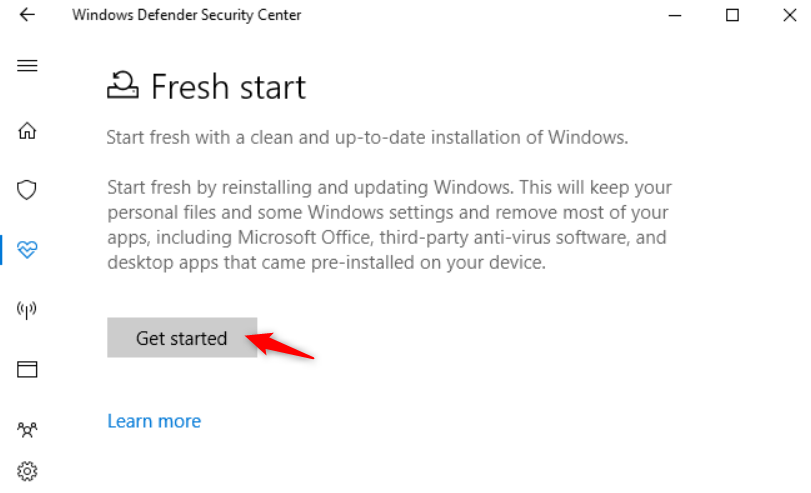
In past Windows 10 updates, Microsoft introduced clean boot for factory resetting your computer. Fresh start downloads a new copy of the latest Windows 10 version, retains your personal files and some settings, and removes most apps, including Microsoft Office, third-party antivirus software, and pre-installed desktop apps. The specific steps are as follows:
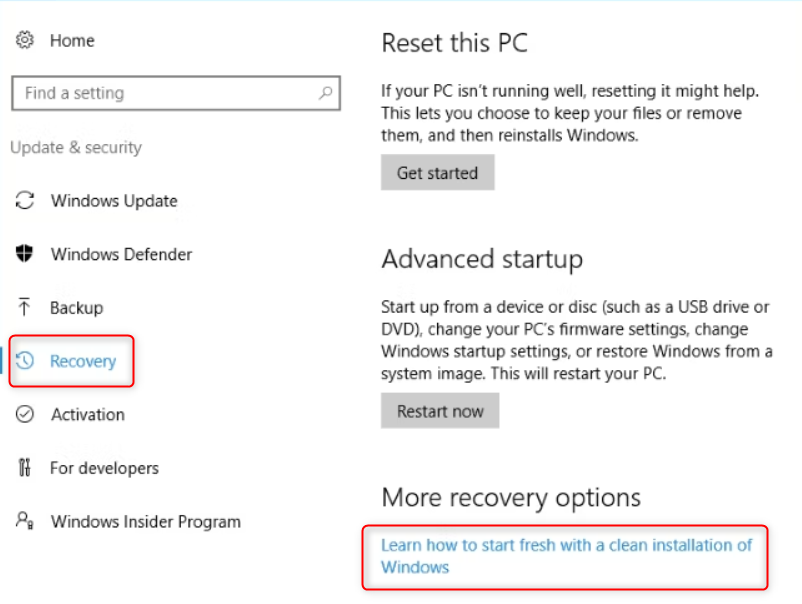
① Open Windows Settings, then click Update and Security > Recovery. Click the text link Learn how to start fresh with a clean installation of Windows.
② Click (Yes) > (Get started) in the opened window to start reinstalling and updating Windows.
The differences between a
Fresh Start and other reset methods are:
- Fresh Start always keeps your personal files; other methods may choose to delete all files.
- Clean Boot downloads the latest Windows 10 version, while common reset methods use recovery information from the hard drive provided by the manufacturer.
- Fresh Start removes third-party software but retains Microsoft Store apps installed by the manufacturer.
- Fresh Start retains some Windows settings, while the usual reset operation does not retain any settings.
6. Use a USB recovery drive to factory reset Windows 10
To factory reset Windows using a recovery drive, prepare a USB disk with more than 8GB of space. The larger and faster the USB, the better. Backup any data on the USB, as it will be reformatted during the recovery disk creation. Follow these steps:
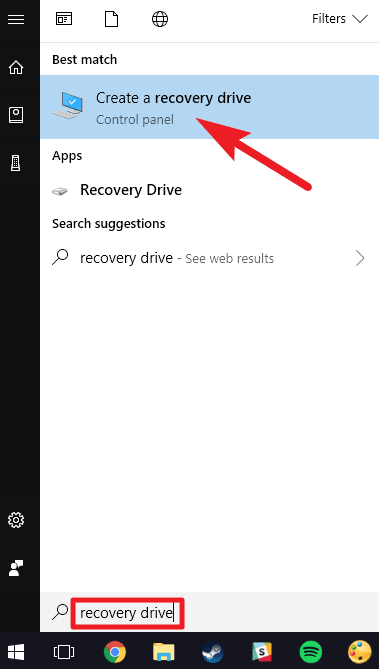
① Connect the USB drive to the computer. Type “create a recovery drive” into the search box in the lower-left corner of your Windows computer, and click “create a recovery drive” in the search results.
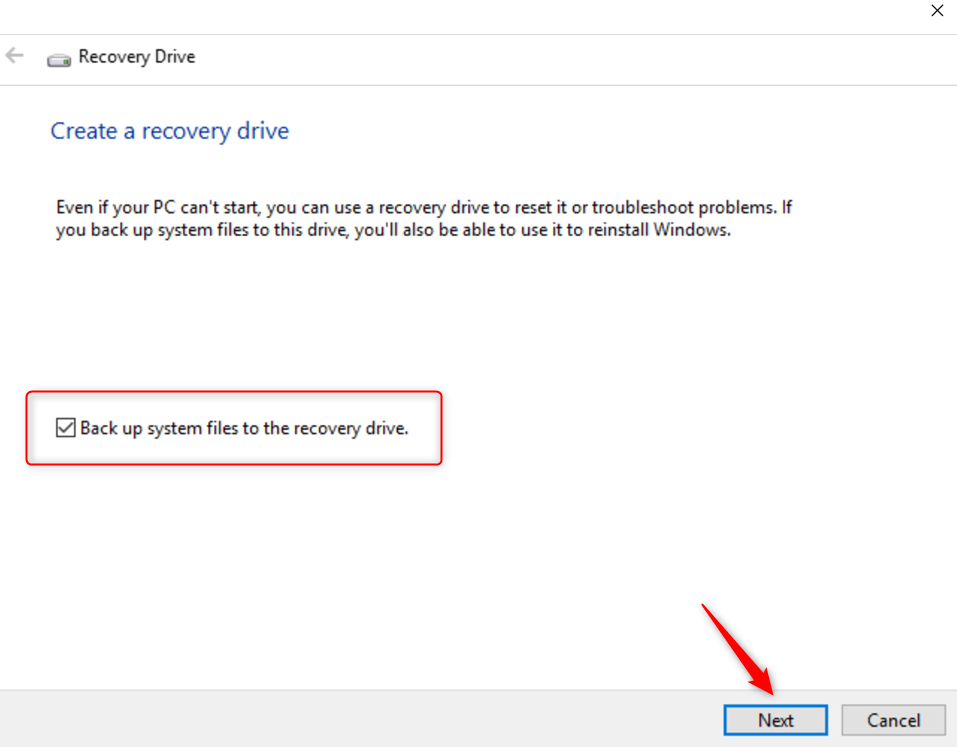
② In the pop-up window, check Back up system files to the recovery drive and click Next. Select your USB drive from the list and click Next.
③ The next pop-up will inform you that all contents of the recovery drive will be deleted. Ensure you have backed up any personal files. After confirming, click the Create button to create a Windows 10 recovery drive.
④ Use the recovery drive to restore the Windows computer to factory settings. Ensure the USB flash drive is properly connected. Press the BIOS shortcut key during restart to enter the BIOS menu, set the USB device as the first startup item, and press F10 to save and restart.
Note: The BIOS shortcut key varies by computer or motherboard brand, typically Del, Esc, F2, or F12. Check the computer manual or the brand’s official website for details.
⑤ After successfully booting from the USB, in the keyboard layout interface, select your language.
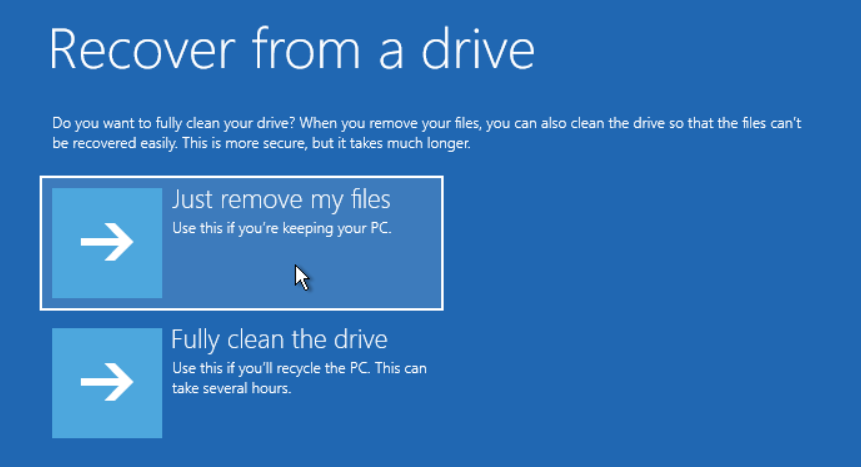
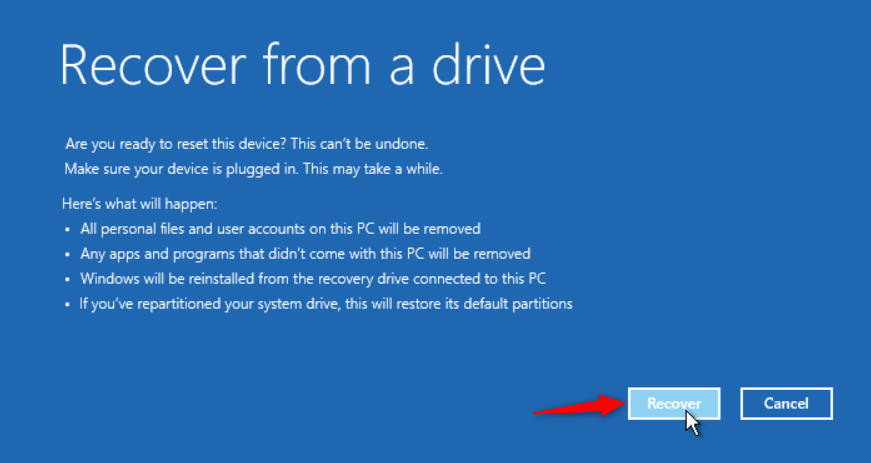
⑥ Click (Recover from a Drive), and then select (Just remove my files) or (Fully clean the drive) according to your needs.
⑦ Click Restore to begin reinstalling Windows. After installation, the computer will restart and display the Windows 10 setup screen.
Please note: Ensure the computer is connected to a power supply and do not force shutdown during reinstallation to avoid issues.
 III. Multiple ways to restore factory settings in Windows 10

