author avatar
    Technology Manager of Test Dept.
 

Summary
Learn how to efficiently transfer OS from SSD to M.2 drive with our comprehensive guide. Back up files, clone OS, verify transfer, and optimize settings easily.


Transferring your operating system (OS) from an SSD to an M.2 drive can greatly enhance your computer’s performance and storage capacity. M.2 drives are known for their lightning-fast speeds and compact form factors, making them an ideal choice for upgrading your system. However, the process of transferring your OS can seem daunting if you’re unfamiliar with the steps involved. In this article, we will guide you through a simple and effective method to successfully transfer your OS from your SSD to an M.2 drive, ensuring a smooth transition without losing any data or functionality.

Backing up Important Data Before Transferring Windows OS to M.2

Before you start the process of transferring your Windows operating system to M.2, it is crucial to back up all important data on the source drive. This step ensures that you have a safety net in case anything goes wrong during the transfer process.
Start by identifying the important files and documents that you want to back up. This includes personal documents, photos, videos, and any other data that you cannot afford to lose. Then, connect an external storage device such as a USB flash drive or an external hard drive to your computer. Copy and paste all the important files and documents from your laptop’s internal storage to the connected external storage device.
Once you’ve successfully backed up your important data, it’s time to install the M.2 drive and explore methods for transferring OS.

Installing the M.2 Drive for Efficient OS Transfer

Once you have successfully backed up data, the next crucial step is to install the M.2 drive. This process involves ensuring that the M.2 drive is properly connected to your computer to facilitate the transfer of the operating system.
To begin, carefully locate the M.2 slot on your motherboard. Once identified, gently insert the M.2 drive into the slot, being mindful of the orientation. After inserting the M.2 drive, secure it in place using the provided screws or clips. This step is vital to prevent any accidental disconnections during the installation process. Double-check that the drive is firmly attached before proceeding. Now, let’s get started.

Install an M.2 SSD in Desktop

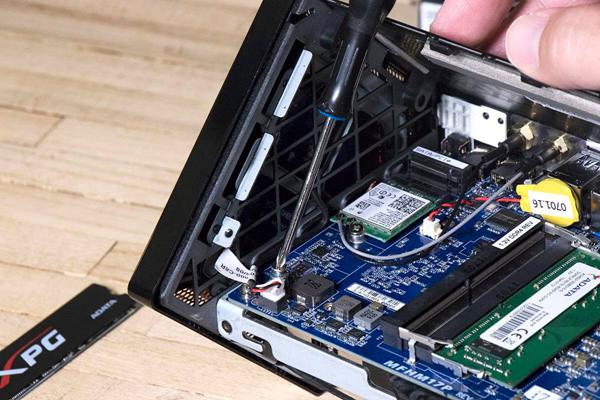
Step 1: Unscrew and remove the sides of your computer’s case. Find out the M.2 slot. If there is mounting screw on the M.2 slot, just unscrew it at first.
install M.2 SSD in the PC
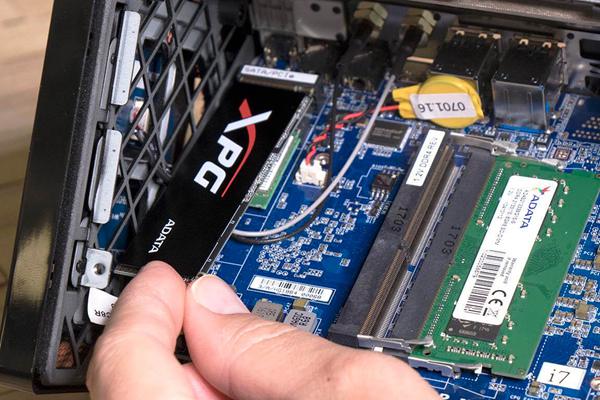
Step 2: Tilt the M.2 SSD about 25 degrees and then carefully insert and push it into the M.2 slot.
install M.2 SSD in the desktop PC
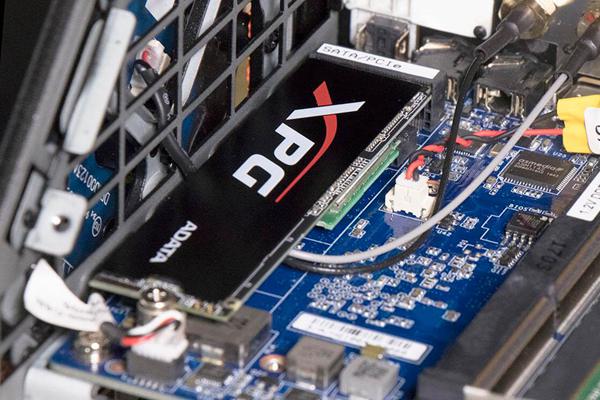
Step 3: Secure the M.2 SSD using the mounting screw. Finally, put the sides of your computer’s case back together.
M.2 SSD installed

Install an M.2 SSD in the Laptop

Step 1: Remove the bottom access panel door cover. And find out the hard drive slot.
The ways to remove the access panel usually vary from laptop model to laptop model. It’s suggested to read the instruction manual of your laptop.
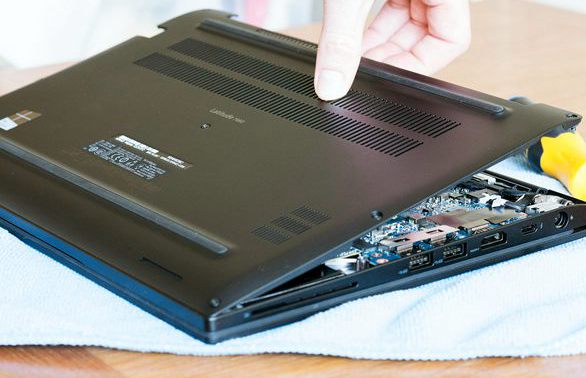
install SSD in laptop
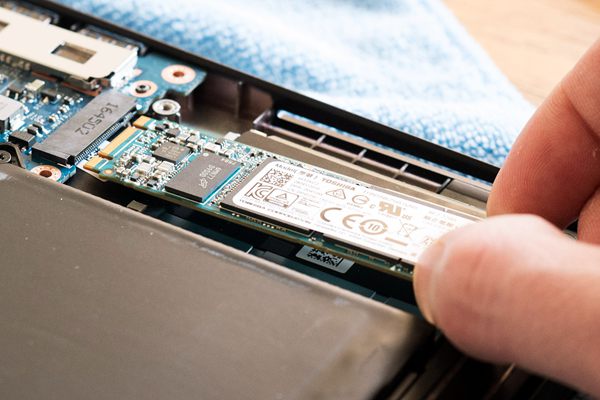
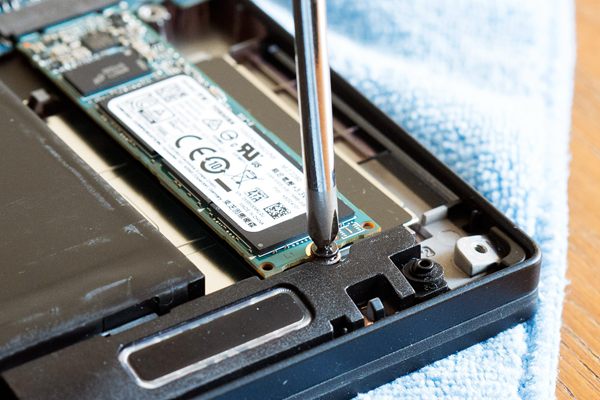
Step 2: Lift the M.2 SSD about 25 degrees and then carefully insert and push it into the M.2 slot.
install M.2 SSD in laptop
Step 3: Secure the M.2 SSD using the mounting screw. Finally, put the bottom access panel door cover back.
M.2 SSD laptop
Once you have completed these steps, your M.2 drive should be properly connected, ready for the next stage of transferring the operating system.

Efficiently Transfer Your OS from SSD to M.2 Drive with Renee Becca

When it comes to migrating your operating system to M.2 drive, using an automation tool can greatly simplify the process and save you valuable time. One popular migration tool for Windows OS migration is Renee Becca.
Renee Becca is a tool specially used for system/hard disk data backup and restoration. It can help you back up and restore important data in your computer, such as programs, system configuration, emails, photos, videos, documents, bookmarks, etc. In addition, you can also use it to clone disk and system data. The software provides three cloning methods, including hard disk cloning/cloning system hard disk; partition cloning and system migration. You can choose the most suitable cloning method according to your different needs.
Here is a guide on how to use Renee Becca for cloning your Windows system to the M.2 Drive.
Hot Topic - ADsRenee Becca – Safe and Quick System Migration to SSD

Automatic 4K alignment Improves SSD performance during system migration.

Support GPT and MBR Automatically adapt to the suitable partition format.

Support NTFS and FAT32 Redeploy various files in different file systems.

Back up quickly Back up files at up to 3,000MB/min.

Overall backup schedule Support system redeployment/system backup/partition backup/disk backup/disk clone.

Automatic 4K alignment Improve SSD performance

Support GPT and MBR Intelligently adapt to a partition format

Support NTFS and FAT32 Redeploy files in different file systems
Free TrialFree TrialNow 2000 people have downloaded!
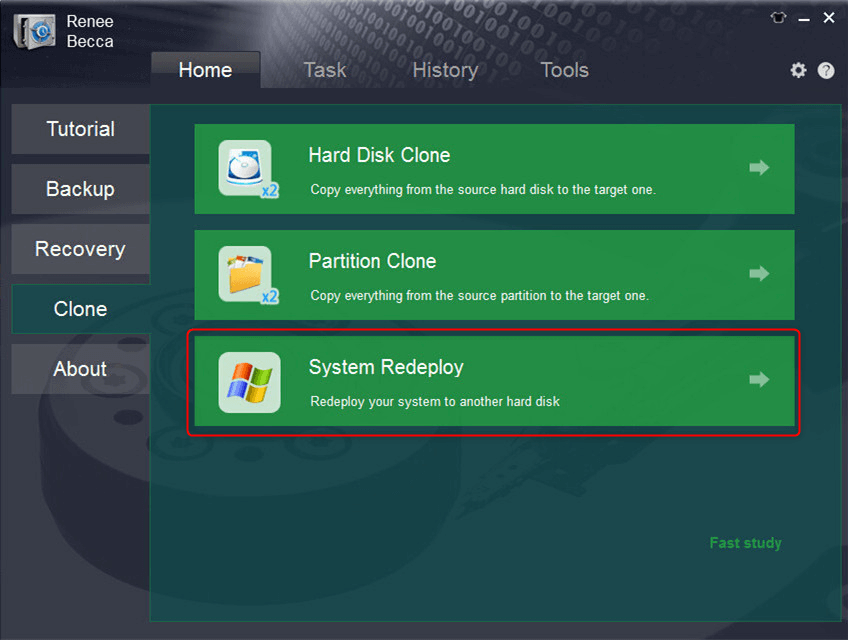
Step 1: Launch Renee Becca and click “System Redeploy” function in “Clone”.
select system redeploy function in renee becca
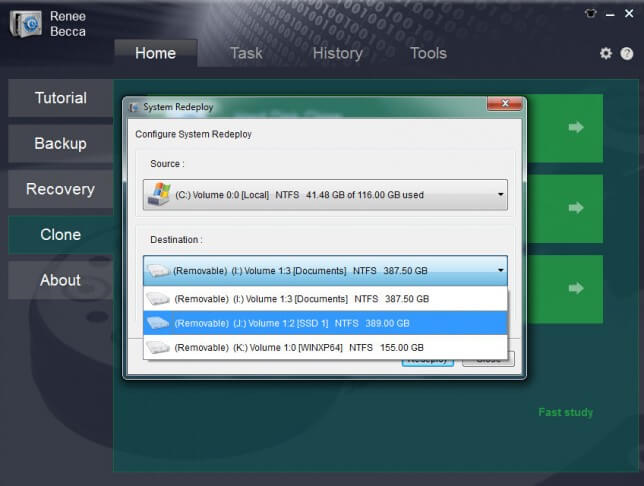
Step 2: Please select the original disk which saves Windows system and the target disk. Then click “Redeploy” to process the system migration.
select target disk and desination in system redeploy function in renee becca
By following these simple steps, you can seamlessly transfer your Windows OS to a new SSD using Renee Becca. This method eliminates the need for a fresh installation, saving you time and effort. Enjoy the improved performance and faster boot times that come with a new SSD!
Pros:
  • Allows safe migration of operating system without fresh installation
  • Simple steps for a smooth and hassle-free transfer
  • Improves performance and faster boot times with new SSD

Cons:

  • Doesn't have a Mac version

Verifying a Successful Cloning Process: Booting from New M.2 SSD

After successfully cloning your operating system from the SSD to the M.2 drive, it is crucial to verify the process to ensure a seamless transition. The easiest way to do this is by booting your computer from the newly cloned M.2 SSD. You can set the M.2 drive as the primary boot device in your computer’s BIOS settings, allowing you to seamlessly switch to the new drive with your OS intact.
To change the boot order, you will need to access the system BIOS or UEFI settings. The specific method for accessing these settings may vary depending on your computer’s manufacturer, but it usually involves pressing a specific key (such as F2, F10, or Del) during the boot process.
BIOS NameMethodThe Key or Keys
AcerPress Del or F2 immediately after powering onDel/ F2
CompaqPress F10 while the cursor in the top right corner of the screen is blinkingF10
DellPress F2 when the Dell logo appears/ or press every few seconds until the message Entering Setup appearsF2
eMachinesPress Tab or Del while the eMachine logo displays on the screenTab/ Del
FujitsuPress F2 once the Fujitsu logo appearsF2
GatewayPress the F1 key repeatedly after restarting the computerF1
HPPress the F1/ F10/ or F11 key after restarting the computerF1/ F10/ F11
IBMPress F1 immediately after powering on the computerF1
LenovoPress F1 or F2 after powering on the computerF1/ F2
NecPress F2 to enter the BIOS SetupF2
Packard BellPress F1/ F2/ or Del to enter BIOSF1/ F2/ Del
SamsungPress F2 to start the BIOS setup utilityF2
SharpPress F2 after the computer startsF2
SonyPress F1/ F2/ or F3 after turning on the computerF1/ F2/ F3
ToshibaPress F1 or Esc after powering on to access BIOSF1/ Esc
ARLTPress Del or F11 when the respective message is shownDel/ F11
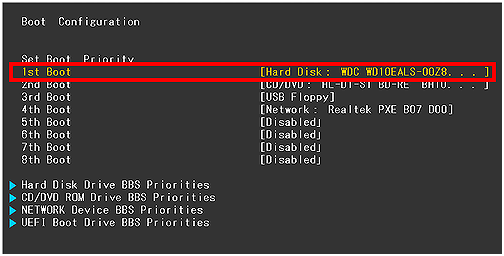
In the boot order settings, you should see a list of available storage devices. Locate the newly cloned M.2 SSD in the list and prioritize it as the primary boot device. Save the changes and exit the BIOS.
change the boot order in hard disk in boot configuration in BIOS
Upon restarting your computer, it should now boot from the M.2 SSD rather than the original SSD. This is a critical step as it confirms that the cloning process was successful and that the M.2 SSD contains an exact copy of your operating system and data.

Once the computer successfully boots from the M.2 SSD, take a moment to navigate through your operating system and ensure that all your files, applications, and settings are intact.

Tips:If the computer fails to boot from the M.2 SSD, it may indicate an issue with the cloning process. In such cases, it is advisable to repeat the process.

Conclusion

In conclusion, transferring your operating system from an SSD to an M.2 drive can provide a significant boost in performance and speed for your computer. By following the steps outlined in this article, you can seamlessly migrate your OS without losing any data or settings. With the increased storage capacity and faster read/write speeds of an M.2 drive, your overall computing experience will greatly improve. Take advantage of this technology and unlock the full potential of your system today.