author avatar
    Senior Program Developer
 

Summary
Resolve the "Xbox game bar not working" issue with the following solution, ensuring smooth game recording. Read on if you're facing similar issues.


problem of xbox game bar not working

I. How to solve the problem that the Xbox Game Bar cannot be opened?

The Xbox Game Bar, integrated into Windows 10, provides a gaming overlay with widgets for screen recording, sharing, LFG, and chatting with friends on Xbox consoles, mobile devices, and PCs. Typically, pressing the Windows key + G activates it during most games. However, issues may arise if the shortcut has been altered or if there are problems with the Game Bar’s settings, preventing it from opening.
Below are some practical solutions concerning the Xbox Game Bar:

1. Check the shortcut key setting of Xbox Game Bar

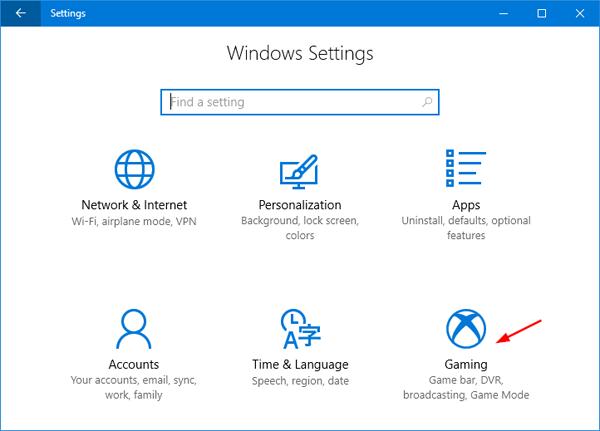
Step 1: Click (Start)-(Settings), and select the (Gaming) option.
gaming in Windows
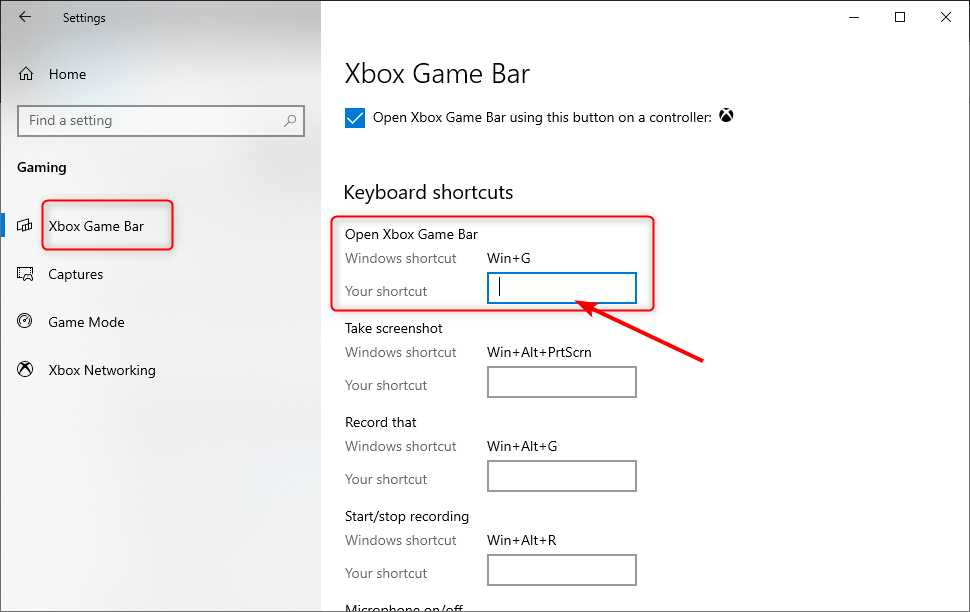
Step 2: Verify the Xbox Game Bar shortcut in the settings interface; it should be Windows key + G by default. Press the appropriate shortcut to test if the Game Bar opens.
Game Bar shortcut

2. Turn off and enable the Xbox Game Bar option

If the Xbox Game Bar fails to open, disabling and re-enabling the feature after a short wait might resolve the issue.
Step 1: Click (Start)-(Settings), and select the (Gaming) option.
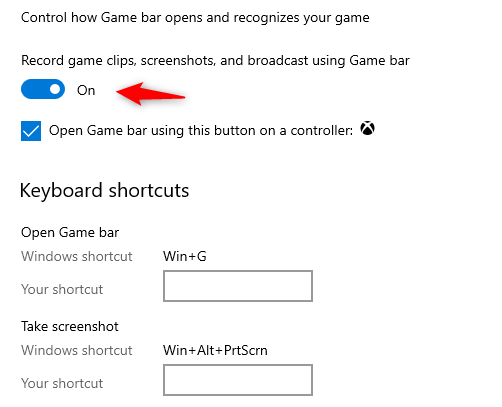
Step 2: Navigate to the Xbox Game Bar settings, toggle the “Enable Xbox Game Bar” switch to Off, pause briefly, then toggle it back to On. Verify if this resolves the issue.
Game Bar settings

3. Check Game DVR camera settings

Game DVR settings control the background recording and its duration. Disabling background recording can prevent the Xbox Game Bar from opening.
Step 1: Click (Start)-(Settings), and select the (Gaming) option.
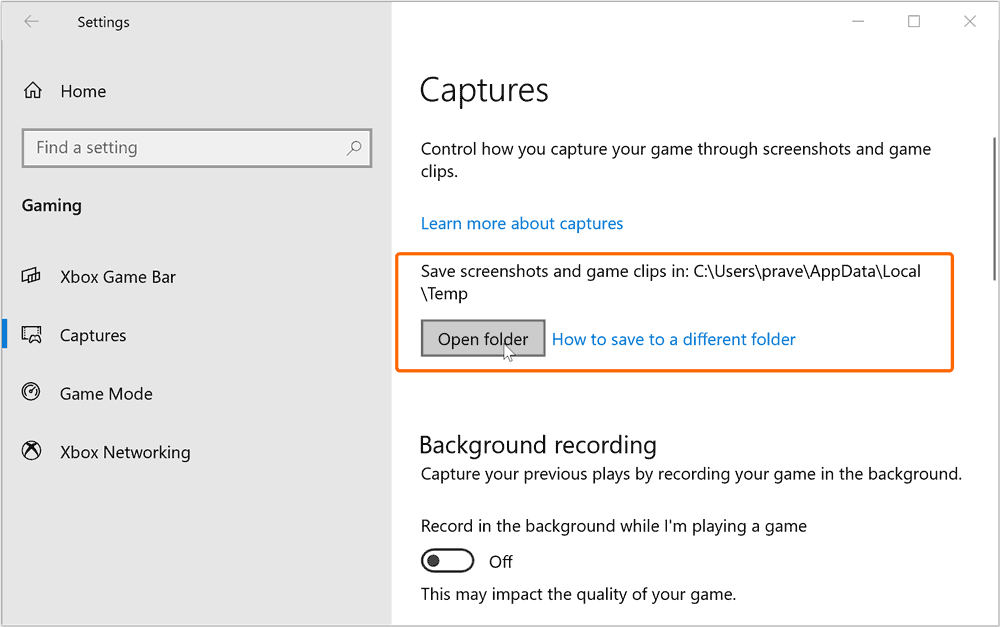
Step 2: Navigate to the Game DVR settings and enable the ‘Record in the background while I’m playing a game’ option. Customize your experience by setting the save location for screenshots and game clips, adjusting the recording duration, and deciding whether to capture audio during game recording. Once configured, ensure to verify if the issue has been resolved.
Captures Folder location Windows 10

4. Run the game in windowed mode

If the Xbox Game Bar doesn’t open when using the shortcut Windows key + G in full-screen mode, switch the game to windowed mode before pressing Windows key + G to access the Game Bar.

5. Reinstall Xbox Game Bar via Powershell

Reinstalling the Xbox Game Bar may fix some unknown errors. Specific steps are as follows:
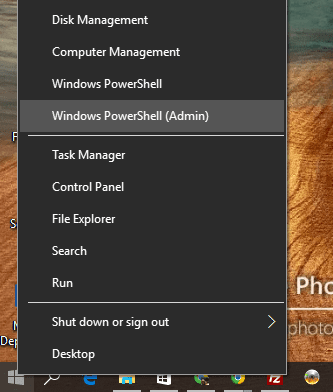
Step 1: Right-click (Start), and select Windows PowerShell (Admin).
windows powershell admin
Step 2: Copy the Get-AppxPackage *XboxGamingOverlay* | Remove-AppxPackage command and press Enter to uninstall the Xbox Game Bar. Reinstall the Xbox app from the Microsoft Store to check if the issue is resolved.
uninstall Xbox Game

6. Create a new administrator account

If your user account file is corrupted, you might be unable to open the Xbox Game Bar. Create a new administrator account to resolve this issue.
Step 1: Open Command Prompt with administrative privileges by typing cmd into the search box, right-clicking the result, and choosing Run as administrator.
run as administrator
Step 2: Open the command prompt by pressing Windows Key + R, type cmd, and press Enter.

Type the command:

net user [new_account_name] /add

Replace [new_account_name] with your desired account name and press Enter. To add a password, use: net user [new_account_name] [password] /add, substituting the appropriate account name and password.

Type the command: 

net local group administrators [new_account_name] /add

Press Enter to grant the new account administrative privileges. Remember to replace [new_account_name] with the name of the account you’ve just created.
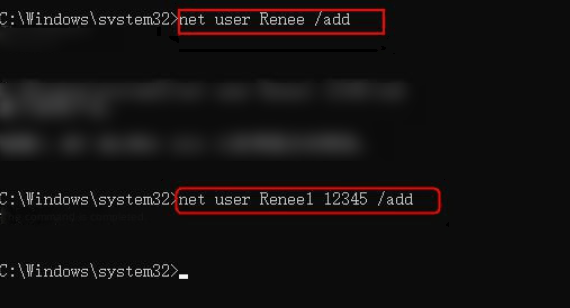
Create a new administrator account
Step 3: Restart your PC, log into Windows using the new admin account, and test if the Xbox Game Bar opens. If it works, move your files to this account.
To resolve issues with the Xbox Game Bar not opening, the solutions outlined should be diligently followed. Additionally, to safeguard against unforeseen system failures, timely file backups are advisable. For detailed backup and restoration procedures, consider using Renee Becca as a reference.

II. (Extended Information) Using Renee Becca to Backup Files

1. What is Renee Becca

Renee Becca provides a full range of backup options such as system, partition, hard disk, and file backup, alongside features like disk cloning and system migration. It is the go-to solution for regular backups or during hard drive upgrades, employing incremental/differential backup technology to only capture new or altered files after the initial complete backup, thereby maximizing time efficiency and minimizing storage space.
Hot Topic - ADsProfessional Data Backup & Restore Software - Renee Beccadata bacup software Renee Becca

Provides multiple functions like backup, restore, clone, system migration.

Clone all data (including system) in HDD to smaller SSD or larger HDD. Disk could boot PC after clone finished.

Supports to migrate Windows to SSD with a few clicks.

4K alignment will be processed when clone disk, migrate system, restore disk or system.

Backup & restore system/disk/folder. Auto backup plans are available.

Provides functions like backup, restore, clone, system migration.

Clone all data (including system) in HDD to smaller SSD or larger HDD.

Backup & restore system/disk/folder. Auto backup plans are available.

Compatible with: Windows 10 / 8.1 / 8 / 7 / Vista / XP / 2008 / 2012(32bit/64bit) / Server 2008
Free TrialFree Trial

5000 people have downloaded and made the disk clone successfully!

2. How to use Renee Becca to back up important files?

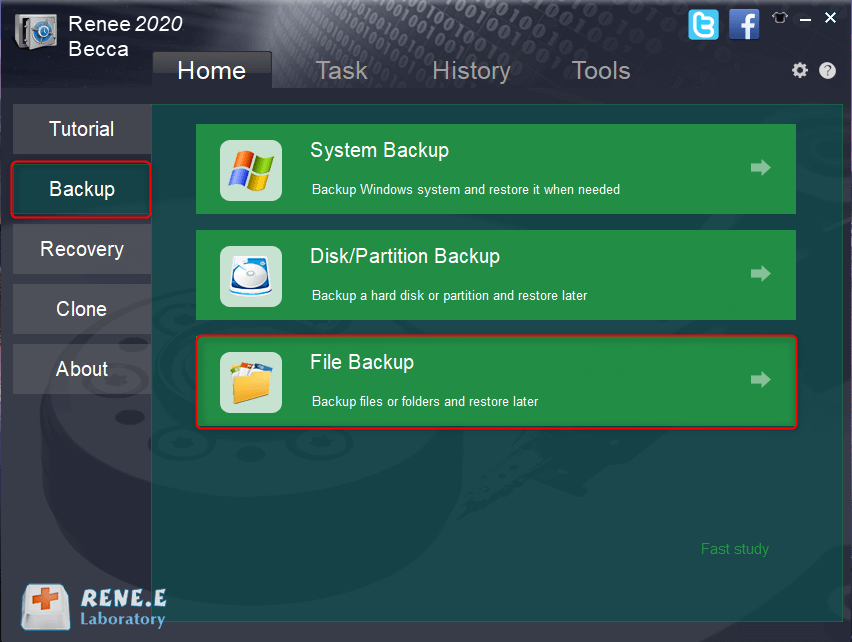
Step 1: Download, install, and launch Renee Becca on your computer. In the main interface under the “Backup” section, select “File Backup” for individual files or “Disk/Partition Backup” for entire disk or partition data.
click to back up files in renee becca
Step 2: Select the file you wish to back up from the source device, then choose the destination partition on your hard drive to store the backup. Press Backup to commence the backup procedure.
Tip: To ensure regular backups, enable task scheduling to configure automatic backups on a daily, weekly, or monthly basis at your preferred time. In the Backup Scheme settings, select the Scheme Type that best fits your requirements. Renee Becca offers five backup scheme options: version chain mode, single version mode, full mode, incremental backup mode, and differential backup mode.
how to back up files in renee becca
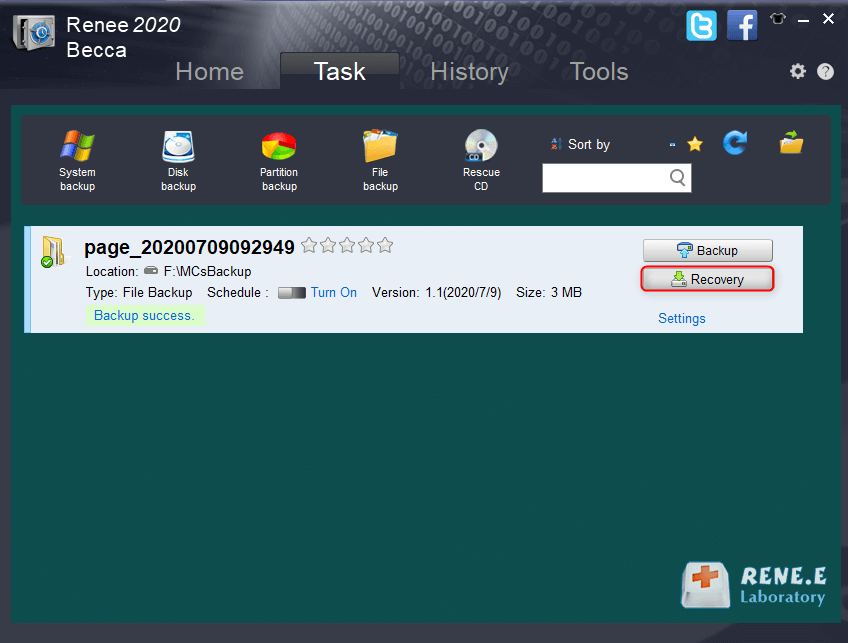
Step 3: Monitor all backup tasks in the task column. Once the backup finishes, use the Recovery button to recover files to the chosen hard disk as needed.
recover backup files from renee becca
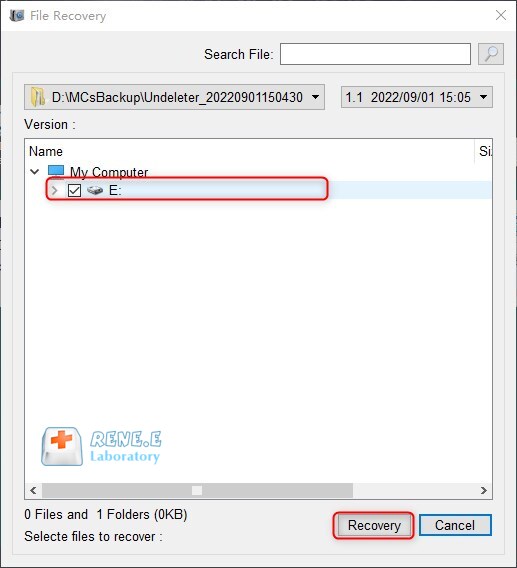
Step 4: Select the target location for the file recovery and click the Recovery button.
files recovery location