

Mastering Moving C Drive to SSD: A Step-by-Step Guide

Summary
This article provides a thorough guide for moving your C drive to an SSD, including preparation, using cloning software, and troubleshooting common issues. Follow our step-by-step instructions to ensure a smooth and efficient transition.
Table of contents
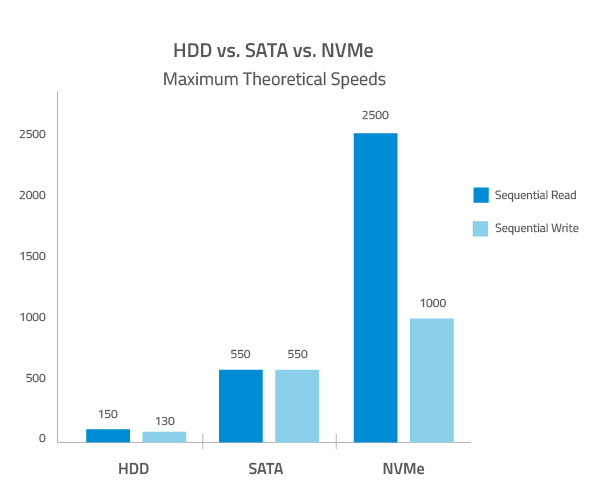
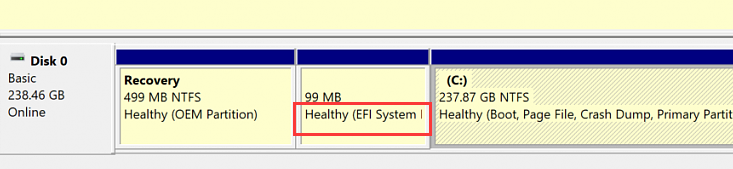
- System Reserved Partition: This usually contains boot configuration data, which is crucial for starting up Windows.
- EFI (Extensible Firmware Interface) System Partition: Used in UEFI systems, this partition contains boot loaders and other files necessary for booting.

Automatic 4K alignment Improves SSD performance during system migration.
Support GPT and MBR Automatically adapt to the suitable partition format.
Support NTFS and FAT32 Redeploy various files in different file systems.
Back up quickly Back up files at up to 3,000MB/min.
Overall backup schedule Support system redeployment/system backup/partition backup/disk backup/disk clone.
Automatic 4K alignment Improve SSD performance
Support GPT and MBR Intelligently adapt to a partition format
Support NTFS and FAT32 Redeploy files in different file systems
Free TrialFree TrialNow 2000 people have downloaded!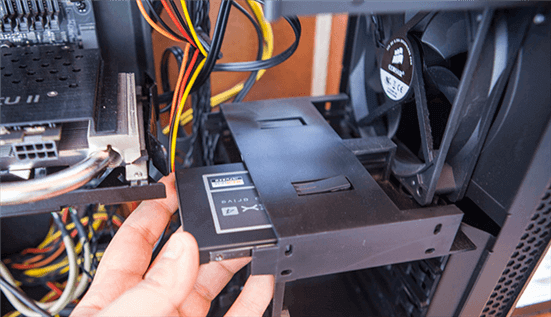
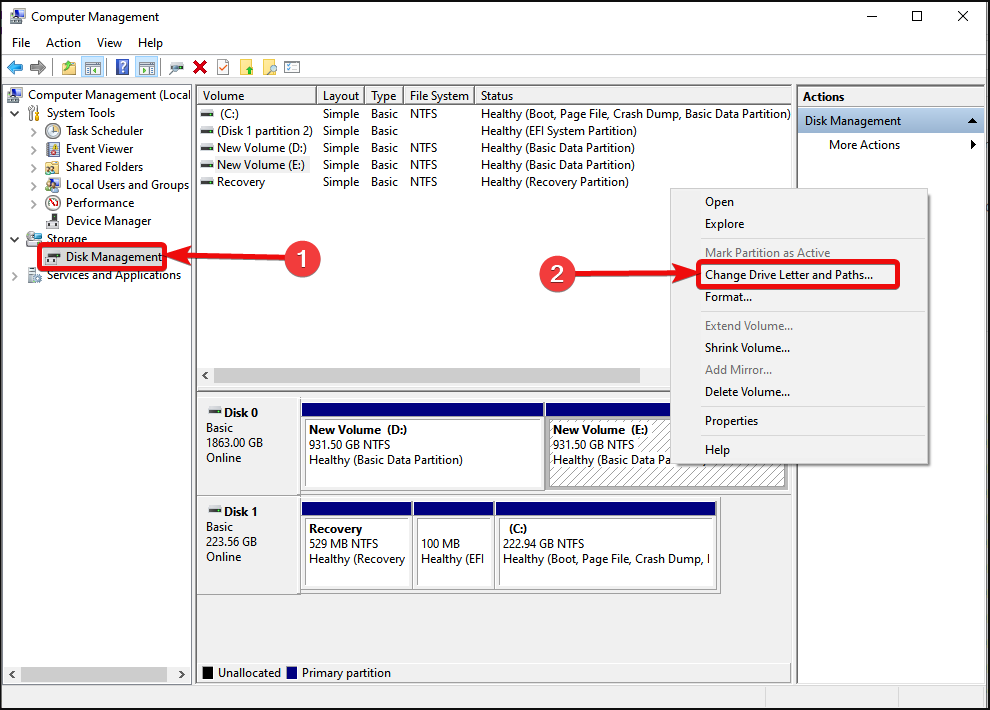
diskmgmt.msc and press Enter. This will open the Disk Management utility. You can also access Disk Management by right-clicking the Start button and selecting Disk Management.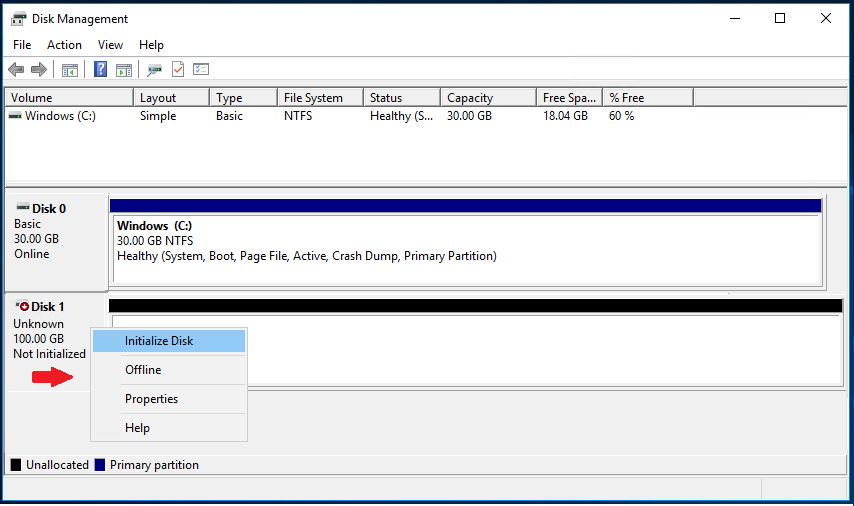
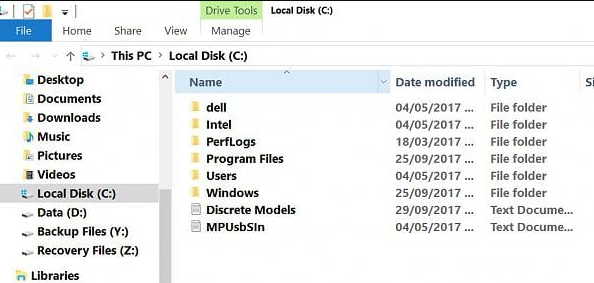
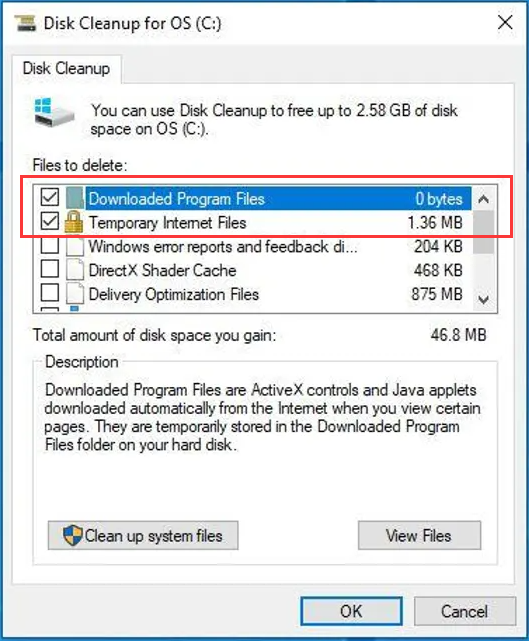
- Open the Start menu and type ‘Disk Cleanup’. Select the Disk Cleanup tool.
- Choose the C drive from the drive selection box and click OK.
- The utility will calculate how much space you can free up. After the scan, check the types of files you want to delete, such as temporary files, system cache, and Recycle Bin items.
- Click OK and then Delete Files to confirm the cleanup operation.
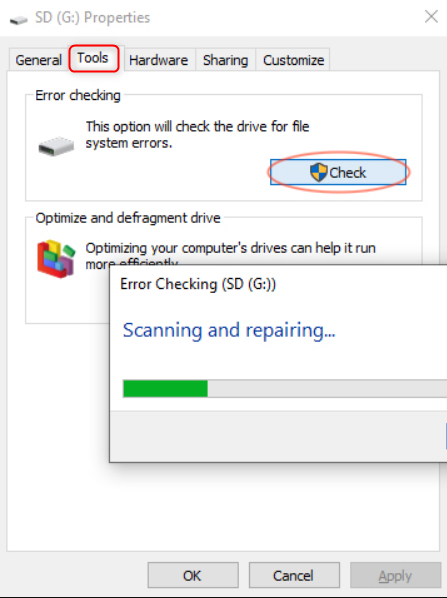
- Open the Start menu and type ‘partitions’. Select Create and format hard disk partitions to open Disk Management.
- Right-click the C drive and select Check Volume.
Automatic 4K alignment Improves SSD performance during system migration.
Support GPT and MBR Automatically adapt to the suitable partition format.
Support NTFS and FAT32 Redeploy various files in different file systems.
Back up quickly Back up files at up to 3,000MB/min.
Overall backup schedule Support system redeployment/system backup/partition backup/disk backup/disk clone.
Automatic 4K alignment Improve SSD performance
Support GPT and MBR Intelligently adapt to a partition format
Support NTFS and FAT32 Redeploy files in different file systems
Free TrialFree TrialNow 2000 people have downloaded!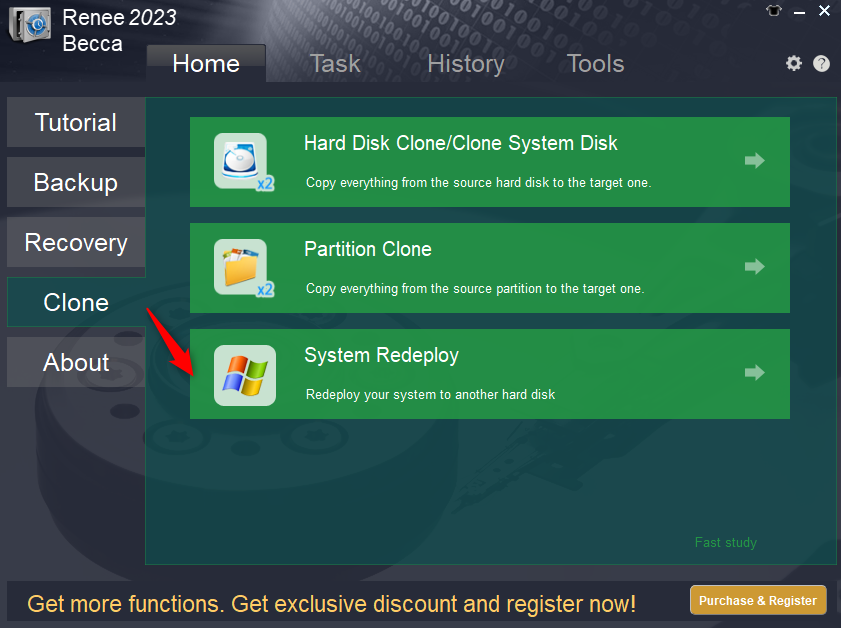
| Server Type | Enter boot menu method |
|---|---|
| DELL | Press the F12 key repeatedly before the Dell logo appears on the screen. |
| HP | Press the F9 key multiple times when the HP logo is displayed. |
| BIOS Name | Enter boot menu method |
|---|---|
| ASRock | DEL or F2 |
| ASUS | DEL or F2 for PCs, DEL or F2 for Motherboards |
| Acer | DEL or F2 |
| Dell | F12 or F2 |
| ECS | DEL |
| Gigabyte / Aorus | DEL or F2 |
| Lenovo (Consumer Laptops) | F2 or Fn + F2 |
| Lenovo (Desktops) | F1 |
| Lenovo (ThinkPads) | Enter then F1 |
| MSI | DEL |
| Microsoft Surface Tablets | Press and hold Power and Volume Up buttons |
| Origin PC | F2 |
| Samsung | F2 |
| Toshiba | F2 |
| Zotac | DEL |
| HP | Esc, F9 for "Boot Menu", Esc, F10, Storage tab, Boot Order, Legacy Boot Sources |
| INTEL | F10 |
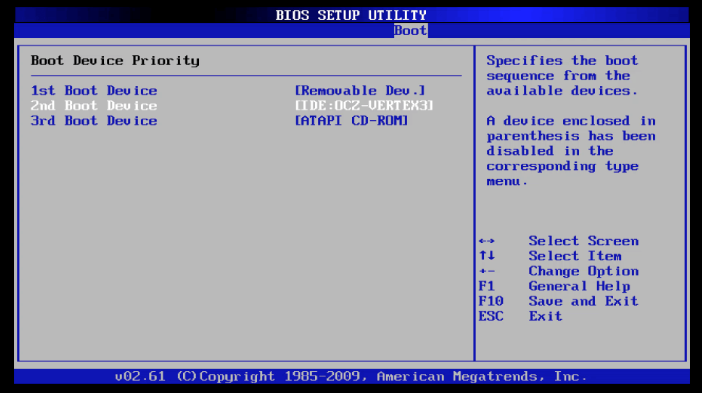
- If your computer uses Legacy BIOS, change the boot order to set the new SSD as the first boot device.
- If the BIOS mode is UEFI, select the SSD as the primary boot drive.
- Ensure that all your applications and files are accessible and functioning properly.
- Check the speed and responsiveness of your system. The SSD should significantly improve boot times and application load times.
- Open Task Manager by pressing Ctrl + Shift + Esc to monitor resource usage, especially the disk activity under the Performance tab.
bootrec /scanos
bootrec /fixmbr
bootrec /fixboot
bootrec /rebuildbcd
fsutil behavior query DisableDeleteNotify
fsutil behavior set DisableDeleteNotify 0
Relate Links :
How to Move Windows 11 to Another Drive: A Step-by-Step Guide

06-07-2024
Ashley S. Miller : Learn how to move Windows 11 to another drive with our detailed guide. This step-by-step tutorial covers everything...
How to Clone HDD to SSD in Windows 10/11 Without Reinstalling

01-06-2024
John Weaver : Discover how to effortlessly clone your HDD to an SSD in Windows 10/11 without the hassle of reinstalling...
Everything You Need to Know About Moving OS to New Drive

01-05-2024
Jennifer Thatcher : Discover the benefits and challenges of moving your operating system to a new drive. From saving time and...
Upgrade Your PC: How to Move OS to Another Drive
21-12-2023
Jennifer Thatcher : Upgrade your PC and improve performance by learning how to move your operating system (OS) to a new...
- Understanding the C Drive: Is It Enough to Just Move the C Drive?
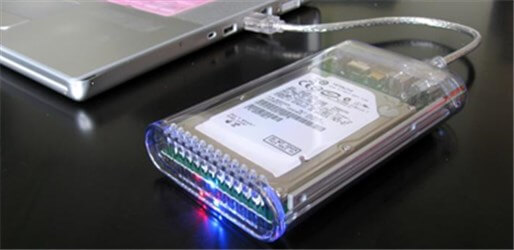
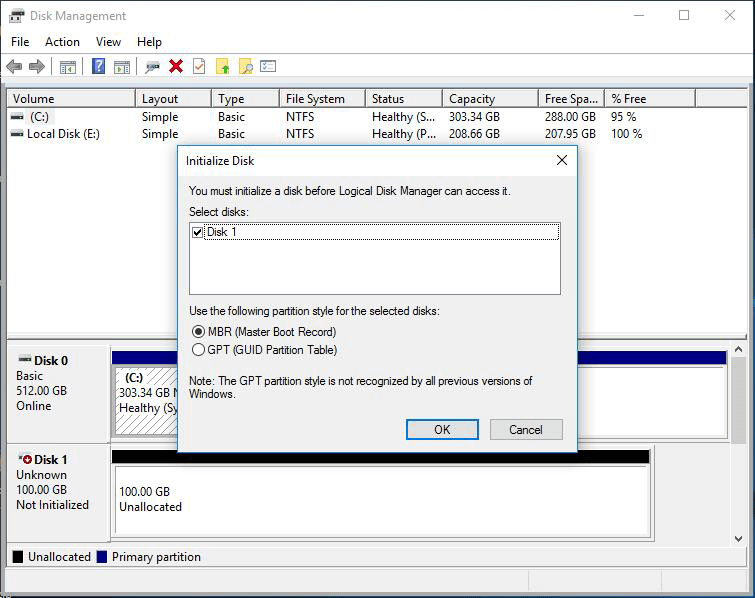
- Step 1: Connect SSD to Your Computer and Initialize It
- Step 2: Clean and Fix the C Drive to Make the Transfer More Efficient
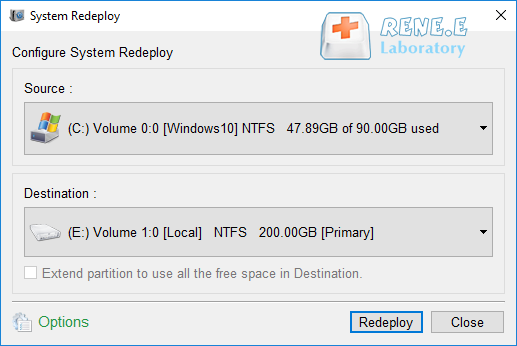
- Step 3: Use the Renee Becca to Move the C Drive to New SSD
- Step 4: Boot Your Computer from the New SSD
- FAQ: Problems with Cloned SSD
- Conclusion

