

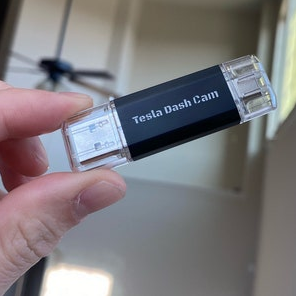
How to Recover Deleted Tesla Dashcam Footage

Summary
The article discusses the possibility of recovering deleted Tesla dashcam footage, emphasizing that success depends on factors such as the age of the footage, the recording mode used, and the condition of the USB drive storing the videos. Tesla dashcams typically record one-minute clips for up to an hour before overwriting the oldest footage, which complicates recovery efforts. The article aims to guide readers through the considerations and steps necessary to potentially retrieve lost dashcam videos.


Table of contents


Easy to use Only simple steps to recover data from storage devices.
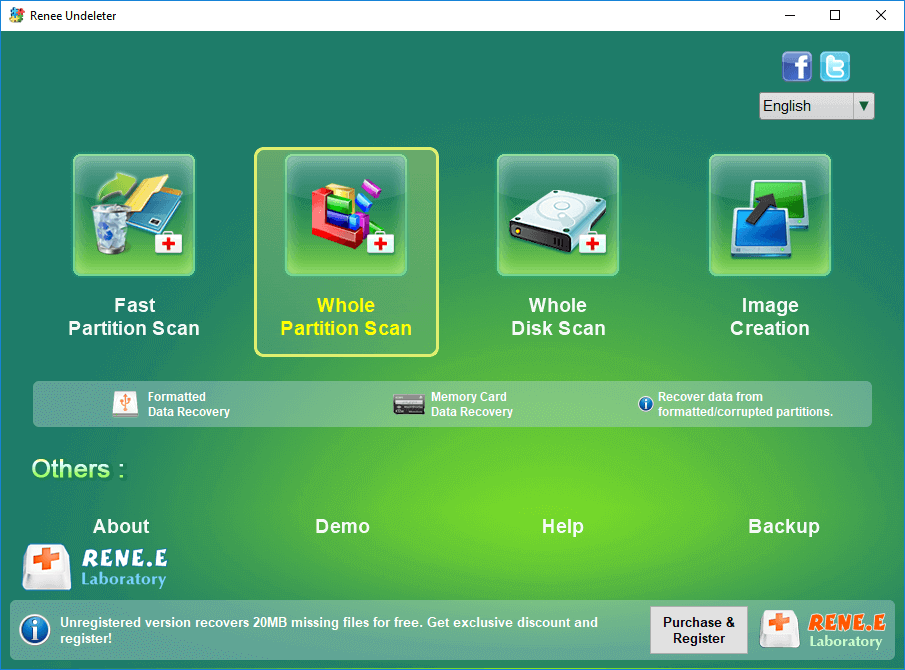
Multiple scan modes Fast partition scan, whole partition scan and whole disk scan for different recovery needs.
File types Support to recover pictures, videos, audios, documents, mails, etc.
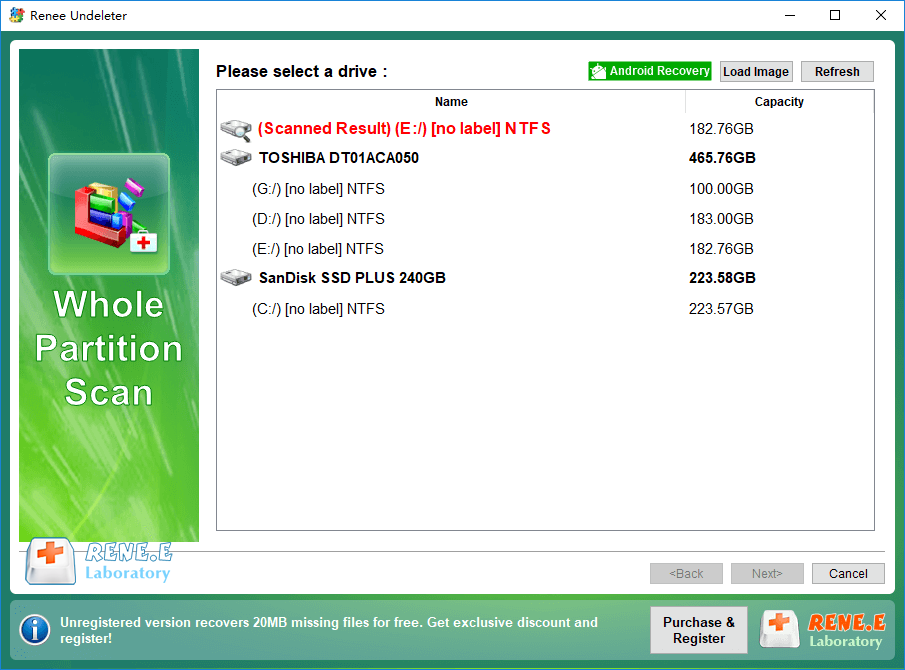
Supported storage devices Recover data from recycle bin, SD card, external disk, etc.
Supported systems Windows 10, 8.1, 8, 7, Vista, XP, 2000 and Mac OS X10.6, 10.7, 10.8.
Easy to use Only simple steps to recover data from storage devices.
Multiple scan modes - 3 scan modes for different recovery needs.
Supported storage devices Recover data from recycle bin, SD card, external disk, etc.
When Tesla collects data, we believe it’s important for you to know what we’re collecting and what it is used for. The data provided to you as part of your request may include information such as Tesla Account details, customer support activity, service history, and vehicle data. Tesla vehicles record operational and diagnostic data at regular intervals and may transmit that data over-the-air to our servers. That data enables our Engineering and Service teams to assess vehicle health remotely and diagnose, and potentially proactively resolve your concerns.
| Processed directly on vehicle by default | Shared with Tesla/ but not associated with your account | Shared with Tesla and associated with your account | |
|---|---|---|---|
| Sentry Mode camera recordings | ✓ | N/A | N/A |
| Dashcam camera recordings | ✓ | N/A | N/A |
| Cabin camera data | ✓ | If opted in through Data Sharing | N/A |
| Autopilot camera recordings | ✓ | If opted in through Data Sharing | In the occurrence of a safety critical event only |
| Location data | ✓ | If opted in through Data Sharing | In the occurrence of a safety critical event only |
| Speed | ✓ | For fleet analysis and improvement | In the occurrence of a safety critical event only |
| Voice commands | ✓ | N/A | N/A |
| Browsing history | ✓ | N/A | N/A |
| Odometer | ✓ | For fleet analysis and improvement | Last known value only, for warranty calculation |
| Charging data | ✓ | If third-party charging network used | If Supercharger network used |
| Touchscreen interactions | ✓ | ✓ | N/A |
Easy to use Only simple steps to recover data from storage devices.
Multiple scan modes Fast partition scan, whole partition scan and whole disk scan for different recovery needs.
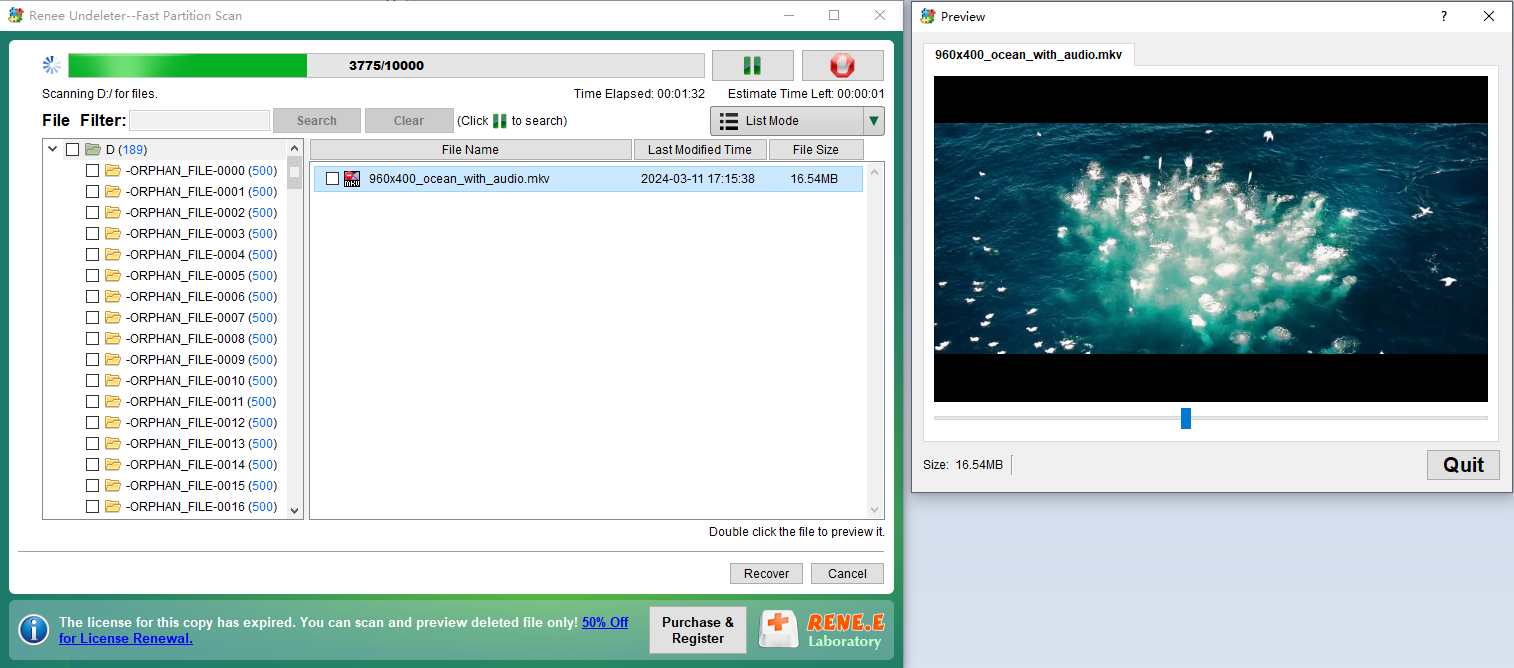
File types Support to recover pictures, videos, audios, documents, mails, etc.
Supported storage devices Recover data from recycle bin, SD card, external disk, etc.
Supported systems Windows 10, 8.1, 8, 7, Vista, XP, 2000 and Mac OS X10.6, 10.7, 10.8.
Easy to use Only simple steps to recover data from storage devices.
Multiple scan modes - 3 scan modes for different recovery needs.
Supported storage devices Recover data from recycle bin, SD card, external disk, etc.


sudo ./run.py /dev/disk2s1 myoutputdirectory.

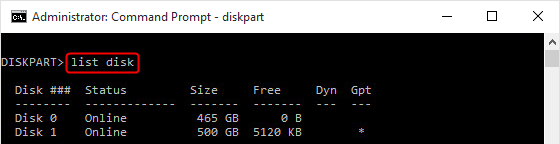
diskpart
list disk
python ./run.py "\\.\PhysicalDriveDISK_ID" C:\TeslaVideos
python ./run.py "\\.\PhysicalDrive1" C:\TeslaVideos
Easy to use Only simple steps to recover data from storage devices.
Multiple scan modes Fast partition scan, whole partition scan and whole disk scan for different recovery needs.
File types Support to recover pictures, videos, audios, documents, mails, etc.
Supported storage devices Recover data from recycle bin, SD card, external disk, etc.
Supported systems Windows 10, 8.1, 8, 7, Vista, XP, 2000 and Mac OS X10.6, 10.7, 10.8.
Easy to use Only simple steps to recover data from storage devices.
Multiple scan modes - 3 scan modes for different recovery needs.
Supported storage devices Recover data from recycle bin, SD card, external disk, etc.
Relate Links :
Comprehensive Guide to CFast Card Data Recovery
31-08-2024
Amanda J. Brook : This guide covers essential information on recovering data from CFast cards, which are specialized memory cards used by...
SD Card Photos Disappeared? Learn Quick Recovery Tips Now!

12-07-2024
John Weaver : Lost photos from your SD card? Don't worry. This article will guide you on how to recover lost...
Mastering RAID 0 Data Recovery: From Crashes to Complete Data Retrieval

06-05-2024
Ashley S. Miller : Learn how to master the process of recovering data after a RAID 0 array crash, including determining disk...
How to Recover Permanently Deleted Videos: A Step-by-Step Guide
28-11-2023
Amanda J. Brook : Learn how to recover permanently deleted videos with this comprehensive guide. From common causes of video loss to...
- What Are the Recording Modes in Tesla Dashcams?
- Things to Do Before Recovering Data from Your Tesla Dashcam
- How to Recover Tesla Dashcam Footage
- Method 1: Request Your Data from Tesla Including "Safety Event" Camera Recordings
- Method 2: Use Renee Undeleter
- Method 3: Using Python Script (FREE DIY)
- What To Do If DIY Data Recovery Didn’t Work?
- Contact a Professional Data Recovery Service
- Measures Against Loss of Dashcam Footage in the Future
- Conclusion

